Not everyone gets a spacious home. Those who have limited space in their home may feel embarrassed as they need to compress everything inside. And consequently, putting in more furniture becomes a challenging task as they find it hard to look for a good space for it.
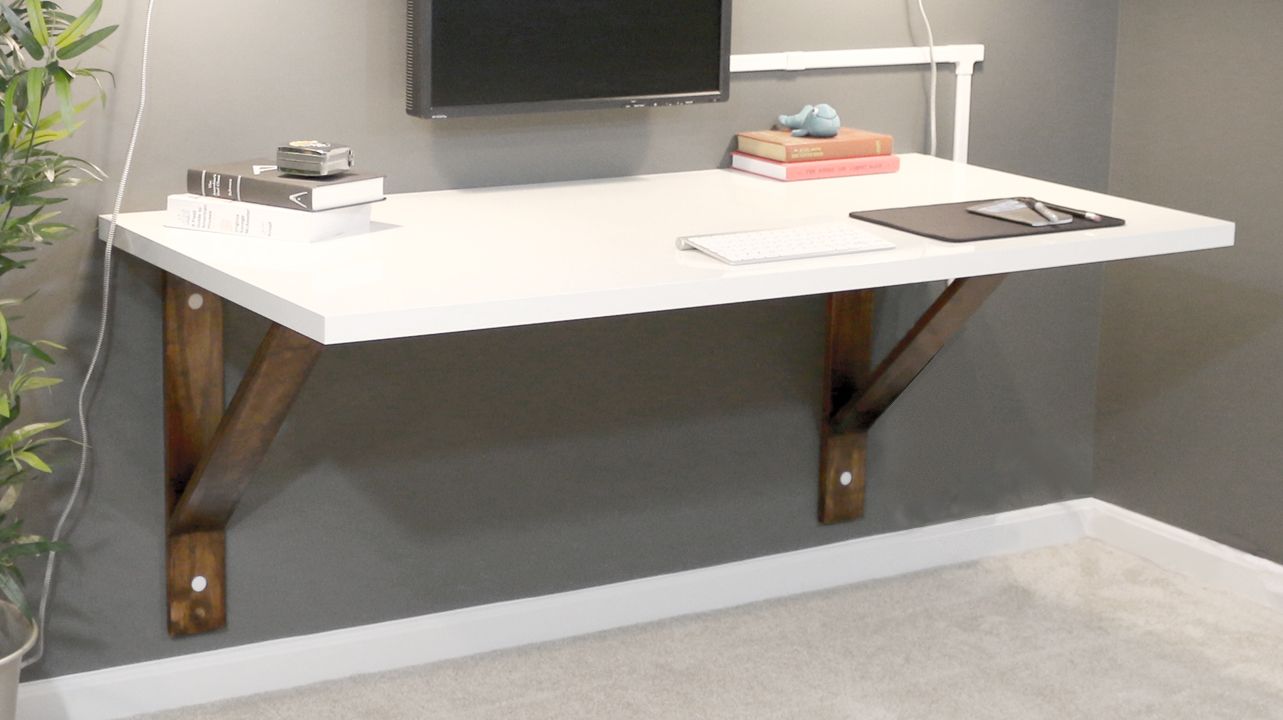
One of the strategies that you can use to give your home more space is to make a DIY wall desk. This project can offer a neat floor space. It can also enhance the home interior decal view.
Are you curious to learn more about DIY wall desks? Whether you have bought one for your space in the office or you are still in the process of looking for the best one, this article can give you step-by-step instructions so you can excellently make a DIY wall desk. Read on to learn the steps.
What will you need to follow this Tutorial?
You may be eager to start the project. However, just like any other woodworking task, it isn’t enough that you know the steps, you should have the necessary materials. Before you start doing the steps in this tutorial, you need to secure several things:
- Tools and Supplies
Several tools are needed to carry out the project. You should have a rotator saw machine, hole-making tool, drill machine, and a smoothing machine. These are common woodworking tools so you may not need to buy a new one if you have these already in your place. Just make sure that are in good condition.
Moreover, you should prepare the glue, measuring tape, mask, and goggles. You do not have to spend a big amount of money on these supplies. They are widely available in the market and they come at affordable prices.
Step-by-Step Instructions
Here are the steps on how to mount a DIY wall desk:
1. Assemble an L-Stand
Using a rotator saw machine, cut the woods into a length of 24 inches. Always practice safety precautions when using the saw machine. You should also cut 2 more wood pieces with a length of 23 ½ inches. Then, create holes in the woods through a hole-making tool.
By using wood glue, connect the two planks of wood. Apply only enough glue, which means that you should not apply too much glue on the woods. Then brace the L-stand with a table and screw the nails using a drill machine to provide them strength.
Just do the same steps when creating another L-stand. And by referring to the L-shape, confirm the 90 degrees angle on both L-stands. Remember that it is compulsory to check the angle of the L-stand.
2. Create Brackets
Next is to create the brackets of the stand. Take a measuring tape and mark the sides of the wooden piece. One side is 7 inches, and the other side is 6 inches. Keep the L-stand in wooden pieces and create angles on two sides.
Now, cut the pieces of wood based on the angles. Then affix them to the stand. Create holes on the two wooden pieces used in the L-stand. Brace the brackets and the stand with a table and screw inside the nails to strengthen the brackets. Do the same steps for the other L-stand.
3. Create Holes in the Stand
Label ¾ inches dot inside and outside the brackets. Use a drill machine to create holes, although the holes shouldn’t be full. Drill a smaller hole right in the first bracket. Just do the same steps and create the same holes in the interior and exterior part of the brackets as well as on the upper portion of the L-stand. There should be 4 holes in the stand. Find the measurements of these holes by embedding clips inside. Your measurements must be precise while creating the holes.
4. Finishing
Smoothen the L-stands through a smoothing machine. Wear a goggle and mask while smoothening. Once smoothened, apply a wood polish using a brush. Cover the entire sides of the L-stand when polishing. Keep the stand far from a fireplace. Then, connect the L-stand to the prospected wall to finish the mounting of a wall desk.
Conclusion
These are the steps on how to mount a DIY wall desk. This project can make the best space-saving solution and you will be happy to build one for your home. You do not have to endure your congested home because all things are seemed to be forcefully compressed due to the limited space.
By following the steps above, you can make DIY wall desks. The good thing about this tutorial is that it only involves simple steps. Hence, it can be tried by homeowners who do not have a background in woodworking, as long as they know how to operate the required tools and they have the necessary supplies.
Leave a Reply