
Through time, your pieces of wood furniture will likely deteriorate. Because of this fact, having an excellent topcoat becomes an essential thing. Thus, you should learn how to apply polyurethane. However, although this task would seem to be very basic to some people, others are still not knowledgeable about the proper steps of applying polyurethane.
This article will feature a tutorial for this task. You will later learn how to proceed with the project. Just take time to review the contents and you will surely appreciate your curiosity to learn new things – especially if it has something to do with the preservation of your furniture.
What Do You Need to Follow this Tutorial?
Applying polyurethane to your furniture is actually an easy task. However, it will not be possible for you to carry out this tutorial if you do not have the necessary things:
- Materials, Tools, and Supplies
Obviously, this task would require an oil-based polyurethane. You’d prefer to use oil-based polyurethane as it gives incredible depth and color. Its quality is quite incomparable to water-based ones. You must also prepare mineral spirits, automotive polishing compounds, and automotive rubbing compounds.
Furthermore, this tutorial requires certain tools and supplies. Get ready with your shop vacuum and a sanding block. You will also need sandpapers and brushes. Prepare tack cloth, lint-free cloth, and wet/dry sandpaper, too.
Step-by-Step Instructions
Step #1 Sand the Area of your Object

Before you proceed with applying polyurethane, you have to sand the area of your object first. For this step, you should use increasingly finer grits. Sandpaper with greater grit gets rid of the deeper scrapes developed by using lower grit sandpaper.
Most of the time, you will have to use 100-grit sandpaper for the initial sanding, then followed by 150-grit, then 220-grit sandpaper.
Step #2 Get Rid of Any Dust

Once you have freed the object from blemishes, you should then remove any dust left. To easily carry out this step, you can get a shop vacuum that features a soft brush. However, you must reinforce it by wiping down the surface with a clean cloth drenched with some mineral spirits. Lastly, wipe down the surface with a tack cloth.
Step #3 Secure the Surface

Dilute the oil-based polyurethane with a single part of mineral spirits and two parts of polyurethane. Run the mixture into a container and smoothly stir it with a stir stick. Apply the sealer using a natural-bristle brush following long and even strokes. Make sure you spot any runs.
Make sure to check the information from the can of the stain since some stains are characterized as self-sealing. Now, if you got a self-sealing stain, then you can simply skip step 3.
Step #4 Apply your First Coating for Polyurethane
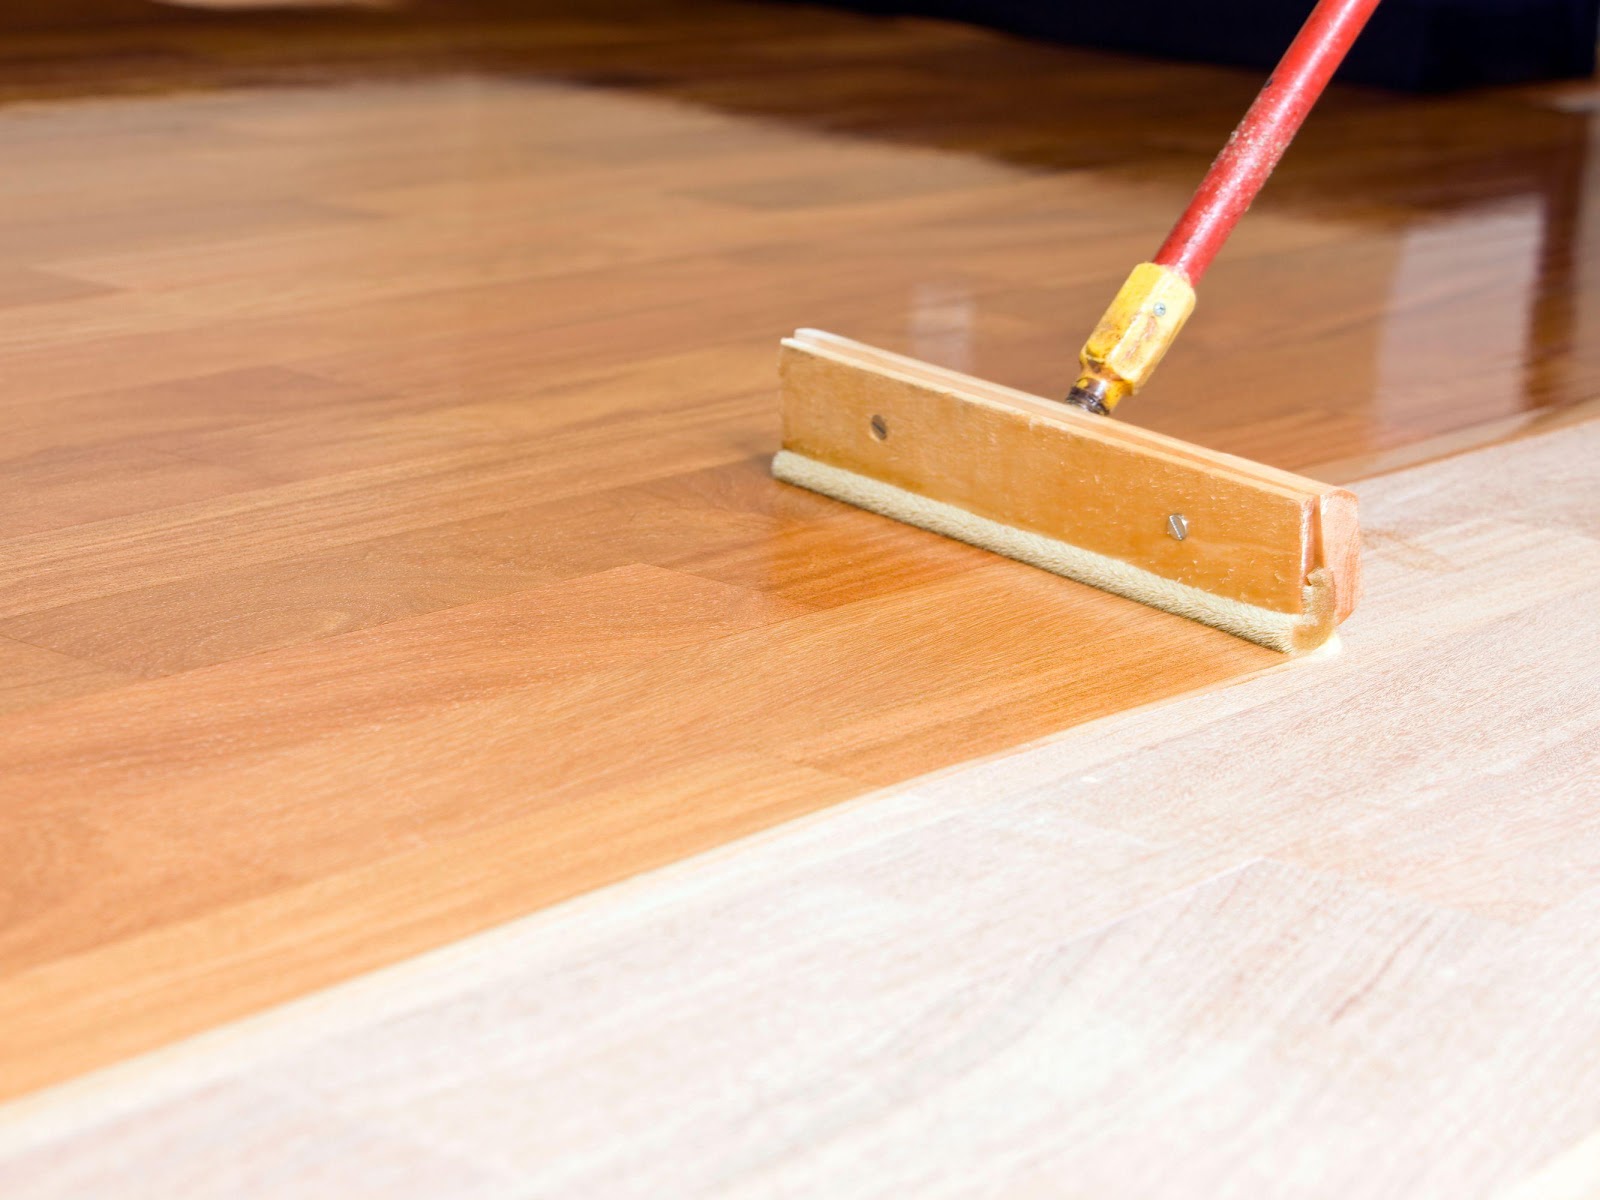
Apply a finish directly from the can and it has to be done within 24 hours after the application of the seal coat. Smear the varnish throughout the whole surface while following long and even strokes. Lie over the strokes so you can achieve even coating. Lay hold of the drips, specifically those that are near the lower edges.
Step #5 Cut off the Bumps
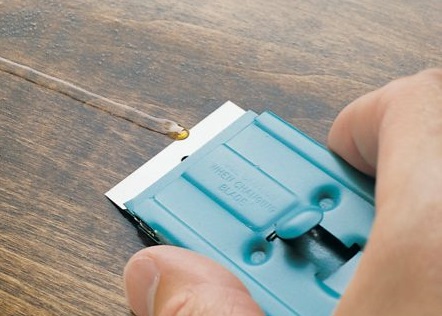
Wait for at least 12 hours and touch the surface to feel if it has completely dried. Once the surface has dried, cut off any drips through a razor blade. However, you have to be careful when cutting off the drips as you do not want to cut the underneath surface.
Step #6 Do Wet-Sanding
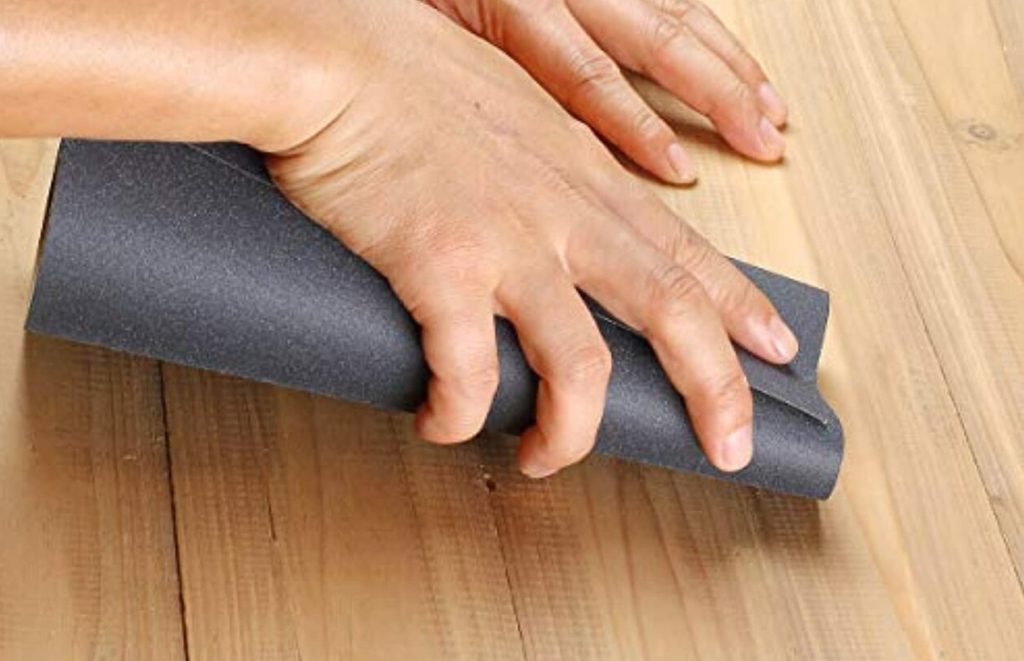
After drying the first coating for 24 hours, get rid of the little blotches by doing wet-sanding while mounting 400-grit sandpaper to a sanding block. Drench the paper to water and perform strokes in a circular motion to get rid of the blotches as well as the dust bumps.
Once the surface is already smooth to touch, wipe it down with a moistened cloth and dry it with a dust-free cloth.
Step #7 Apply Second Coating

Apply second and final coating 24 to 48 hours after the application of your first coating. This should be easy for you as you will only have to perform the same steps as the first coating. After drying the second coating, cut off any bumps and do wet-sanding again on the surface.
Step #8 Polish the Object if you did Wet-Sanding during the Second Coating

After waiting for 48 hours and with an automotive rubbing compound, polish your finish. Moisten a cloth with some water and use the compound by rubbing it in a circular motion. Once done, wait for the surface to completely dry and smoothen the finish with a dry and clean cloth.
Conclusion
Learning how to apply polyurethane is a smart way of taking care of your furniture at home. You wouldn’t want to hire somebody to do this simple task. Regardless if it is going to be the first time to apply polyurethane, you can carry out this task well if you carefully follow the steps above.
You wouldn’t have a hard time grasping the instructions in this tutorial as they were very detailed and clear. Enjoy the experience of learning something new. Learning how to apply polyurethane is a skill you can use throughout.
Leave a Reply