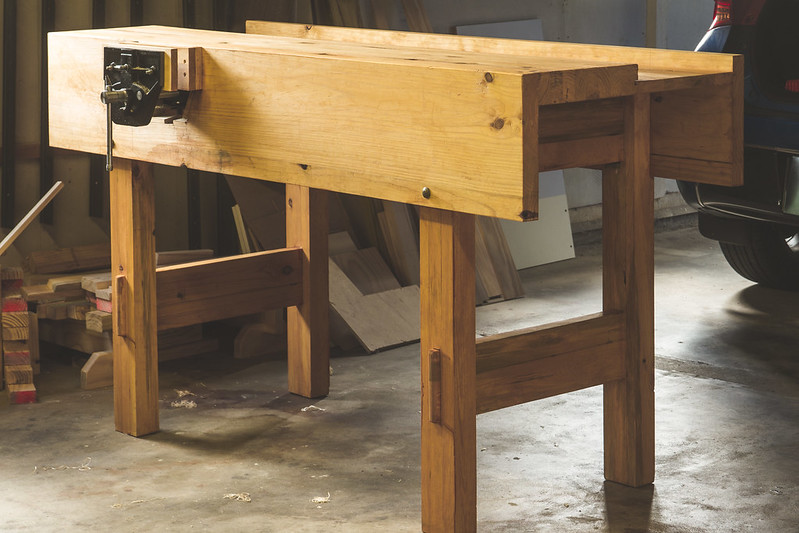
When working in a workshop, you should realize the importance of a workbench.
Your workbench is actually the most commonly used in the area. It is the tool you would normally use daily for your projects. This is where you clamp or hammer your things on. You may also want to simply clutter your things on it. However, you choose to utilize your workbench, there is no question that it is an essential tool in a workshop.
Now, your workbench should complement your current space as well as the kind of work you carry out. It should be at a comfortable height so you can comfortably work, too. If you are just starting and you are want to know how to build a workbench, you may consider checking this article for detailed instructions.
What Do You Need to Follow this Tutorial?
This tutorial is consists of affordable tools and materials. You will need the following to smoothly follow this tutorial:
Lumber and Plywood
Get ready with your lumber and plywood before following this tutorial. You will need 2×8 and 2×4 inches lumbers. These will be used during the assembly of your substrate, stretchers, and rails. Basically, there will be 18 pieces of 2×4 with a size of 57-in, 2 pieces of 2×8 with a size of 60-in, 2 pieces of 2×8 with a size of 27-in, 2 pieces of 2×4 with a size of 27-in, 8 pieces of 2×4 with a size of 30-in, 2 pieces of 2×4 with a size of 54-in, and 2 pieces of 2×4 with a size of 21-in.
The ½-in plywood will also be used for the cover. These materials are not expensive, thus making this project an affordable DIY task.
Tools and Supplies
To help you carry out the steps in this tutorial, you should also get ready with your tools and supplies. You need a circular saw, power sander, power drill, tape measure, and wrench. These tools are necessary if you want to achieve smooth results in your implementation. Get ready with your clamps and glue as you will need them when making an assembly of workbench parts. You will also need wood screws to secure the parts.
Step-by-Step Instructions
Step #1 Set up the Substrate for the Bench Top
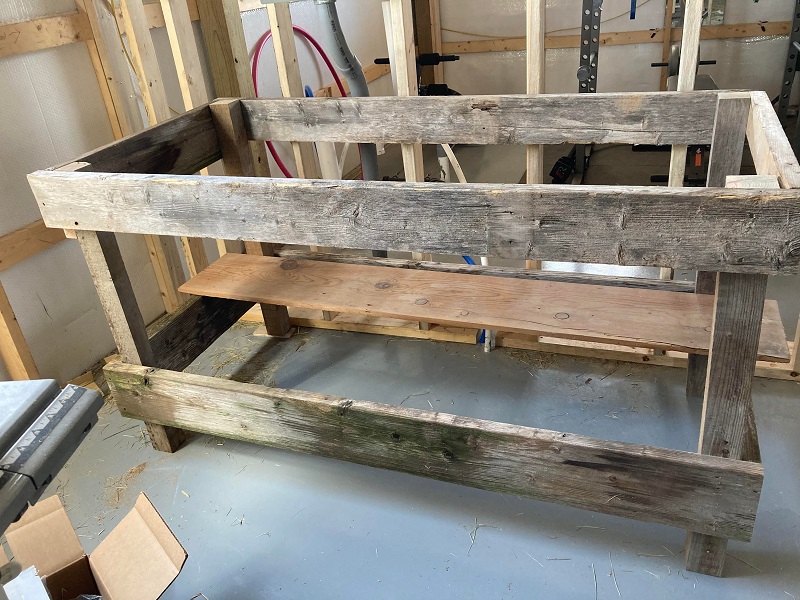
URL: https://www.reddit.com/r/Frugal/comments/m6ey1v/0_build_workbench_so_far_need_creative_ideas_for/
With clamps and wood glue, attach the 2×4 boards to serve as your top substrate so they can provide the look of a butcher-block top. The assembly of substrate shall give your workbench support and power. Flatten the surface of the substrate with a power sander.
Set out the substrate, with its top side facing down. Line up the short 2×8 top rails flushes to the short corners of the substrate. Mount 3-inch wood screws using a power drill to anchor the rails to your substrate.
Step #2 Attach the Top Rails
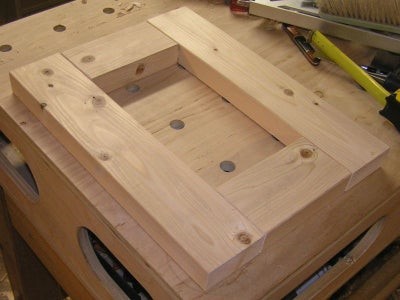
URL: https://www.instructables.com/Mini-Workbench-With-Rails/
Line up the long 2×8-inch top rails through the long parts of the substrate. The tip of the long-sized top rails must be even with the exterior face of every short-size top rail. Fasten the long rails to your substrate by mounting 3-inch screws.
Imbed the rail stretchers right in the middle of the long rails. Mount 3-inch wood screws into the long rails up to the edges of the rail stretchers.
Step #3 Set up the Legs of the Workbench
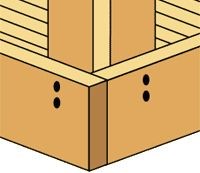
URL: https://www.lowes.com/n/how-to/how-to-build-a-workbench
Create four assemblies of the leg. Using one 2×4 leg piece, thrust its edge to the face of another leg piece and align the ends. Connect the pieces of the leg using 3-inch wood screws. Place the legs within the corners where you can find the short and long top rails that meet together.
See to it that the joints in the middle of the leg assemblies are discernible from the short parts of the bench. Drill 3/8-inch holes into the legs and top rails. Embed 3/8 x 4-inch carrier bolts coming from the exterior of the top rails into the leg pieces. Mount a nut and washer on the back portion of every carriage bolt and proceed to tighten it.
Step #4 Lock Up the Rails to the Legs
URL: https://www.instructables.com/Simple-Sturdy-Workbench/
Mark out 12 inches starting from the bottom part of every leg. Then, following the marking, line up the tops of the longer-size bottom rails and tighten the rails into the legs with 3-inch wood screws. Thrust the short 2×4 bottom rails in the middle of the longer ones. The exterior of the bottom rail must shove into the interior of the leg. Connect the short rails to the legs by using 3-inch wood screws.
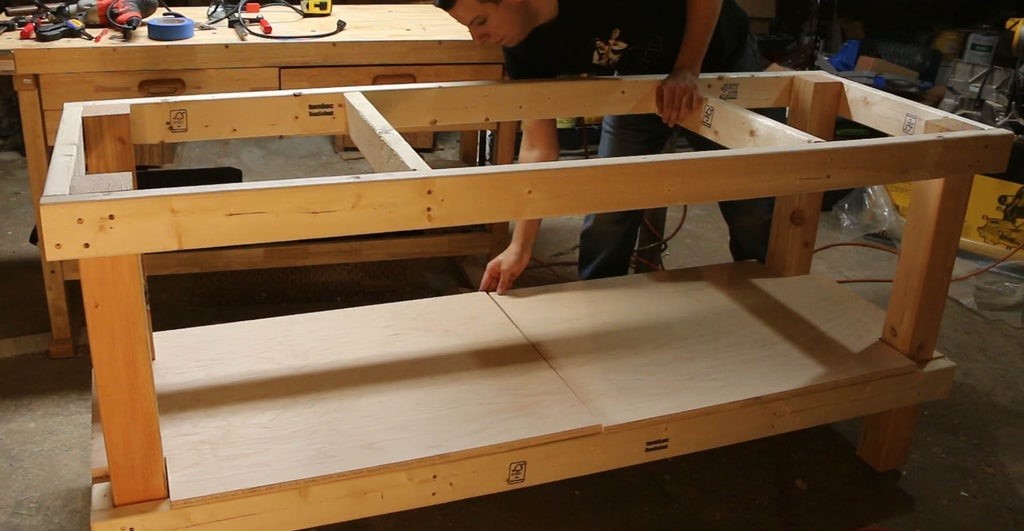
Step #5 Anchor the Substrate
URL: https://www.pinterest.ph/pin/18014467248320014/
Position the workbench side up. You may need the help of someone as the workbench is quite heavy. Line up the rim of the ½-in plywood top evened with the rims of the workbench. Tighten the top to your substrate by using 1-inch flathead screws. In case the top is damaged afterward, it will not be very exhausting and costly to take it off and do the replacement.
Conclusion
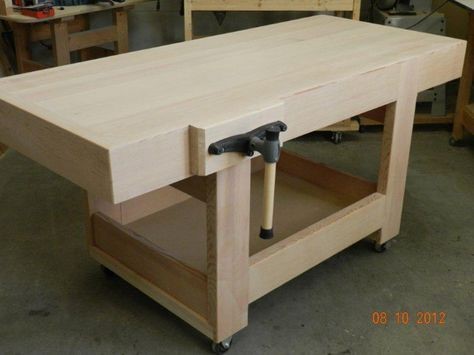
That’s it! You should now know how to build a workbench. This DIY tutorial is actually a practical solution to your workshop requirement of workbench. As mentioned, any workshop will need a workbench to carry out various projects. You will surely appreciate the tutorial above as it features easy-to-follow instructions.
You might want to install accessories in your workbench, too. Good light is necessary for a workbench. You can buy cheap 4-ft shop light and tighten it right on the lower side of your top shelf. Furthermore, you can choose to add power to your bench by installing a power strip to any of the legs.
Leave a Reply