Despite being named as a circular saw, this tool can actually cut straight lines. It got its name based on the shape of the blade used. Still, it does not mean that it is not capable of cutting anything else, including a straight line. While it may be difficult to believe, a circular saw can produce straight, laser-accurate cuts. To use it effectively, follow this guide on how to cut a straight line with a circular saw.
What You Need
- Circular saw
- Rule guide
- Safety goggles
Step-by-Step Instructions
Step 1 – Safety First
Even though producing straight cuts is highly important to produce beautiful pieces in your Jobsite or workshop, safety should always be given a priority. Make sure to observe all safety rules in using a circular saw, while wearing all the needed protective equipment, including safety goggles that will protect your eyes from debris and sawdust while completing your project.
Step 2 – Clamp the Wood to Secure It
Clamping or securing the wood allows you to focus on the actual cut and not on the wood. Most of the time, cutting wood using a circular saw is possible even without clamping it, only if you are an expert in using this tool. It is also possible if the wood or board weight makes it impossible to shift while cutting.
Still, it is always recommended to clamp the board to secure it before actually performing the cut. This will prevent risks against shifting outline while cutting, allowing you to maximize the country of both the wood and saw, thus possibly resulting in more accurate straight cuts.
Step 2 – Properly hold the Blade
There are different ways to hold a circular saw, which means that there’s both a wrong and right way to do it. How you hold your blade will influence the output of the cut. Note that there are two kinds of circular saws – right-hand and left-hand models.
As suggested by their description, right-hand models are designed for righties, while lefties use left-hand circular saws. Even though not using the right one for your style gives you better visibility to the blade, you will be able to hold the saw better without using your hands possibly crossing over.
Step 3 – Set the Exact Cut Depth
If you want to produce accurate and straight cuts, the very first thing that you need to focus on is setting the exact cut depth. Without this, the blade may easily divert itself from the right path, skewing your cut. Aside from that, it is also not safe to cut without the right cutting depth. All you need to do is to adjust the blade just enough so that it protrudes a bit from the lower part of the wood, with just ¼ of an inch.
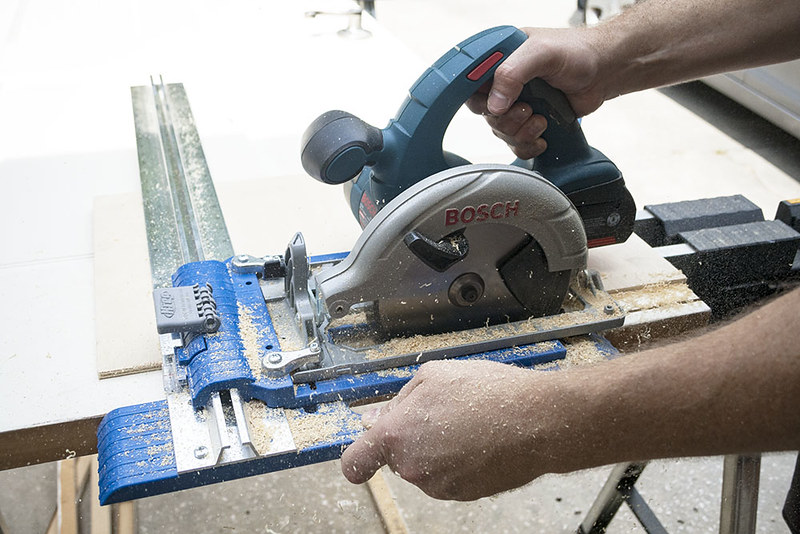
Step 4 – Use a Guide for Your Circular Saw
If you consider yourself a newbie, the best option is to create straight cuts each time by using a circular saw guide. With one, there is no need to measure, without even a need to draw a straight line in marking the cutting line. You simply need to lock the guide on the exact width that you want to create and start cutting. A dependable guide is ideal in producing straight rip cuts, repeating the cuts, and you can also make straight cuts each time while pushing the circular saw through the slide.
Step 5 – Cut with the Good Side
The pointed side of the circular saw’s blade teeth moves upwards from beneath, and through the wood. This means that if you need to cut across the grain of the wood, there will be some splinters on top. So that you will not end up messing with the good side, cut from the good side while the board is faced down. If there are splinters on top, they will continue to be hidden after the piece is completely assembled.
Step 6 – Come to full Speed Before Cutting
Coming to full speed is a vital step before making any cut. After compressing the trigger of the saw, wait for the blade to reach full speed before having the blade in contact with your wood. If not, it will only end up having a mess on the wood edge and into the wood.
Conclusion
You may have done it before – attempting to create straight cuts using a circular saw. Even though you may have tried your best, the blade seems to stray away from the pencil mark, with the blade binding up as you try the get everything on track. Learning how to cut a straight line with a circular saw using the guide in this article will help you achieve functionality while using the tool. If you have ideas to share, leave them in the comments section below. Feel free to share this article if you like!
Leave a Reply