
Running out of space for your books is never fun. You don’t want them lying out there on the floor, waiting for their own space. A trip to the furniture shop is ideal. You’d get a lot of bookshelf options and designs. But why not try building your bookshelf?
If you are up to a new challenge, you may want to learn how to make a bookshelf. You’d create a design you want that will perfectly fit the size of your space and the aesthetic you desire. It wouldn’t be too complicated at all. Build a simple bookshelf out of these easy DIY steps.
What Do You Need?
It may cost you an entire day and a couple of thousand dollars in building this simple bookshelf. Yet, it will all be worth it. This DIY bookshelf is sturdy and will last you for years.
The exact cost will depend on the quality and kind of materials you will use.
- Wood
Most traditional bookshelves are from quality solid wood. These are expensive, but if you want to invest in quality wood, feel free to do so. However, if you require to save but still get quality wood, you can use plywood.
There are different types of plywood in the market today. Buy the ticker ones, like the veneer plywood that has more than three layers. It will help make a solid bookcase compared to the softwoods you can buy.
Buy the birch plywood if you want to coat your bookshelf with paint. Maple plywood is an excellent choice if you prefer a more natural look devoid of any stains. Check your local lumber shop for the kind of veneer plywood made from different quality wood.
- Nails
Pick the nails that match the thickness of your wood. You will need a lot of them. So, get a box that will be sufficient to build all the shelves you want on your bookshelf.
You will need the following tools to get the DIY project started:
- Circular Saw
- Jigsaw
- Drill
- Hammer
- Utility Knife
- Level
- Tape Measure
How to Make a Bookshelf
In case you are wondering how hard it is to build a bookshelf, the range is moderate. The most difficult parts are getting all the measurements and the cuts accurate. But if you have enough experience with woodworking, this will be easy for you.
1. Measure the bookshelf space

With your tape measure, take the measurements of the bookshelf you want. Whether you prefer it as big as your wall or just small enough to fit between your closet and bed, write the measurements ready so you will have an accurate basis when you cut your woods.
Measure the height and width of the bookshelf, as well as the length of the shelves. Count how many racks you want to out. Then, measure the end support of the bookshelves. The end support depends on your preference. It is either you want the bottom of the bookshelf close to the floor or not.
2. Cut the wood with accurate measurement
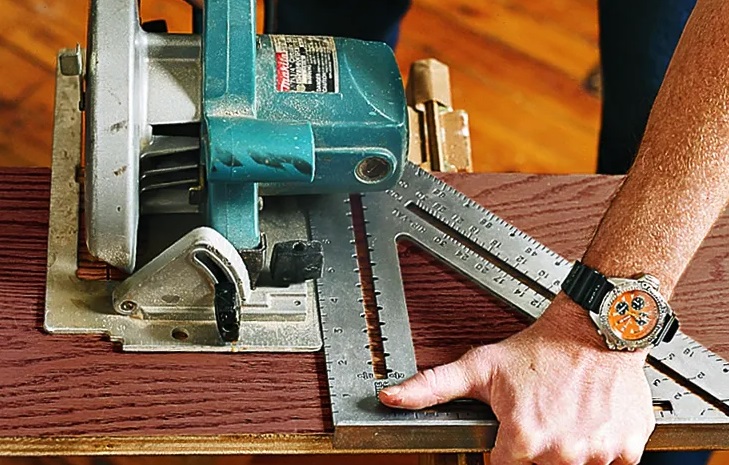
Cut your pieces of wood according to your measurements. You can use your circular or jigsaw to cut the parts of your bookshelf. First, cut the legs on each side, the number of shelves you want, and the supports as well.
If you are not good with cutting or do not have any of the saws mentioned, you can ask your lumber shop to cut the wood for you according to the measurements you want. You may need to pay them, but it gets the job done quickly.
If you want a sturdier bookshelf, you can have two sheets of plywood stack together on the sides or have the inner side cut in blocks following the shelves. It will help you insert the bookshelf racks quickly and without problems.
3. Start with the support and legs
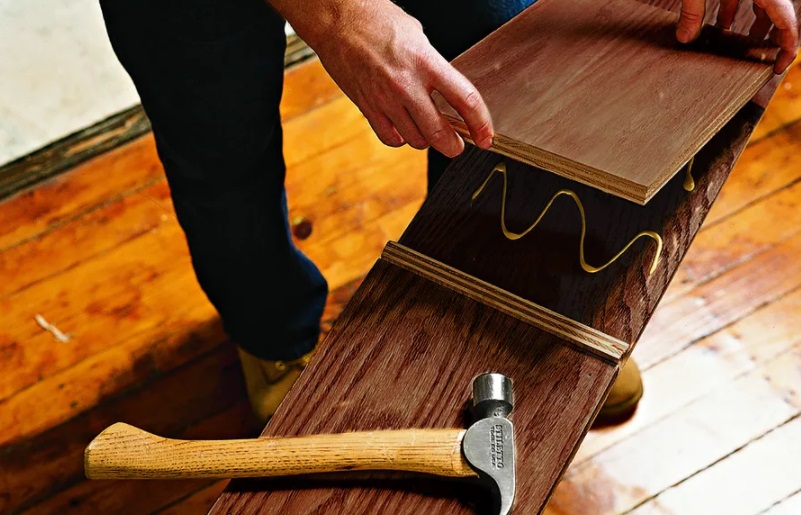
Before you start working on the bookshelf, sand the edges and surfaces of the plywood.
First, work on the bottom of the bookshelf. Get the cut blocks of wood for your end support. Instead of only having two-end supports on both ends, add another block on the center to support the middleweight. It will help balance the bookshelf better.
To secure the bottom of the shelf well, you can apply wood glue to attach them securely and finish it off with a couple of nails on each corner. Then, place the bottom block on the space you want the bookshelf to be.
4. Assemble the Bookshelf Box
Now, it is time to assemble the bookshelf box. Start with the sides. Attach them securely to the bottom of the bookshelf. Work on two sides first, and once done, attach the top plywood. It secures the top end of the sides.
You can work on another layer of the sides by putting blocks of wood into them. Cut them into blocks the same size as the height of your shelves. The spaces between these blocks are where you can insert the shelf racks.
5. Insert your bookshelves
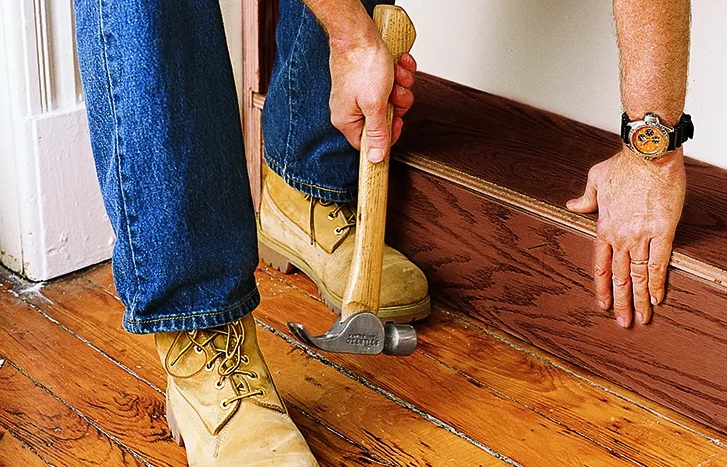
Once the bookshelf box and sides are in place, you can now insert the cut shelves. To make sure they fit perfectly, grab your mallet or hammer to put the shelf racks in place. Avoid hitting them too roughly, or you might break the wood.
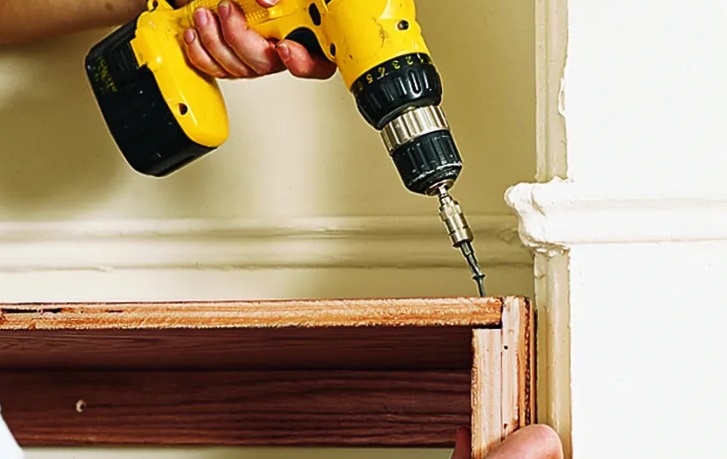
6. Apply the Nosing
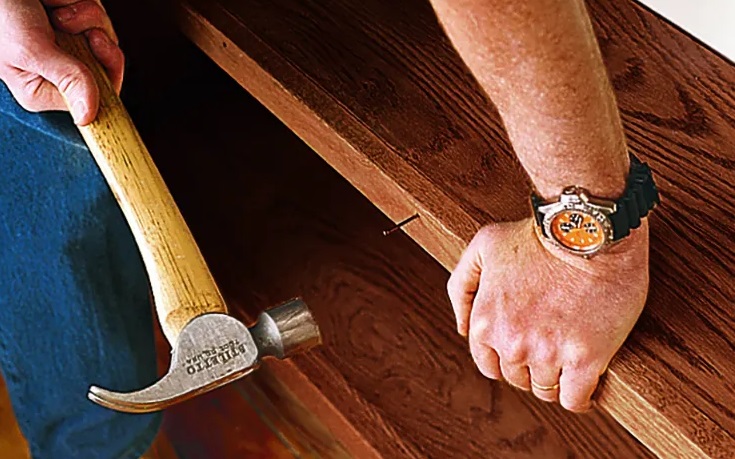
The edges of the plywood may not look appealing. Thus, to give it a nice finish look, apply nosing on each front edge, especially on the shelves and sides. Attach the nosing with a nail and glue. Start on one end and check the balance and fit before you attach the other end.
Once the nosing gets done, you can now put the finishing touches on your bookcase. Either you want to paint it or cover it with polyurethane, the choice is up to you. Now, your bookshelf is done and ready for your books and other dainty collections.
Conclusion
Building your simple bookcase is easy once you know how to work with wood, measurements, and designs. It may look challenging at first, but you will slowly learn the mechanics once you know more about woodworking.
It is an excellent investment to know how to make a bookshelf on your own. You will get to personalize it and add a few excellent touches and designs you want. Thus, start your training by doing this simple DIY bookcase.
Leave a Reply