While working on a project, you may have underestimated the color of the wood you used. Wood with red tones may have ended up too red or having a striking red appearance. Which may have resulted in questions like “How to neutralize red tones in wood?”
Red tones are not the only color you’ll find in natural wood. Some species come with yellow, brown, and even black tones. However, red colors are too striking or too overwhelming that it’s common for furniture makers and woodworkers to find ways to get rid of or neutralize this color.
Let’s first find out why wood develops red tones and then, focus on how to neutralize this color using safe and effective ways.
Why Does Wood Develop Red Tones?
Hardwoods naturally undergo aging and eventually, change color from light to dark. The color change can also be due to exposure to the elements such as the sun’s UV rays, oxygen, and chemicals.
Some woods with a lighter color will become darker and look richer while woods that are dark will become lighter as these are exposed to different factors.
But there are also other wood species that possess a red tinge. The reddish hue may be harder to neutralize than in other woods. Here are some of them.
- Red Cedar – this wood species is the most well-known for its lovely red hue. The species that grow in the Pacific have the most reddish color. Red cedar is soft with a straight grain and an amazing smell. Red cedar is the choice for making outdoor furniture as this won’t rot even when exposed to moisture.
- Walnut –this wood is beautiful and very strong. The red color is darker compared to red cedar although sometimes walnut can turn purple. Walnut is used in manufacturing furniture pieces, flooring, and walls. This wood is very strong and can resist cracking and shock. You will also find walnut cabinets, shelves, tables, doors, and home ornaments or décor.
- Redwood – redwood is on this list because of its natural red hue. It is also called Sequoia and is related to the yew. Redwoods come with a subtle red color that makes them luxurious. Most woodworkers and hobbyists find the color and the grain lovely that they don’t neutralize the appearance of redwood at all.
- Other qualities of redwood include its resistance to rotting and high humidity. These qualities have made redwood popular in general carpentry and in making indoor and outdoor furniture.
- Red Oak – Oak trees can produce two types of wood: white and red. Of the two, red oak is the most resistant and the most beautiful. Red oak comes with a pale red-brown color but the sapwood usually varies from gray to red.
- Oak may be hard to work with because of its hardness however, the results are stunning. Because of its amazing color and qualities, red oak is used for flooring joinery, decorative veneer, cabinets, and manufacturing plywood.
- Mahogany – this wood is similar to cedar as it has colors ranging from red-brown to very dark red. Mahogany is tropical wood with a fine grain. This wood is resistant to woodworms and other pests. Mahogany is easy to work with making it the best wood for making cabinets. Also, it is one of the strongest woods which is why it’s used to make floors, doors, furniture, and cabinets.
- Acacia – the acacia has varying colors from gold to deep red and light brown to extreme red. Acacia is often used in furniture making. You’ll find dressers, tables, and chairs made of lovely acacia wood. Acacia is also one of the strongest and is extremely resilient against woodworms, high humidity, and deformity.
- Cherry – this wood has a golden color that tends to become redder as the wood ages. Cherry has a satin texture making it look very luxurious. These qualities make cherry the best wood for making exquisite furniture. To expose the lovely red hue of cherry, woodworkers create a tangential cut on the wood.
- English Yew – red and fine, the English yew is also compact and very elastic. The natural color of yew wood is red to brown making it a fantastic wood to make fine furniture. English yew is very dense with high resistance and very little shrinking capabilities. When you dye yew black, the wood will look almost the same as ebony wood.
- Red Pine – also known as Scots pine, this wood is naturally red with white-yellow sapwood and red heartwood. Red pine is a softwood but is easy to work with. It is also aromatic and is commonly used to make fine furniture, carvings, and décor.
How to Effectively Neutralize Red Tones?
There are many ways to neutralize red colors in the wood. Take note that if the wood you’re using is naturally reddish, it could take more work to neutralize the dark color. But if the red hue is very subtle, you can lighten the color with some of our effective techniques.
Bleach Red Tones from Wood
Bleaching is one of the most highly recommended ways to neutralize red tones in the wood. Bleaching also works in removing or toning down other dark colors like dark brown, violet, and black hues. For this method, we will discuss how to use store-bought bleach to lighten the red tones in the wood.
Store-bought bleach works best on bare or raw wood. It will not work if the wood you’re bleaching has been painted or varnished before. Also, wood that has been significantly sanded or shaped will not respond well to bleaching.
For all bleaching projects, it would be best to sand the top layer lightly before applying bleach. Don’t sand too heavily as this will only expose a fresh layer of red tones. You may need to bleach wood, again and again, to get rid of more red hues.
In case the wood you want to neutralize has a wood varnish or finish, you must remove all the finished layers first before applying bleach. This will expose the bare layers and help you bleach the wood more efficiently
Store-bought bleach can be very toxic. Avoid using this product in enclosed spaces. Make sure that your working area is well-ventilated or work outdoors if possible. Also, wear gloves and goggles to avoid splashes.
What you will need
- Store-bought bleach – any kind of pure bleach will do. But don’t use bleach with detergent, fabric conditioners, and other additives. These may only add more chemicals to the surface of the wood you wish to bleach.
- White vinegar – you need white vinegar to remove yellow stains that are common after applying bleach. You will combine white vinegar with water to create a neutralizing solution.
- Water – you need water to mix with bleach and then with white vinegar. Use water to rinse the wood after applying white vinegar.
- Foam brush or applicator – you need this kind of applicator to evenly apply the bleach and water solution to wood.
- Sandpaper – use coarse sandpaper with 40 to 60 grit.
- Spray bottle – spraying the bleach and water solution on tight nooks and crannies of wood can help create an even appearance.
- Dry towel – use towels to completely dry the newly bleached wood.
Instructions
- Prepare the wood surface you will bleach
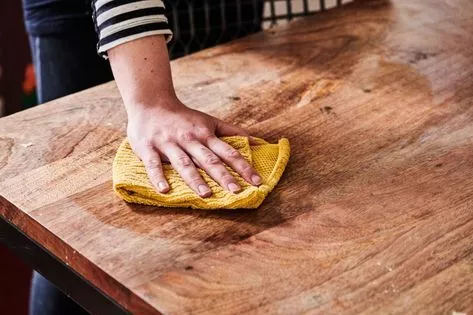
As we mentioned before, clean and prep the surface you want to bleach. You can wash the surface with soap and water if it’s too dirty or sand it lightly to remove stubborn grime. If there’s paint, polish, or varnish, remove these completely and sand the area. Use a shop vac to remove all wood debris from the surface before you start bleaching.
- Prepare the store-bought bleach solution
Mix the store-bought bleach with equal amounts of water. Use a plastic container to mix the two as metal may become corroded when exposed to bleach. The amount of solution you need to prepare depends on the size of the surface you wish to bleach.
- Apply the store-bought bleach to wood
Now that the bleach and water solution is ready, you may now apply it to the wood. Use the foam brush applicator to evenly apply the solution. Make sure to apply the solution generously all over the wood for the best effects.
To distribute the solution in tight areas, use a spray bottle. As always spray the solution generously in all tight areas to ensure the best-neutralized effects.
- Allow the bleached wood to dry
Take the piece out under the sun to dry. The sun will dry the wet wood and help make the bleaching process quicker and more effective. If the sky is overcast or if there is cloud cover, allow the piece to dry in a shed or garage. It can take more than a day for wood to dry completely so don’t rush.
- Apply white vinegar and water solution
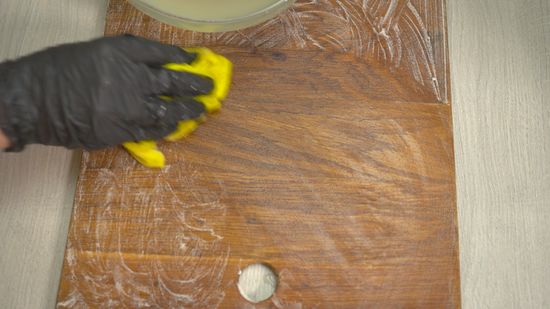
Once the wood is dry, you will notice some yellow stains on the surface. These stains are very common when the wood is treated with bleach. You can remove this by applying a solution made from white vinegar and water.
Mix equal parts of white vinegar and water. Apply this solution to the yellow stains and let this stand for a few minutes. You will notice that the stain will disappear completely.
- Rinse the wood completely and air dry
Rinse the surface with clean water and wipe dry with dry towels. You may also place the piece back under the sun to dry completely.
You can use store-bought bleach to remove excessive red tones on wood. But store-bought bleach can be too strong or too toxic to use. You may want to make your homemade bleach to neutralize dark wood.
Create Homemade Bleach for Wood
You can make your homemade bleach solution at home with just a few simple ingredients: hydrogen peroxide, lye, and water. Hydrogen peroxide is a compound used as a mild antiseptic for wounds, cuts, burns, and scrapes. Lye is an active ingredient in making soaps, and candles, and in manufacturing different kinds of food.
If you’re always working on a project that needs bleaching then you may find homemade bleach more practical than using store-bought bleach.
What you will need
- Hydrogen peroxide – you can purchase hydrogen peroxide in pharmacies or hardware stores and craft stores. Buy a big bottle if you want to make more bleaching solutions.
- Lye – purchase lye from a hardware store or hobby shop. Buy a big bottle for future wood bleaching projects.
- Water – you need water to dilute the lye solution and to rinse your work after applying white vinegar.
- White vinegar – as with the previous tip, you need white vinegar to remove any yellow discoloration after applying lye and hydrogen peroxide.
- Foam brush – a foam brush applicator can help you evenly distribute the lye and hydrogen peroxide. You may use a spray applicator to reach hard-to-treat areas.
- Sandpaper – you need sandpaper grit of 40 to 60 to prep the wood surface.
- Plastic container – you need a plastic container to mix lye with water.
- Towels – you must have clean towels to dry the bleach wood surface completely.
Instructions
- Prepare the wood surface you want to bleach
As with the first tip, sand the surface of the wood you want to bleach lightly. This is just enough to remove dirt, grime, and dust. Use a shop vac to get rid of any wood dust that’s left behind. You need a clean surface to apply the lye and hydrogen peroxide bleaching agents.
- Prepare the lye and water solution
Next, you need to prepare the lye and water solution. Remember, lye is caustic and should be handled carefully inside a well-ventilated area. Please wear protective gloves, goggles, and a face mask to prepare the solution.
Use a plastic container and fill this with a quart of water. Add three tablespoons of lye. Be careful to add the lye a scoop at a time and stir well until all the lye has been completely dissolved. The correct way is to add lye to the water and not the other way around to prevent mishaps.
- Apply the hydrogen peroxide and the lye solution to the piece of wood
Apply hydrogen peroxide all over the piece of wood you will treat. Use a foam brush to distribute all the hydrogen peroxide on the surface of the wood.
Afterward, apply the lye and water solution on top of the hydrogen peroxide layer. You can pour the lye mixture to improve coverage. Make sure that all the surfaces are covered, even the nooks and crannies.
- Dry the piece under the sun
Take the wooden piece and dry this completely under the sun. The warm rays and dry air will help bleach the wood faster. It can take around two to three days for the wood to completely dry depending on the size, the severity of the red tones, and any intricate designs on the wood.
- Remove yellow stains on the dried wood
You will eventually find yellow residue all over the wood once it’s completely dry. This is the lye solution that has left marks on the surface of the wood.
You can remove this with vinegar and water. Dilute equal parts of vinegar with water and apply this all over the stained areas. The acid in the vinegar will remove all the ugly yellow stains.
- Rinse and dry the wood
Rinse the wood with water to remove all the vinegar. Wipe this with a clean towel and take the piece out in the sun to completely dry. The sun helps neutralize the reddish tones so leave the piece out in the sun longer.
Lighten Red Tones By Applying Green Color
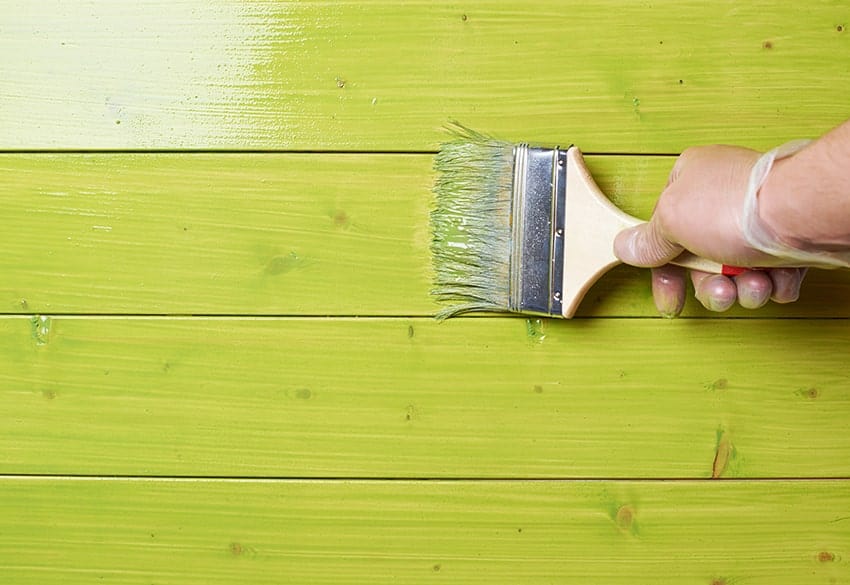
The color on the opposite side of the color wheel to red is green. However, this is easier said than done. You must select the right shade of green to completely neutralize the red tone. You may use green paint tones or wood stains that have greenish undertones for this method.
What you will need
- Green paint – use Mixol Universal Tints, this product is easy to use, non-flammable, and non-hazardous.
- Wood stain with greenish undertones – use Varathane Premium Fast Dry Wood Stain (Rustic Sage color)
- Soap and water – use dishwashing soap and water to clean the surface before applying stain or paint.
- Sandpaper – we recommend 100-grit and then 120 and 180-grit for finishing.
- Paintbrush – use a paintbrush to apply wood stain or green paint
Instructions
- Prepare the wood before applying paint or stain.
Wash the wood with dishwashing soap and water. Scrub lightly and rinse well. Let this dry under the sun. When the wood is finally dry, sand all imperfections.
Use the 100-grit sandpaper to remove all defects. Remove the sawdust with a brush or vacuum. Use the 120-grit to sand the wood again. Finally, use the 180-grit sandpaper to finish.
Remove all the sawdust and make sure that your surroundings are clean and free from dust once you apply the stain or paint.
- Prepare the neutralizer
Prepare the semi-transparent stain with a liquid green tint. You may also use powder dye but the liquid tint is much better. Place one tablespoon of dry into the poly and blend well. Continue mixing until you have an evenly concentrated green shade. You may use two tablespoons of dye if one is not enough.
If you want to use wood stain with greenish tones, use a stick to mix the product well before applying it to the surface of the wood.
- Apply the green stain on wood
Apply the stain with a foam brush. Brush with even strokes and make sure to maintain an even coat. Follow the directions of the grain when applying the stain.
- Let the first coat dry
Let the first coat of stain dry completely before applying the second coat. Usually, the first coat dries completely in a day.
- Apply another coat
Once the first coat is dry, check if the coated surface has the right color. If you’re not satisfied, you may apply another coat of stain. If the reddish tone has been neutralized, you can stop right here.
- Dry the coat of paint or stain
Dry the coat of stain under the sun for at least a day or two.
Using Raw Sienna or Raw Umber Colors
Raw umber and raw sienna are lovely natural pigments. These are brownish colors but have very slight differences. The best for neutralizing red tones in wood is raw umber. This is cool brown with greenish tones. Meanwhile, raw sienna is pale brown but with yellow undertones.
What you will need
- Raw sienna or raw umber pigments – these paints are available in powder, acrylic paint, or glazing stain formulations.
- Bristle brush – you need a bristle brush to apply raw sienna and raw umber pigments to wood.
- Lint-free rag – use a rag to remove any excess glaze.
Instructions
- Mix the raw sienna and raw umber colors
Use a metal or plastic container to mix the two glazes. You will get a natural color that can neutralize the red tones.
- Apply the new color to the wood
There’s no need to strip the red color from the wood. Apply the glaze using a bristle brush. Don’t forget to apply glaze on hard-to-reach surfaces of wood.
- Dry the glaze and wipe any excess
Let the wood dry completely after applying the glaze. Wipe any excess glaze and check if you’re content with the results. You may add more glaze if you need to.
Aside from red, you may want to tone down and neutralize orange tones in the wood. To neutralize orange, choose the color that’s opposite orange in the color wheel: blue. Mix equal parts of orange and blue to neutralize the orange hue.
Final Words
There are many ways to neutralize red tones in the wood. You can use store-bought bleach or use homemade ones. You may use green color to neutralize red or use natural pigments like raw sienna and raw umber.
With all these strategies, you can tone down too much red in wood. But make sure to clean wood and remove all dirt, dust, and grime before applying bleach or strain.
Leave a Reply