
Restaining your cabinets may require some knowledge and a little hard work. Nevertheless, this project can be an incredible way of enhancing the look of your cabinets. But how to restain cabinets? This can be a major concern to those who haven’t tried doing this project.
If you are planning to do a makeover on your cabinets through restaining, then this article can give you the best help. You are about to know the simple steps of restaining cabinets. You will also know what things to prepare before starting the task.
Read on so you can finally renovate your cabinets at home.
What You Will Need to Follow this Tutorial?
Before you focus on performing the steps in this tutorial, you should first prepare the following:
- Gel Stain and Wood Finish
Obviously, you need to prepare a gel stain for this task. There are several choices in the market but it can be more helpful if you find something easy to use. Your goal here is to find quality stains so make sure to choose well here.
You will also later use a good finish. For this tutorial, you are free to choose what kind of finish to use. You can get acrylic urethane, regular polyurethane, spar varnish, or water-based polyurethane.
- Tools and Supplies
You should be ready with your scrub pad as you need to clean the surface of the cabinet before starting with the restaining. Get ready with your sanding sponges, too. You will also need 150-, 180-, and 120-grit sandpapers. Rags will also be used.
During stain application, you will be using a brush. Find a high-quality bristle brush, preferably ½ to 2 inches. You should be particular in choosing your brush as the process of stain application is a bit tough.
Step-by-Step Instructions
1. Pull Out the Door and the Drawer Fronts

One way of simplifying the preparation in restaining cabinets is to pull out the door and the drawer fronts. Removing all these parts, you will see that the whole frame is already exposed. If there are any items placed inside the cabinets, you should prevent them from collecting sanding dust. You can do it by covering the entire item with some easy-weight plastic.
2. Clean the Surface

Cleaning the surface and clearing it from soap scum, grease, and other pollutes can ensure the long-lastingness of your restaining. You should use a powerful cleaner to thoroughly clean it. For extreme deposits, you should use a scrub pad. Wait for the entire surface to fully dry before you carry out the next step.
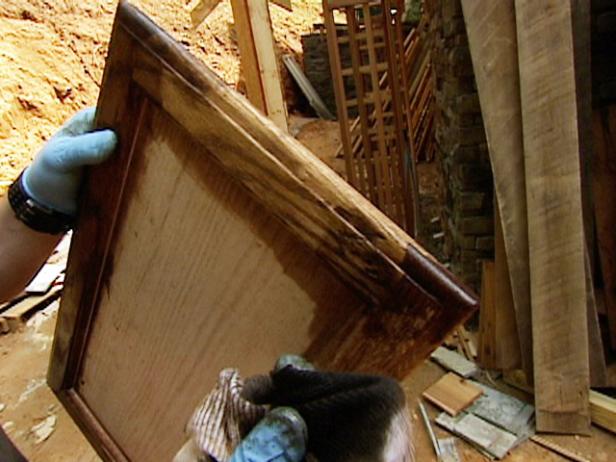
3. Begin Sanding

This time, you should begin sanding the surface. This will roughen and degloss the surface and doing so will give access to the new stain to stick well to the surface. The best method of sanding the surface is through the hand. The use of a palm sander is also an option, however, you should understand that this tool is a little too intrusive.
Sanding sponges and sandpaper will make a great combination. Ideally, you should use fine sanding sponges and 150 to 180-grit sandpaper. In case you have a peeling clear finish, then you should use 120-grit sandpaper to detach anything sloppy and finish it with 150-grit paper to complement the ruined parts.
Your goal is to create a smooth haze once you are done with sanding. Do your best so you will not get rid of any stain or finish. Once you are done sanding, use a shop vac along with some tack cloths to eliminate the fine dust.
4. Consider Cleaning Again

This step may not be necessary, however, it will make a great idea. You might want to perform another round of cleaning to clear away anything that is left and eliminate any lingering dust. Use a deglosser to do the task.
Get clean rags and drench with your deglosser. Make sure to wipe every portion of the cabinet. It will be best if you assertively ventilate when performing this step. Wait for one hour so the surface gets fully dry. Once dried, proceed by applying your stain.
5. Apply your Gel Stain
Now, this part is perhaps the most difficult in this tutorial. Applying gel stain to cabinets with finishing demands a bit of consistency in terms of using the brush. It will also need a bit of a creative glow.
Apply the new stain following the same direction with the grain of the wood. Apply in thin coatings. You may want to do another coating after 24 hours if you wish to get a darker shade. Do quick and short brush strokes in a single direction. Pull your brush against you, get across and pull against you.
Get a rag to clear away excess stain following a dabbing motion. Allow the stain to dry for at least 24 hours. Once dried, apply a wood finish.
Conclusion
These are the steps on how to restain cabinets. First-timers may find the steps, specifically the application of gel stain quite complex, but they will eventually learn the perfect approach to this step. Obviously, practice will help you learn the brushing method until it begins to feel natural. It will be easier for anyone to follow this tutorial if they have the tools and materials ready.
By following the steps mentioned above, you can restain your cabinets by yourself. Just make sure you pay attention to the small details as you do not want to waste your time and effort here.
Leave a Reply