Wood putty application is very easy which means anybody can try it. However, one should understand that to guarantee its proper application, he should know well enough. Good thing there are techniques on how to use wood putty!
Newcomers will particularly appreciate this article as they are about to know the common techniques in using wood putty. The application does not require a special skill, only the will to follow the right manner of application.
What are the Techniques when Using Wood Putty?
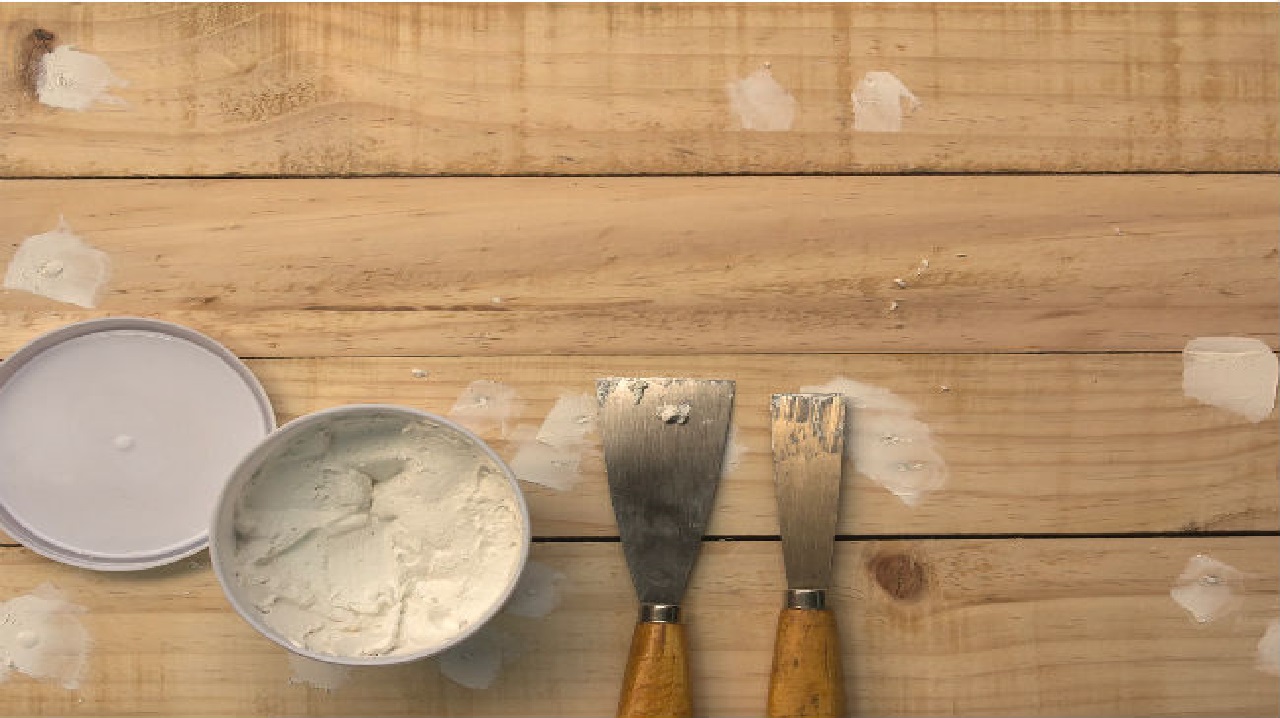
Wood putty plays an important role in your woodworking projects. If your wood develops small cracks and holes and is used outdoor, wood putty can do the magic. Putties are affordable and you can find them largely in the market. They are also shrinkage-resistant with the ability to endure the harsh environment. This is the reason they are appropriate for woods that are used outdoor.
The improper application of wood putty can damage the look of the whole wood piece. Also, other elements could affect the wood putty, making it stick to the hole. You should learn to mix it properly, what should compose the mixing, how to toughen the putty, and more.
Here are some techniques in using wood putty:
1. Choose the Appropriate Wood Putty
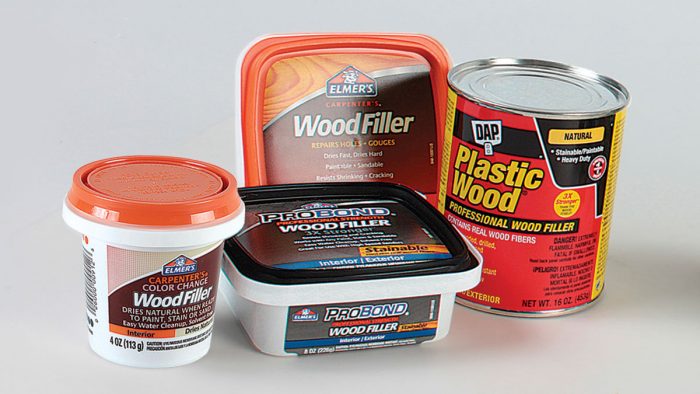
Nitrocellulose-based and acrylic-based are the most common wood putty types. Nitrocellulose wood putty is known for its extremely fast drying feature which makes it a better option if you have quick projects. This type of wood putty can be cleaned up with either acetone or lacquer thinner before curing. The acrylic-based, on the other hand, does not dry quickly, however, it can be easily cleaned up by water before curing. You should use acrylic-based wood putty when the completion time of your project is not an issue.
2. Match the Wood Putty with your Project
Wood putty manufacturers try to simplify your option so you can look for a wood putty color that fits your project. These manufacturers introduce a large array of colored wood putties. Some of the most common colors that you can find in putty are butternut, ebony, light oak, light birch, maple, cherry fruitwood, and teakwood.
Difficult-to-match shades may need a blend kit that contains several colors. Once mixed, they create a tailored shaded wood putty that is fitted for your work. However, when none of them works, mix artist oil colors with some solvent-based putty or artist acrylic colors with a water-based putty to complement the color of your work.
Another technique of using wood putty is to collect sawdust from the corresponding project and combine it with your wood putty to achieve a more proximate match.
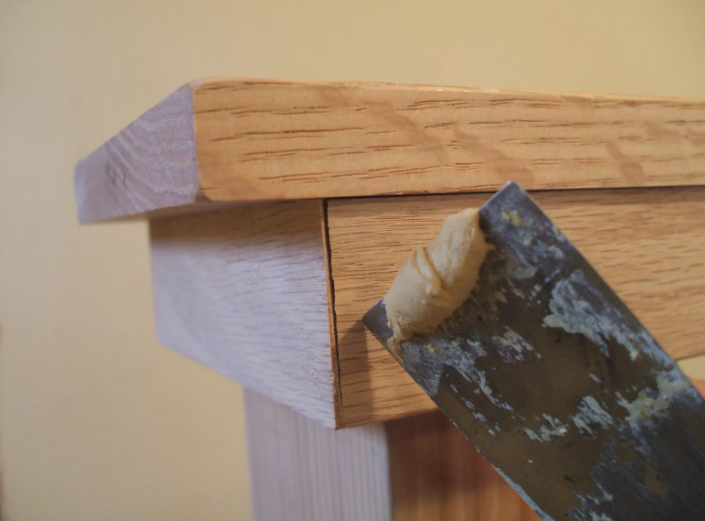
3. Press the Material during Wood Putty Application
The wood putty application requires compressing the material into the gouge or scratch with a common putty knife. You may also try other methods such as your finger, craft stick, or cotton swab when applying wood putty.
Compress the material right into the distressed surface and allow it to dry. Take off excess putty before it gets dry. You can check your wood putty and see whether it has already dried and can already work by crushing the tip of the thumbnail into the wood putty. When you notice it cave in, give it more time to dry.
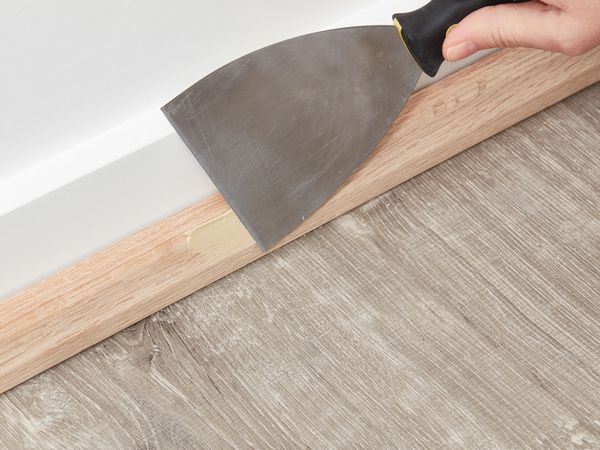
4. Sand Wood Putty
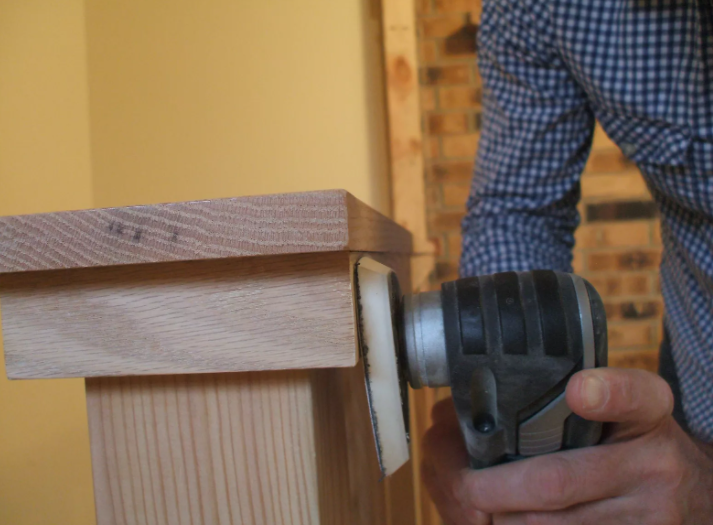
Use a sanding block featuring fine-grit sandpaper to flush wood putty fixes and their works. You may also want to use a handheld oscillating tool with 220-grit sandpaper. You might find it challenging to sand down the toughen putty but you can eventually do it. After sanding, the surface is stained so it can match with the finish of the applicable project.
5. Stain Wood Putty
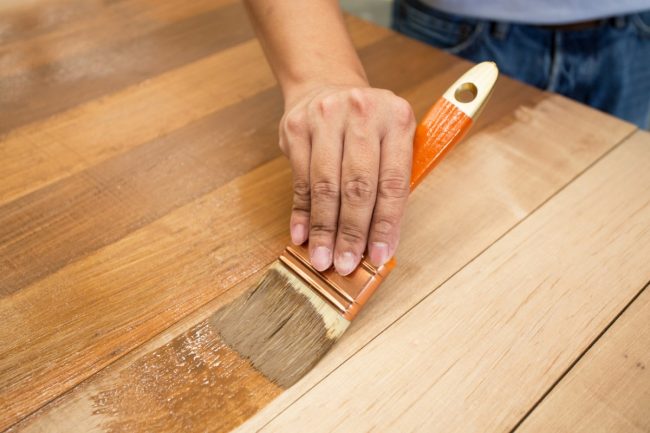
Staining your wood putty relies on the kind of repair. Some repairs demand that they are both sanded and stained to complement the project. The rates of absorption differ between various types of putties as well as the various wood species.
If staining the project, check the wood putty and start staining on scrap wood. Load the gouge with your wood putty and give it enough time to dry. Sand and stain the surface so you can easily see whether it complements well.
You should adjust the tone of the putty to make a good match.
Conclusion
Learning the techniques on how to use wood putty can help you fix the holes in your wood workpiece. Although applying it isn’t that complicated, it is said that one has to be knowledgeable enough about its application. With the techniques discussed above, you should be able to maximize the use of wood putty on your projects. You do not have to worry about the execution of these techniques as they are very doable and simple. What is important is you are willing to follow the tips of effective usage.
Leave a Reply