One of the most popular arts and crafts materials is Modge Podge. This is a versatile decoupage medium as it can be used as glue, an effective sealer, and a durable finish. The Modge Podge formula is similar to PVA glue but comes with higher moisture. It is best for projects involving inkjet prints compared to Elmer’s Glue. In this tutorial, you will learn how to put a picture on wood with Modge Podge.
There are two techniques to put a picture on wood with Modge Podge. You can Modge Podge the picture directly on the wooden surface or you can use the Modge Podge to place the image on wood.
What you need for this activity
You need the following to put a picture on wood using Modge Podge
Wooden block
Choose a wooden block or wooden surface to hold your photograph. The surface should be smooth and free from cracks, open spots, and holes.
Sandpaper
Use different grits of sandpaper to carefully sand off any imperfections on the wood.
Acrylic paint
Any color of paint you want to use.
Modge Podge
There are two types of Modge Podge: regular and Photo Transfer Medium. You can purchase this in most craft stores.
2 small paint brushes
You need a brush to apply the Modge Podge on wood and another one to apply acrylic paint
Photo printed in a laser printer
In the second part of this tutorial, you need a photo that’s printed on a laser printer. Inkjet photos will not work.
A flat tool like a scraper or credit card
You need this to make sure that the Modge Podge is applied flat and in a smooth manner.
Soft, clean cloth or a clean sponge
You need a cloth or sponge to wipe the Modge Podge and transfer the photo to wood.
Step-by-step instructions on how to Modge Podge pictures on wood
These are instructions on how to use Modge Podge to flawlessly stick photos on wood.
1. Prepare the piece of wood
Remove all imperfections, dust, dirt, and grime on wood by sanding it. Start with large grit sandpaper and slowly work your way to finer grits.
2. Prepare the photograph you will use
Make sure that the photo you want to stick on wood is the right size and shape. Use a cutter to make precise cuts.
3. Apply two coats of paint on the sides of the wood
If you want to paint the sides of the wood, this is the best time to do so. Apply one coat of acrylic paint and let it dry for a few hours. Apply another coat of paint and let this dry completely before you use Modge Podge.
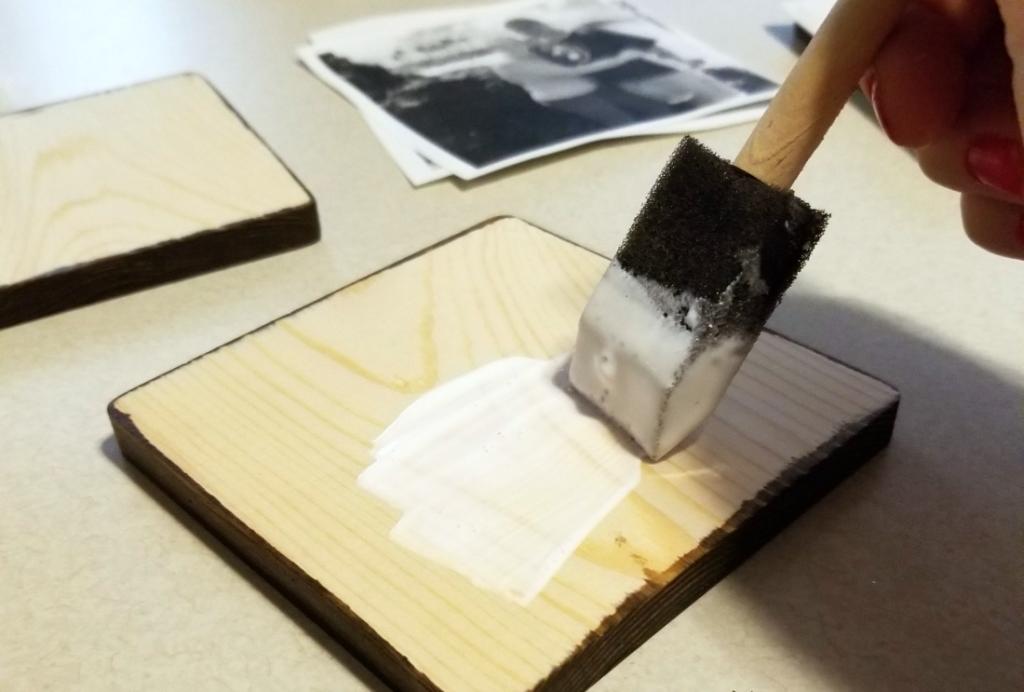
4. Use Modge Podge on the surface of the wood
Use a brush to apply Modge Podge on the surface where you will set the photograph. Make sure that the Modge Podge is distributed equally with no lumps or bubbles on the material.
5. Set the photograph on the wood
Place the photograph with the back on wood. Use a credit card or a scraper to stick the photograph perfectly. Let this dry for about two to three hours.
6. Apply a layer of Modge Podge on the photograph
When the photograph is dry, add another layer of Modge Podge to the photograph. This will seal the photo and add a lovely professional finish.
7. Let the Modge Podge dry and cure for a day.
You may add another layer of Modge Podge after the first layer has cured.
Step-by-step instructions on how to transfer photos on wood using Modge Podge

These are steps on how to transfer photos to wood with the use of Modge Podge.
1. Prepare the piece of wood
Just like the first steps, prepare the piece of wood by sanding the surface. Make sure that the surface is smooth and free from imperfections.
2. Apply two coats of paint on the sides or back
Place two layers of paint at a time. Wait a good 3 or more hours to make sure that paint is completely dry before working on the wooden piece.
3. Print your picture using a laser printer
Take note that pictures printed from inkjet and other types of printers won’t work with this technique.
4. Apply Modge Podge on the surface of the photograph
Place the photograph on a flat surface like a table and apply Modge Podge using a soft clean brush.
5. Place the photograph on the wood in a face-down position
Set the photograph on wood face down. Make sure that the photo is in the correct position before the Modge Podge dries.
6. Wait until the photo is dry for 24 hours
Let the Modge Podge dry for a day. Don’t move or hold the wooden piece. Let the material air dry and don’t use hairdryers or blowers. This is a very important step as you learn how to put a picture on wood with Modge Podge.
7. Use a damp rag to cover the back of the photo for 5 minutes
Use a damp rag (wet this with clean water) and cover the back of the photo. This will wet the photo so it’s easier to remove. The photo paper will become wet almost instantly.
8. Rub the photograph on the wood
Use a clean rag to rub off the image on the photograph and transfer it to wood. Do this carefully and wipe in one direction only.
9. Rinse the wood to get rid of pieces of paper
Take the wood and place it under running water. Rinse all remaining bits of paper on wood and let it dry for a day.
10. Whether the image by sanding it.
Use fine-grit sandpaper to weather the image if you wish.
11. Apply Modge Podge 2 to 3 coats
Place two coats of Modge Podge. Make sure that the first coat is dry before applying the next. Dry the Modge Podge completely for at least a day.
Now that you know how to put a picture on wood with Modge Podge, you can make all kinds of handcrafted items to use as gifts or souvenirs.