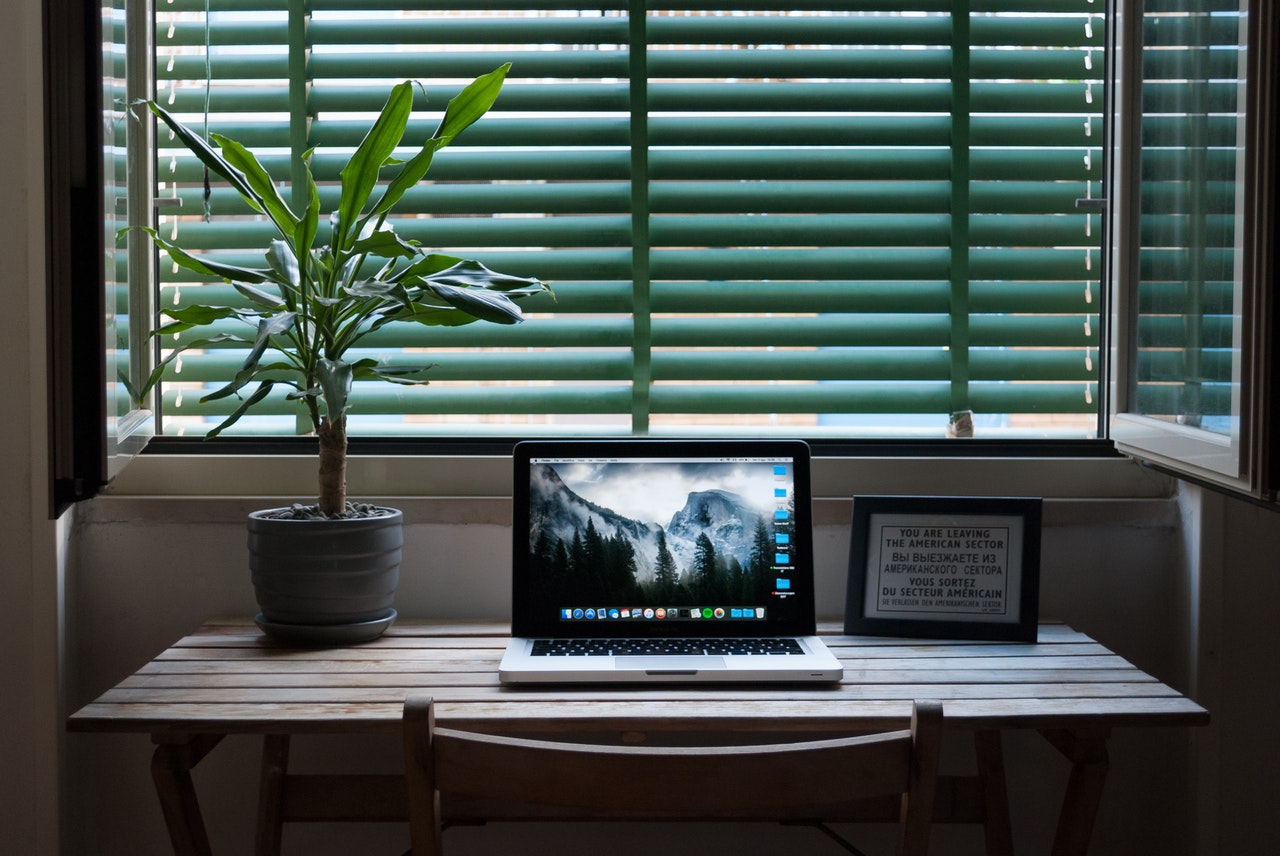
Making your own furniture like a desk is simple and cheaper compared to buying a store-bought desk. With a DIY desk, you’ll have a piece that will fit your space perfectly. You can also stain or paint it according to your preference. Here are a few simple steps on how to build a desk using simple tools and a few pieces of wood. If all goes well, you’ll have a new, DIY desk ready when the day is done.
You need the following for this tutorial
- Pieces of wood – for this tutorial, we selected 2×6 and 2×4 wooden boards. You may use old boards or recycled wood if you have some, just make sure that these are sturdy, free from molds and pests, and are well suited for your project.
The best types of wood to make a desk are oak, maple, cherry, ash wood, walnut, and many more.
- Circular saw – you need a good quality circular saw to efficiently cut your wood pieces. Wear safety equipment when using power tools.
- Power drill and nail gun– you will need a drill to fasten the screws to assemble the table legs. You can use a wired or wireless drill. You need a nail gun to drive nails on wood.
- Measuring tape – you will use a measuring tape to get accurate dimensions of the desk you want to make.
- Clamps – wood clamps will help you hold the pieces as you cut them or when you glue them together.
- Sandpaper – please use 80 to 120 grit sandpaper to sand the wooden pieces before assembly and before staining or painting.
- Metal table legs (optional) – instead of wooden legs, you may go for metal table legs instead. You can purchase these ready-mades from metal fabrication shops online or offline.
- Safety gear – wear masks, work gloves, goggles, and earbuds to keep safe when working with power tools.
- Nails and wood screws
- Wood glue
- Wood stain
- Wood paint
Instructions
1. Prepare your materials

Make sure everything you need is handy. You must work in a safe and well-ventilated area, preferably an outdoor space. You’ll be using paint and stain, very volatile and flammable chemicals so you should have enough ventilation. Wear your protective gear.
2. Measure your space

Is this desk in your room or your study? Are you making a desk for a child or an office desk for an adult? Desks come in many designs, shapes, and sizes. We will be making a basic desk with four legs and a smooth, solid top.
Locate the area in the room where the desk will go. Use your measuring tape to measure the width and length of the desk top and the height of the legs.
Some cool ideas:
You may opt for metal legs instead of wooden legs for your desk. You can get these from a metal works shop; all you need to do is to send in your desk dimensions. You may also prefer a desk with drawers where you can keep your stuff. Or, you may want a desk with shelves if the desk will be positioned against a wall.
3. Cut your wood
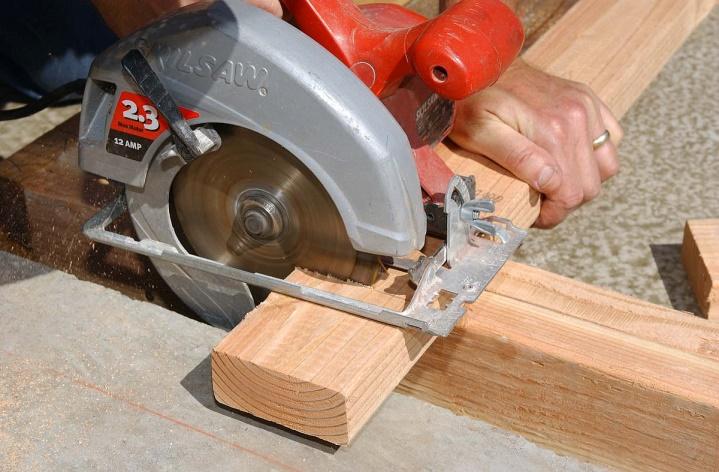
It’s time to cut the wood according to your measurements. Make accurate marks on wood using a pencil or chalk.
For the top, three or four wooden boards will make a sturdy table. Cut these according to the length and width you prefer. Use a circular saw to make accurate and repeatable cuts. For the legs, use 2×4 boards and cut these according to the height of your table.
The table leg design will depend on how you’ll use your desk. If you need a basic desk where you will write on or use your computer, you may opt for the basic four legs and a support beam across. If you plan to place something heavy on top of your desk, add more beams and supports at the bottom, or a beam connecting the left and right legs of your desk.
4. Prepare the wood

After cutting your wood, use sandpaper to remove dirt, grime, imperfections, and rough spots. For larger imperfections, use a hand planer. Remember, the wood you’ll be using should be sturdy and free from defects as you need your desk to be stable and safe.
5. Assemble the desk/tabletop
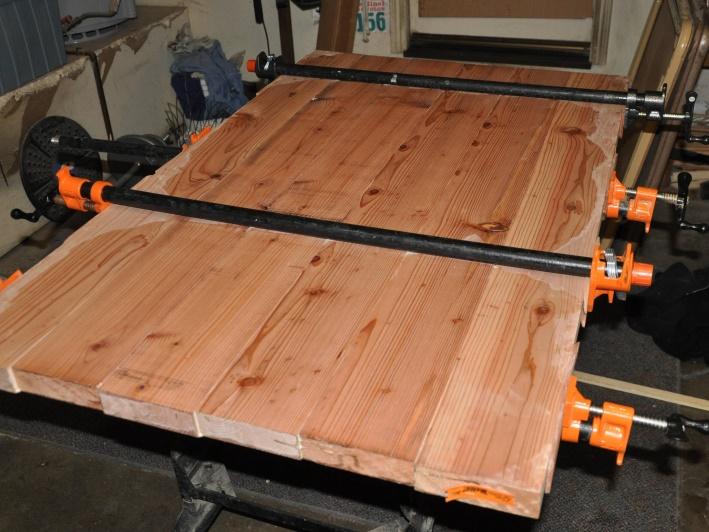
Assemble the wooden beams for the tabletop on a flat surface. Apply wood glue to connect the pieces and form the table or desk top. Use three or four large clamps to hold the pieces. Wait at least four hours for the wood glue to dry.
Use a nail gun to fasten the beams. Drive the nail in a diagonal manner to connect the two pieces of wood. Do this repeatedly on all the wooden pieces across the length of the desk top.
6. Assemble the legs
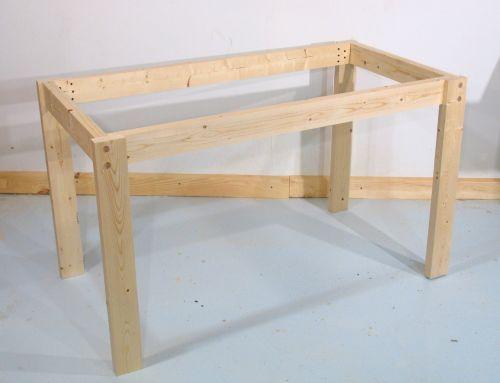
The right set of legs are assembled separately from the left. Cut two pieces of 2×4 wood with a length similar to the width of your desk. These pieces will become support braces from either side.
Assemble the left and right pieces (bracing, and two legs for each side) and start attaching these at the bottom of the desk top using wood screws.
7. Stain or paint the desk
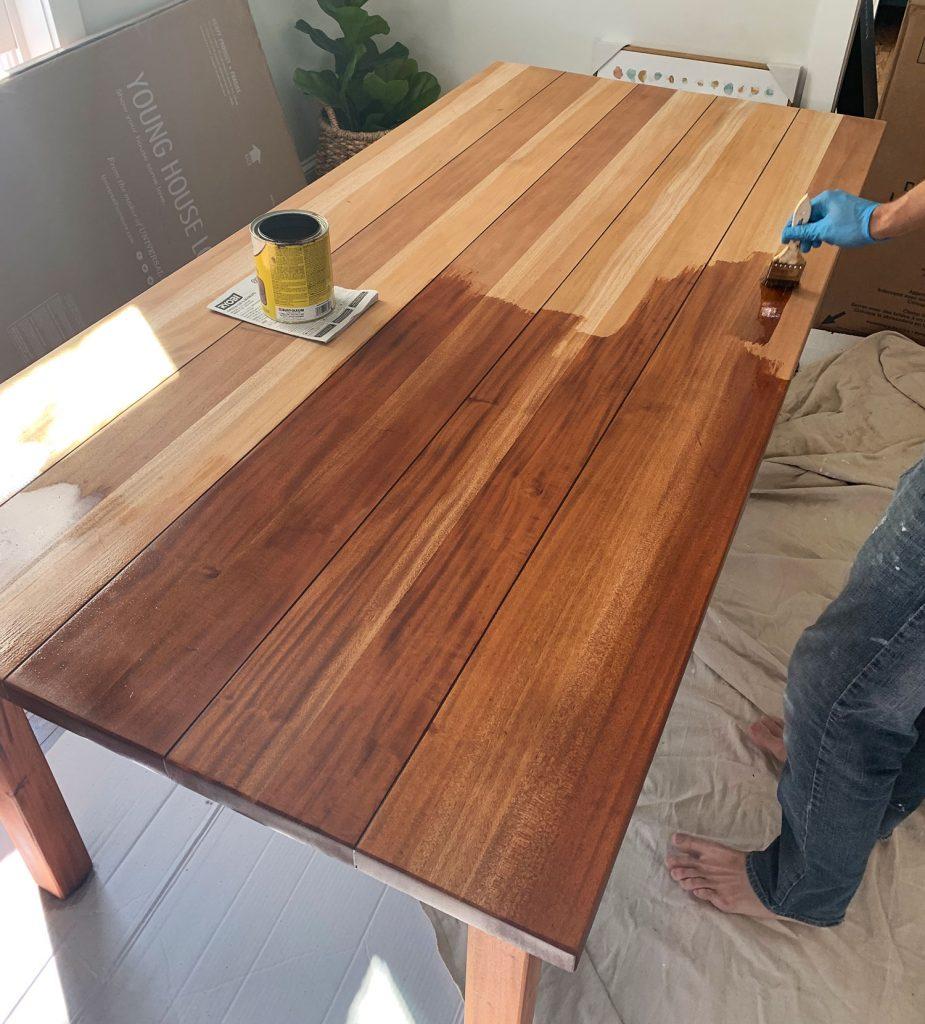
Your desk is ready and now, you may apply the wood stain you selected. To use wood stain, apply layer by layer. Let one layer dry before applying another until you get the right color you want.
To apply paint, sand the surface and the legs. Apply the base coat evenly and let your desk dry overnight. The next day, apply the second coat. You may also add a protective coat on top which is a transparent kind of material that will protect the surface from scratches and marks.
Now that you know how to build a desk, you may now start constructing other furniture pieces like a basic chair, working table, bookshelves, and many more using simple techniques. Have fun creating your own DIY furniture.

Leave a Reply