Instead of buying an expensive table in the store, why don’t you build one? It might surprise you, but constructing your table is quick, easy, and fun. You will get a quality table, plus you spend less. It is why more people are finding farm tables the most effortless DIY to build.
Farm tables look clean, simple, and fresh. That makes it the perfect choice when making your table. Some farm tables have simple designs which are easy to build. You can use whichever of the possible timbers in your lumber workshop. When you learn how to build a farm table, here is all you need to know.
What do you need?
This set of materials are best for a table that has measurements of 10 by 2. If you need a tinier or a larger farm table, feel free to make changes. It is better to sketch the size you want. This table is a simple truss beam table that is the perfect addition to your kitchen or outside patio.
- Wood
Choose the wood that works well with you if you want your farm table not to be too heavy. You can easily rearrange it anywhere if it is not too heavy. Then, choose the best wood that will compliment this preference. Go into your local lumber shop and buy wood with 2 x 4, 4 x 4, and 2 x 10 measurements.
These are the supplies you will need:
- Forty pieces of 6-inch Screws
- Twenty pieces of 4 and a half inches Screws
- One box of 2 and a half inches Screws
- Sandpaper
Here are the several power tools you need:
- A Power Drill
- 12 Inches Miter Saw
- Orbital Sander
- Pocket Hole Jig
- Clamps
- Pencil
- Tape measure
Add to the list the different safety equipment such as safety glasses, gloves, and hearing protection.
How to Build a Farm Table
Once you have all the materials, supplies, and tools you need, you can now start building your farm table.
1. Build your tabletop
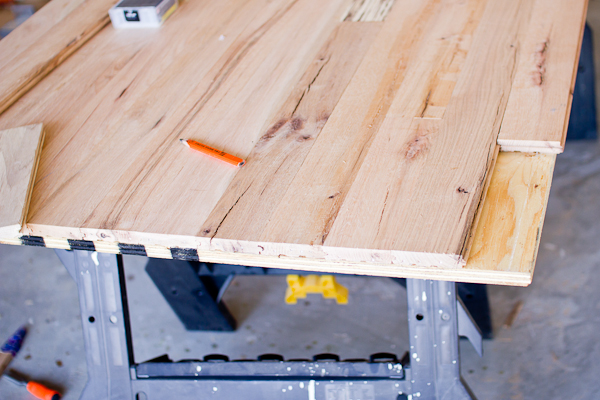
You will use the 2 x 10 wood measurements. Of course, this will depend on the size table you want. For this tutorial, we will use 2 x 10 for the tabletop. There will be five pieces for the primary length part and two for each end.
Using the miter saw, cut all 2 x 10 into 1.75 meters. Your 2 x 10 wood is equivalent to 9 and one-fourth inches. Thus, with all five pieces and the two ends, the overall dimension of your tabletop is 1.17 meters and 2.22 meters. Once you have all wood ready, lay them down on the floor and see how they look together.
2. Drilling Your Pocket Holes
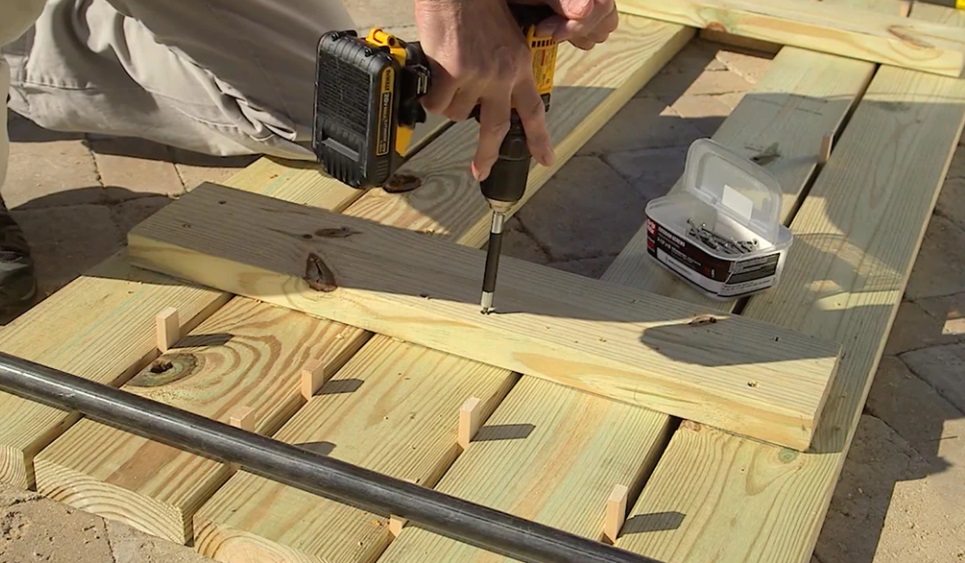
With the wood on the floor, mark the spots where you want to drill your pocket holes. You can put them a maximum of ten inches apart. You will use your 2 1/2 inches screw to attach the different boards. It will help connect the board securely without any added weight.
Next, drill two main holds on the ends of every board to connect the mainboard to its breadboard later. Once all wooden boards are attached, you will get a table board that is 87 and a half inches long with 46 and one-fourth inches wide.
3. Work on your Table Base
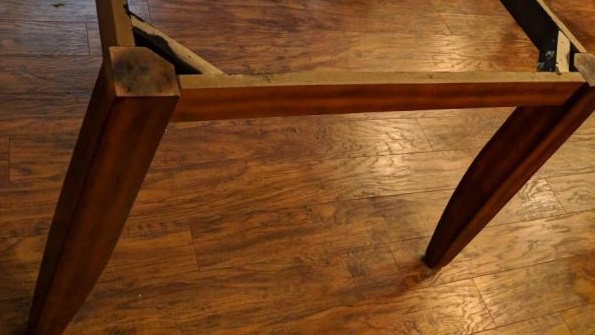
Using your 4 x 4 wood and the 6 inches screws, attach and build the two ends. First, cut two vertical wooden boards at a 10-degree angle. They should be parallel to each other. Then, cut 2 x 4 horizontal wood at another 10-degree angle to hold both vertical boards together.
Attach both horizontal and vertical boards, creating a set of bases for both sides. Screw the two parallel pieces using the 2 1/2 inches screws. You may need a clamp to connect all woods, especially if you don’t have extra help.
4. Attaching Table Base to the Table Top.
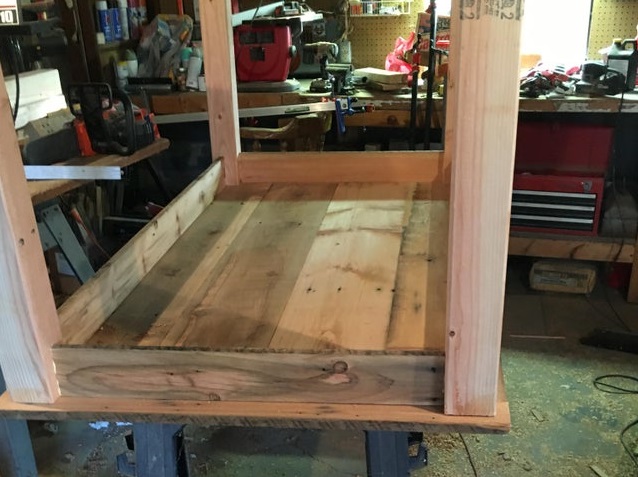
To attach your table base to your tabletop, use another two 4 x 4 wood beams. One is attached to the first horizontal board and the other on the lower one. Use your 4 1/2 screws to secure them. Once done, you can now attach the tabletop using the 2 1/2 screws. Drill the screws at an angle. It will help connect the tabletop and the table base securely.
5. Sand your farm table.
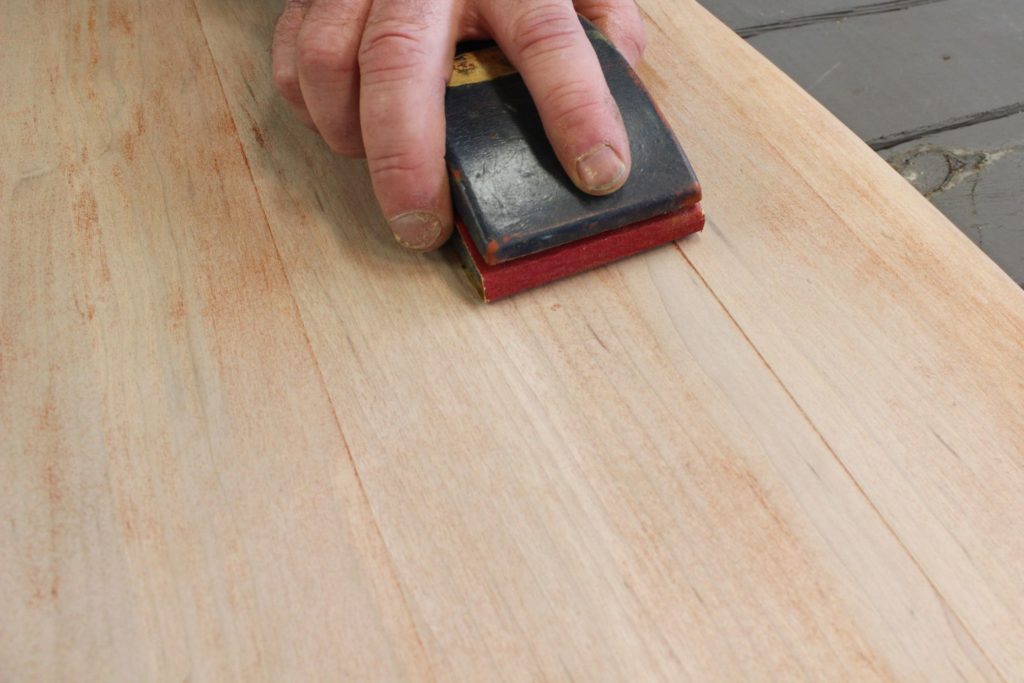
Start sanding your farm table from to bottom to create that smooth look. Make sure all edges get polished. Secure any screws tightly together and test the stability of your table. It should stand perfectly straight and not wobbly.
It is time to personalized your farm table. Many want to recreate that worn-out table look. However, if you desire to keep your table clean and fresh, do well with your sanding.
6. Create the perfect finish.
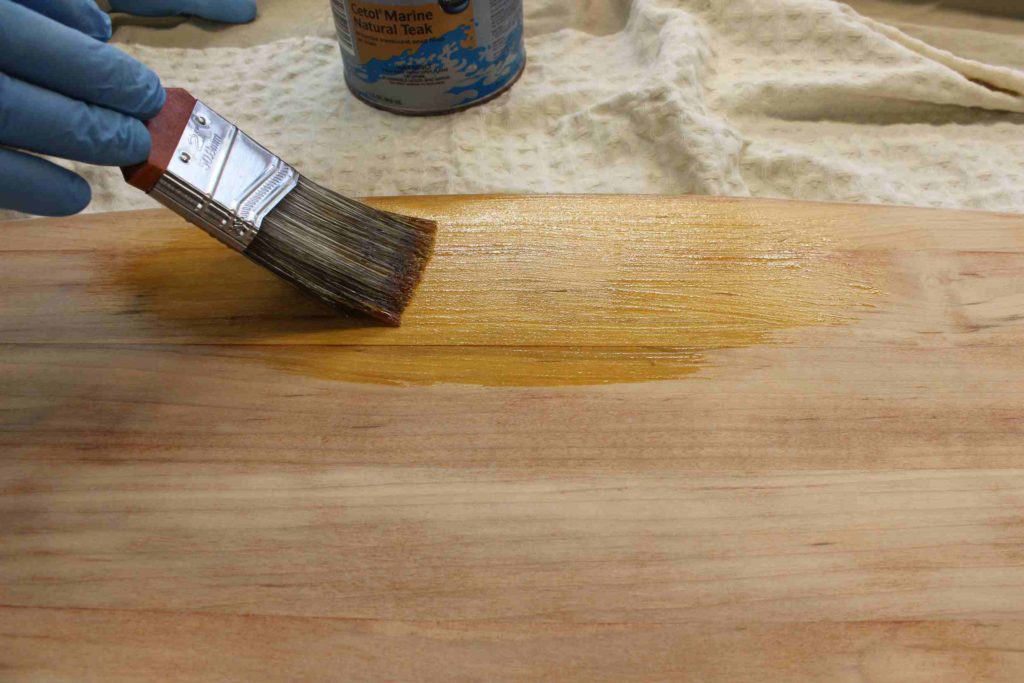
To have the perfect finish, you can coat your farm table with polyurethane. There are options available like clear gloss or satin, depending on the color you want. It will give the farm table a more refined look.
Then, let it dry overnight. Once dried, you can transfer it to the place you want to put it. This table is a bit heavy so ask for help when handling it. Now, you finished building your farm table.
Complete your farm table with a set of benches as well. Nothing completes a table other than the complimentary farm benches. You would have fine dining set for your parties and dinners.
Conclusion
The great point about this DIY farm table is you can make any alterations you want. Make modifications if the model is not your size preference. You can have freedom on how you want the farm table to look. So, whatever you change, you can make sure the table will turn out just fine.
Learning how to build a farm table gives you the chance to have long-lasting furniture at a low cost. You will know that this table will last for a long time. Plus, due to its simple design, you can easily decorate it when you want. Try this DIY farm table and get the tools working.
Leave a Reply