The process of electrocuting wood is something that is ignored by many, thinking that it is a complicated thing to do. The reality is that, when done appropriately, it can serve its purpose. Learning how to electrocute wood will make the process of wood burning easier. In this guide, we will highlight steps that will make the process relatively easy, even making you change your viewpoint of wood burning.
What You Need
- Wood
- Stand or bucket
- Power supply
- Jumper cables
- Fan
- Salt or baking soda
- Brushes
- Small water container
- Microwave transformer
Step-by-Step Instructions
Step 1 – Prepare Safety Measures

In this process of electrocuting wood, always remember that you are working with electricity. This means that you need to know the basics of what you are doing. Unlikely accidents can easily happen if you are working with something that you may not be familiar with. If you wish, you can always ask someone knowledgeable about current and electricity.
Step 2 – Locate a Power Source

The next step is to locate a power source. This is vital and will mark the start of the process of electrocuting wood. A good power source offers a high voltage supply. Some people find it useful to use an old transformer that is often found in microwaves. Select one transformer, though it is suggested to use two. This will allow you to see a better output. You may also want to use two transformers if you are planning to work on bigger wood pieces.
Step 3 – Choose the Right Wood

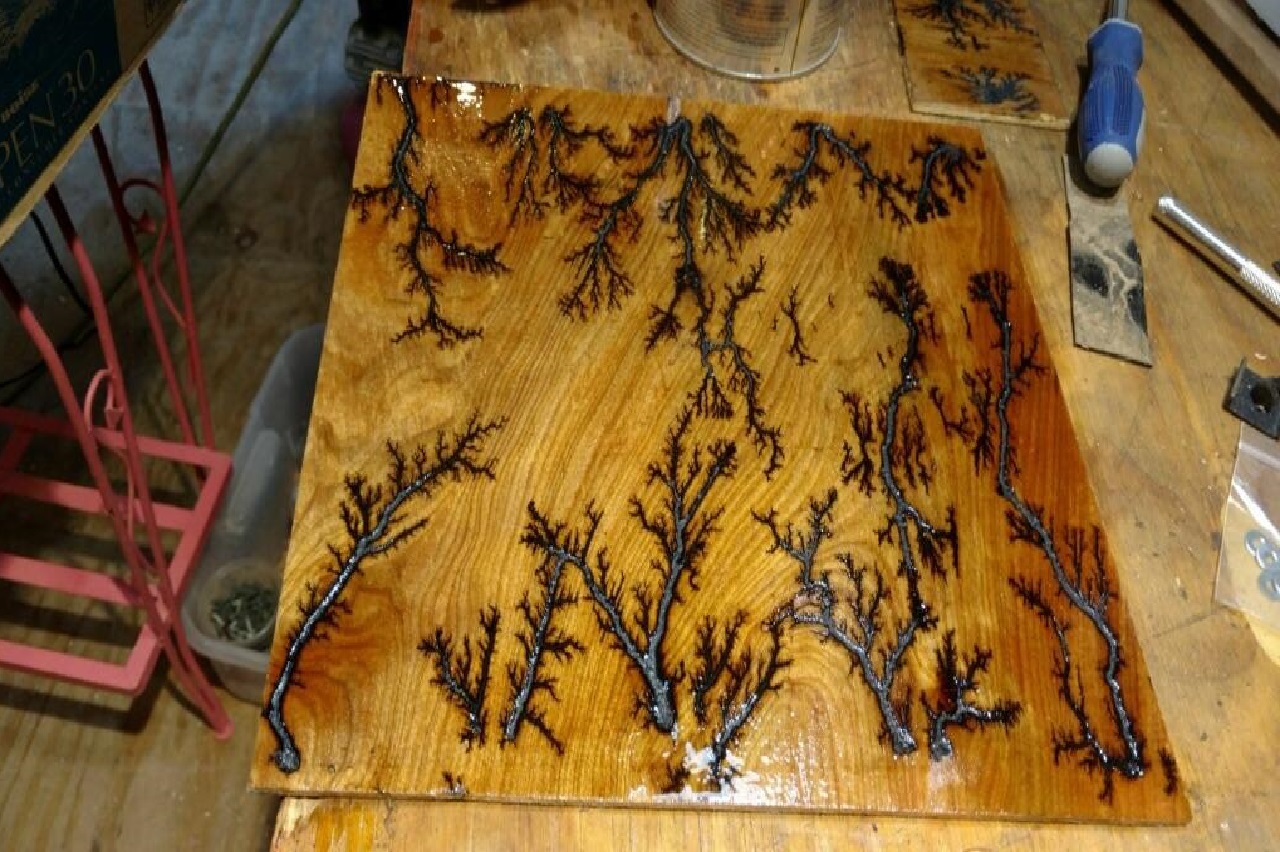
The reality is that you can use any type of wood available. If there are variations, then you will see different results concerning wood species, grain, and thickness. Even the resulting appearance may also vary. Some use underlayment or plywood, because of the veneer bottom that they offer, which is known to be capable of absorbing water effectively. Electricity runs along the grain, as this is a path that offers less resistance. Take this into consideration as you choose wood.
Step 4 – Increase Wood Conductivity

At this point, make sure that you can lower resistance, as this helps electricity to easily flow into the wood better. This can be done by applying a thin coat of water. Water may not be a reliable conductor, which is why you can also add either salt or baking soda with it. Some prefer baking soda because it does not have chlorine, unlike salt.
Combine one cup of water and one tablespoon of baking soda. After creating the mixture, apply it to the wood. Makes sure that your piece is well soaked in it. Note that the results may vary, depending on the used water.
Step 5 – Connect Everything

After applying the mixture to the wood, connect everything. Connect the positive and negative leads into the transformer, on every wood end. Observe how the leads are being attached. This will allow you to ensure better electricity flow along the grain. Also, connect a fan to the electricity that you have created, as this will help you to know if the circuit is live.
After completing the setup, start it up. Plug the transformers, and observe as electricity starts burning the wood. This will make a lighting pattern. While you need to identify when to turn it off, you may want to plug it off once both patterns from every lead meet.
Step 6 – Clean Up and Finish

Once the wood is already burned, the next thing that you need to do is to clean up. This part of the process will make your wooden piece look even better. All you need to do is to brush the charred material, or the location where the burning happens. A garden hose with a brush can be used to accomplish this.
Note that it is important to have consistent water flow for this as this will help avoid scoots from possibly grounding on the wood. You can use a thin coat of polyurethane particularly if you are planning to seal it. This process helps in making your output look shinier, even lasting longer. From this point onward, you can then explore other things that you can do with your electrocuted wood.
Conclusion
Going through the process of wood burning with the use of electricity is often considered art. Learning how to electrocute wood will not just let you complete the process, but will also allow you to experiment on different types of wood, getting different results each time. If you plan to do this on your own, make sure that safety should always be given priority, given that it will involve the use of electricity.
Why not share your experience with us? Leave your thoughts in the comments section below. Feel free to share this article if you like!

Leave a Reply