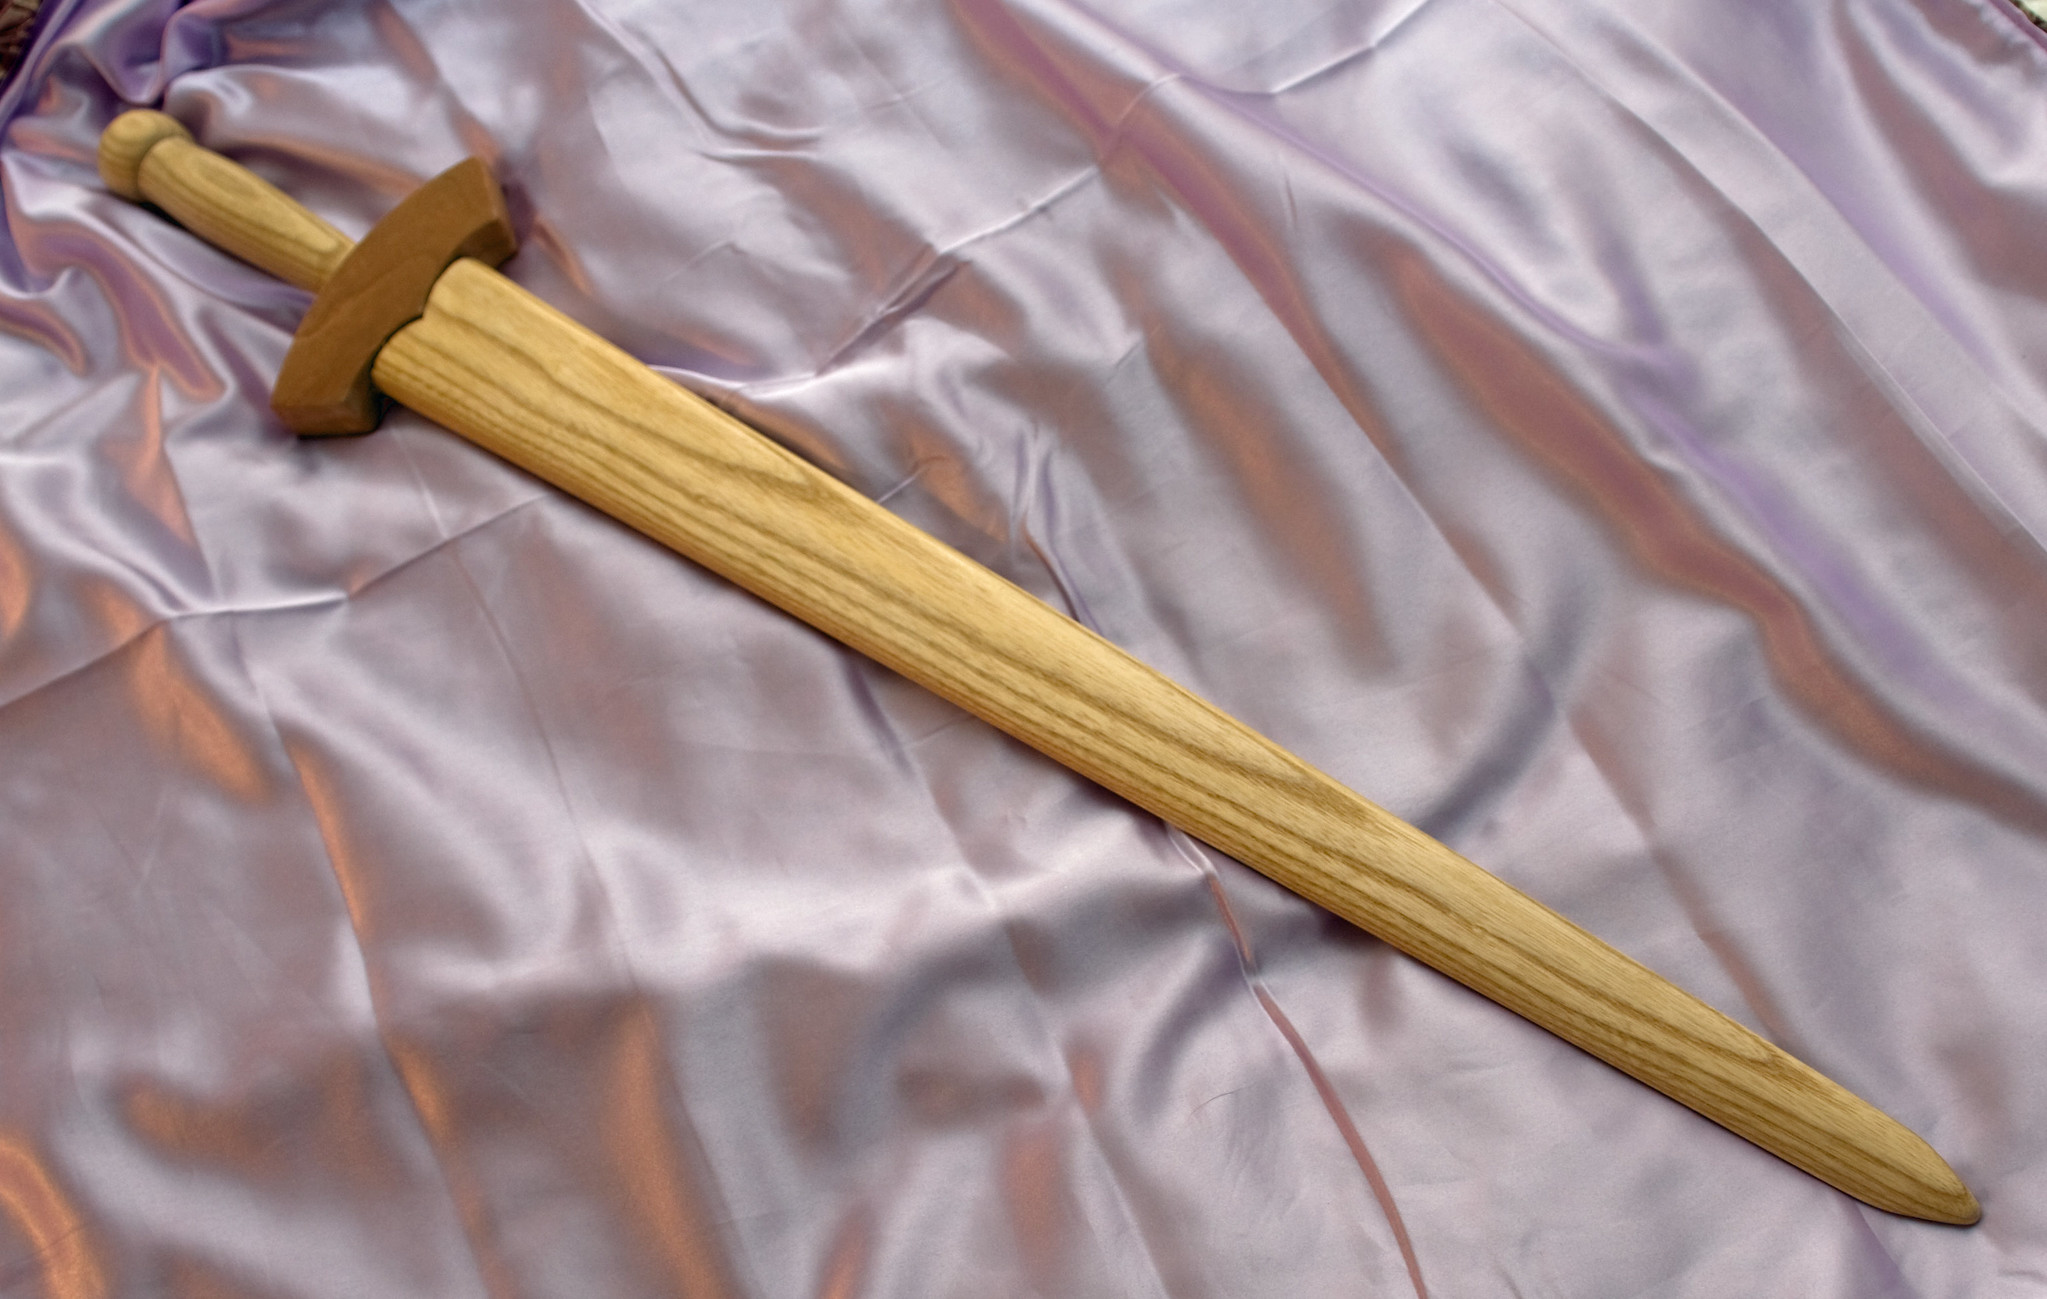
There is no need to buy expensive swords when you can make your wooden sword. Aside from cutting the price down, you can customize your sword into the lengths and designs you prefer. Most hand-made wooden swords are easy to use because they are not too heavy or lightweight. It makes a DIY wooden sword perfect for beginners.
How to make a wooden sword is doable and convenient. Plus, there is no need to use power tools. You can quickly build one wooden sword using a simple knife and sandpaper. However, you need to be careful when handling these materials as well. Now, here’s how you start making your wooden sword.
What Do You Need?
Here are some of the items you will need to get the DIY project going. This DIY tutorial will help you make a wooden sword using materials that are easy to get. Plus, you can conveniently find them in your home.
- Wood
The kind of wood will determine how heavy or light your sword will be. Additionally, the price will differ as well if you opt to choose a higher quality wood. But, using hardwood can likewise prolong your experience with the sword. Hardwoods won’t easily crack even under extreme pressure.
Most hardwood options include beechwood, oak, and maple. However, if you want to test your skill in making a wooden sword first, you can use plywood or spare wood from your other DIY project.
- Knife
You will need the knife to scrape and shape the sword. You have to be careful when handling this one. Use safety measures such as gloves to prevent any mishaps. Use a sharp knife to cut through the wood you are using.
- Sandpaper
You will need to make your sword as smooth as possible to avoid any wood splinter accidents. Sanding will likewise create a nice finish on the wood sword, making it more realistic and defined.
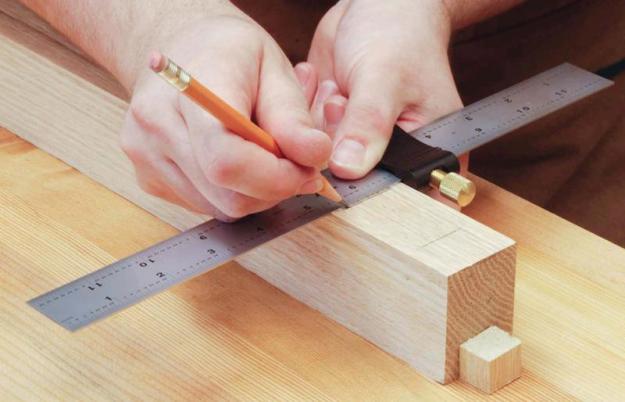
- Tape Measure and Pencil
Measure the lengths and widths of your sword using your pencil and tape measure. It will help you know if the block of wood you have is enough and fit for your desired sword measure.
- Handsaw
To help you cut the excess wood and get the right shape of your sword, you will need a powerful handsaw. It makes the task faster and more comfortable. Take proper caution when handling the hand saw.
How to Make a Wooden Sword
Once all the items are ready, follow these DIY tutorial steps to make a wooden sword. These are quick and fun to do. Make this project a great bonding time with your child or friends.
1. Decide on your preferred length

Before you start working on your wood, decide first the measurements you want for your sword. The lengths and size of your wood sword may depend on the design as well. You can draft it on paper and label the measurements. This way, it will be easier for you to replicate the same design on the wood.
2. Start working on the wood
After determining the sword measurements, use a longer wood than the planned measures you have. Getting a longer and wide wood will give you plenty of room when you make some errors when cutting and shaving.
Make sure the wood is resilient to any pressure by striking it against a concrete surface. Rotten and softwood usually crack easily. If it happens, use another block of wood you have.
Draw the design you have on the wood. Use a pencil or a pen. Drawing the approximate outline of the sword will help you cut it precisely. Draw the pointed tips as well. Angled it accurately, so you get the precise measurements.
3. Cut the wood into a sword
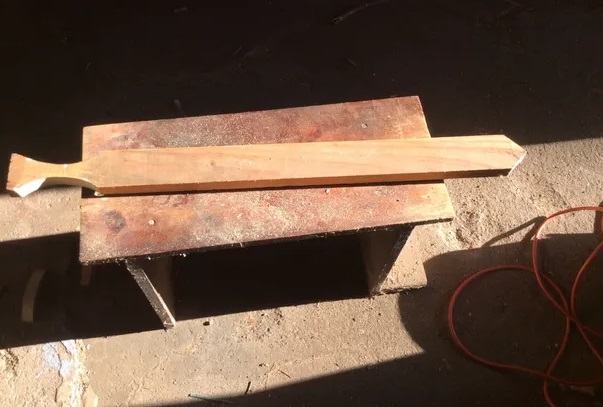
Once done with the drawing outline, you can now cut the wood into a sword shape. To let you do it quickly and nicely, use the handsaw. Cut on the contour of the wooden sword as close as possible. But don’t worry too much about the excess edges. You can scrape the edges later with the knife.
4. Scrape and Shape the Sword
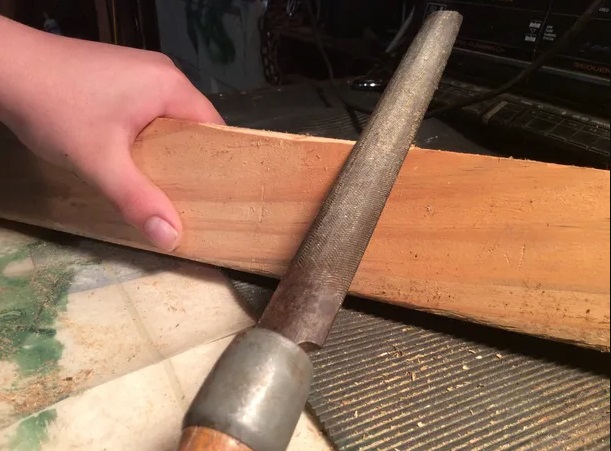
Take the sword and scrape away any excess wood. Use your sharp woodworking knife or any sharp knife, and cut the edges as you slowly create the blade of your sword. If you plan on a one-side blade, you can have a sharp edge and a thick edge on the other.
The double-sided sword will have both sharp edges and a thick center. Be careful when handling the knife. You can likewise shave the wood on the handle. Usually, the handle is thinner compared to the blade.
Continue to scrape and shape the sword. Feel its weight and see if it is still too heavy for you. You can shave more edges and adjust the thickness, especially on the blade. See to it that your handle can carry the weight of your sword blade.
5. Sand the Sword
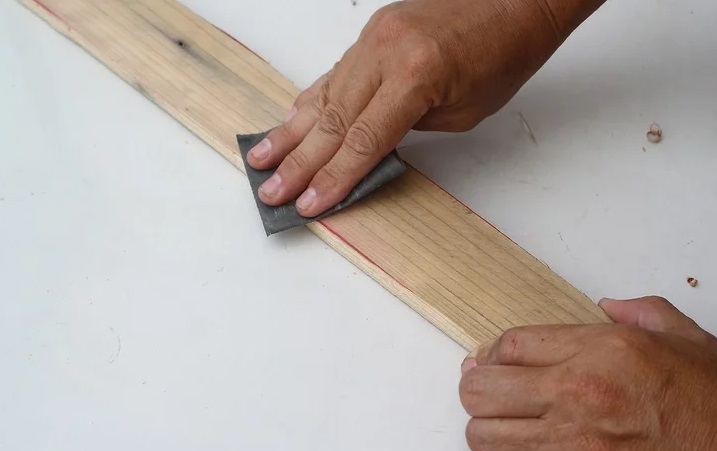
Now that you have your desired shape and size, it is time to sand your sword. Take your sandpaper, use the medium grit, and sand away the rough edges of your wooden sword. This process could take a lot of time, so allow yourself to enjoy and focus on sanding the different surfaces.
Sanding the sword well will help it look polished and clean. If you have a power tool sander, you can use it to make the process quicker and more defined.
6. Add details and designs
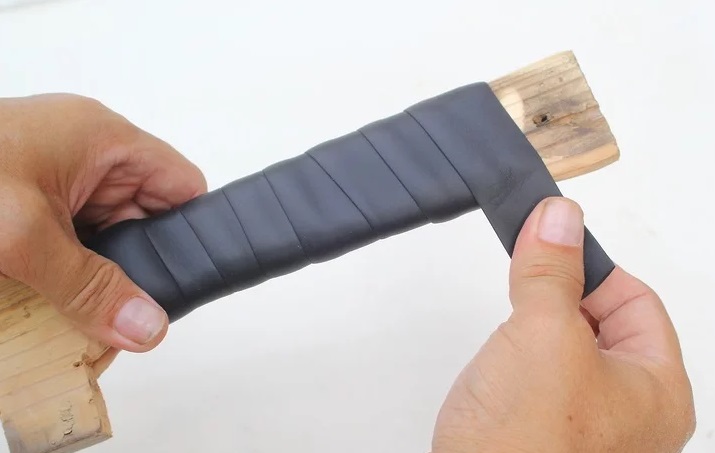
Lastly, you can add the details you want for your sword. Either you paint it or cover it with a wood finish. To get a solid grip on the handle, you can cover it with electrical tape. So, even when you sweat while using your sword, it won’t slip out of your hand. A duct tape works well too.
You can draw designs if you’re feeling artistic and creative. You can even add patterns on the blade if you want. Aside from paint, markers will likewise be suitable for drawing some designs. Let your sword dry. After a while, your sword is now ready for practice.
Conclusion
With those six easy steps, you have the formula for how to make a wooden sword. Not only it is easy, but it won’t take much of your time too. A few hours are enough to polish your wooden sword. Then, on the next day, you can start practicing.
You don’t have to spend hundreds of dollars for any sword sold in stores. You can get yours at a low-cost price. Plus, you get to choose your design as well. Consider this as a sign to begin working and designing your DIY wooden sword.
Leave a Reply