You’ve got a great vinyl design and a beautiful piece of wood, but you’re not sure how to bring them together. Don’t worry, this guide’s got you covered!
You’ll learn how to make vinyl stick to wood, troubleshoot common issues, and get tips for stunning results.
Let’s turn your DIY project into a masterpiece. Get ready to roll up your sleeves and let your creativity flow!
Key Takeaways
- Wood types suitable for vinyl adherence include oak, maple, and birch.
- High-quality, adhesive-backed vinyl is essential for successful adherence.
- Smoothness and durability are important factors when choosing wood for vinyl application.
- Adhesive selection and surface preparation are crucial for successful vinyl application.
Understanding the Basics of Vinyl and Wood
You’ve got to grasp the two fundamental elements of our discussion: the properties of vinyl and wood.
Not all wood types are suitable for vinyl adherence. Some are too rough, others too smooth. Hardwoods like oak, maple, and birch are your best bet, offering a balance of smoothness and durability.
On the hand, vinyl durability factors heavily into the success of your project. It’s a tough, plastic material that resists moisture, but it can be fickle when it comes to sticking to other surfaces. High-quality, adhesive-backed vinyl is a must-have.
Necessary Tools and Materials
You’ll need at least five essential tools and materials for this project: high-quality, adhesive-backed vinyl, a suitable piece of wood, a vinyl cutter, transfer tape, and a burnishing tool.
When it comes to Wood Type Selection, the smoother the surface, the better. Pine or birch is excellent for beginners.
For the Adhesive Choices, make sure the vinyl’s adhesive-backing is strong enough to hold onto the wood’s texture.
Use your vinyl cutter to create your design, and then apply the transfer tape over it.
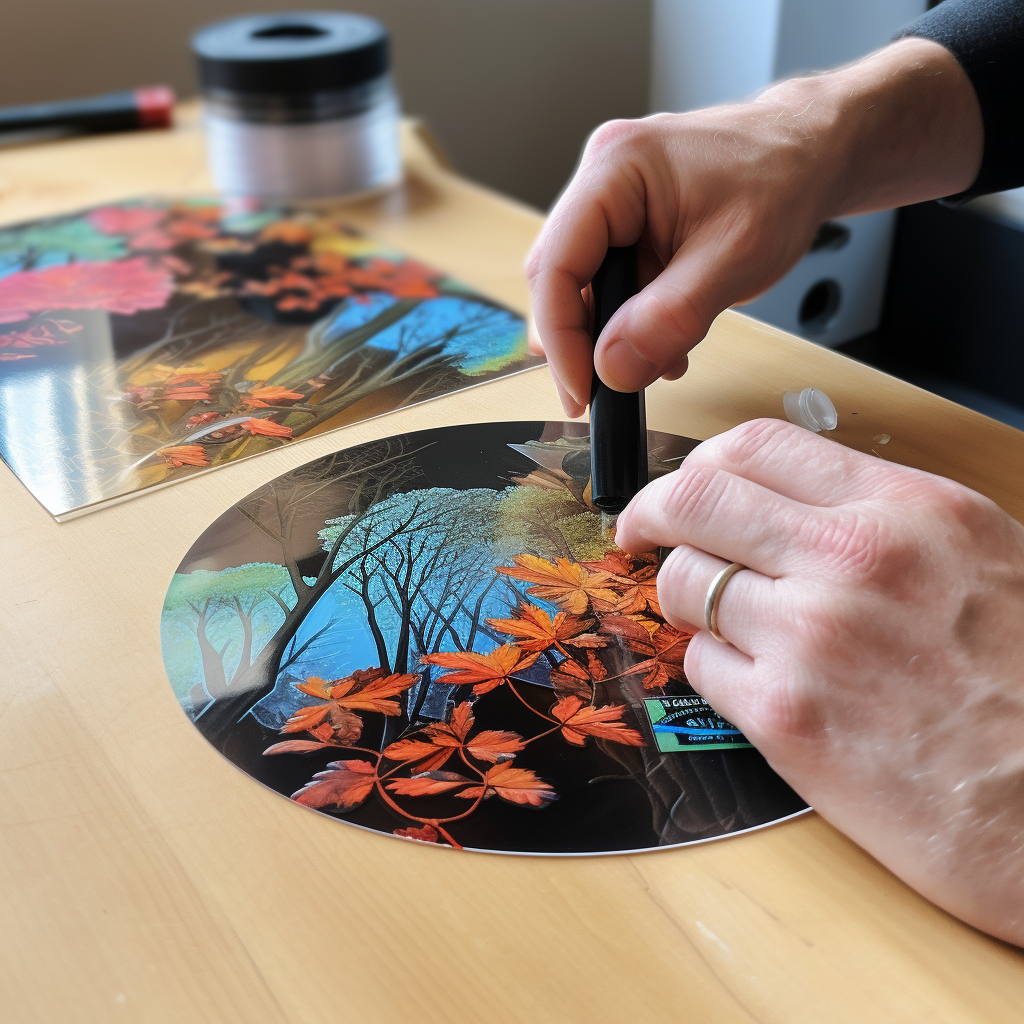
The burnishing tool helps ensure the vinyl adheres properly, eradicating any air bubbles.
Step-by-Step Guide: Applying Vinyl to Wood
Now that we’ve gathered all the necessary tools and materials, let’s dive into the step-by-step guide to applying vinyl to wood, ensuring you’ve a good grasp of each process and a successful result at the end.
Foremost, the Surface Preparation Techniques are crucial. You’ll start by cleaning the wood, removing any dirt or dust. A clean surface promotes better adhesion. Sanding it smooth is next; rough areas can cause bubbles under your vinyl.
Once prepped, it’s time for Choosing Right Vinyl. Opt for adhesive vinyl that sticks well to wood. Carefully cut your design and peel off the backing. Position it onto the wood, smoothing it out to ensure it sticks properly. Burnishing it with a tool secures the bond.
Congrats! You’ve just mastered the art of making vinyl stick to wood.
Troubleshooting Common Issues
In spite of following the steps meticulously, you might still run into some issues with sticking vinyl to wood. The two crucial aspects are Adhesive Selection and Surface Preparation. Most issues can be traced back to these.
| Issue | Potential Cause | Solution |
|---|---|---|
| Peeling | Wrong adhesive | Choose a stronger adhesive |
| Bubbles | Surface not smooth | Sand the wood |
| Won’t stick | Surface not clean | Wipe with a damp cloth |
It’s not just about slapping on the vinyl. You’ve got to select the right adhesive – one that’s strong and compatible with both materials. The surface needs to be as smooth as a baby’s bottom and as clean as a whistle. If you pay attention to these details, you’ll have a better shot at making it work.
Tips and Tricks for Optimal Results
Even though you’ve got the basics down, there are a few extra tips and tricks that can really take your vinyl projects to the next level.
Adhesive Selection and Surface Preparation are crucial steps in the process.
Here are three key tips for optimal results:
- Always clean the wood thoroughly before applying the vinyl. Dirt, dust, or oils can prevent the vinyl from sticking properly.
- When it comes to Adhesive Selection, opt for a high-quality adhesive. It’s worth the investment for a long-lasting result.
- After application, use a squeegee or a flat object to firmly press the vinyl onto the surface. This enhances adhesion.

Leave a Reply