You’ve got that old fence or deck that’s seen better days, haven’t you?
Perhaps, you’re considering pressure treating the wood yourself, but you’re unsure of how to go about it.
Don’t worry! This guide’s got you covered.
You’ll learn the basics, what tools you’ll need, and a step-by-step process to pressure treat wood.
Plus, we’ve thrown in some expert tips and maintenance advice.
Let’s breathe new life into that wood, shall we?
Key Takeaways
- Softwoods like pine, fir, and spruce are effective in absorbing treatment chemicals.
- Preservatives such as Alkaline Copper Quaternary (ACQ) and Copper Azole (CA) are used to resist decay, fungi, and pests.
- Safety guidelines should always be followed when handling treatment chemicals.
- The pressure treating process involves soaking the wood to ensure effective treatment.
Understanding the Basics of How to Pressure Treat Wood Yourself
Understanding the basics of pressure treating wood is a crucial step before you start any woodworking project.
Choosing the right wood is key. Wood selection importance can’t be overstated. Softwoods like pine, fir, and spruce are typically best because they absorb treatment chemicals effectively.
Speaking of treatment chemicals, understanding them is essential too. It’s not just about soaking the wood.
You’re infusing it with preservatives that help resist decay, fungi, and pests. Common chemicals used include Alkaline Copper Quaternary (ACQ) and Copper Azole (CA). Always follow safety guidelines when handling these chemicals.
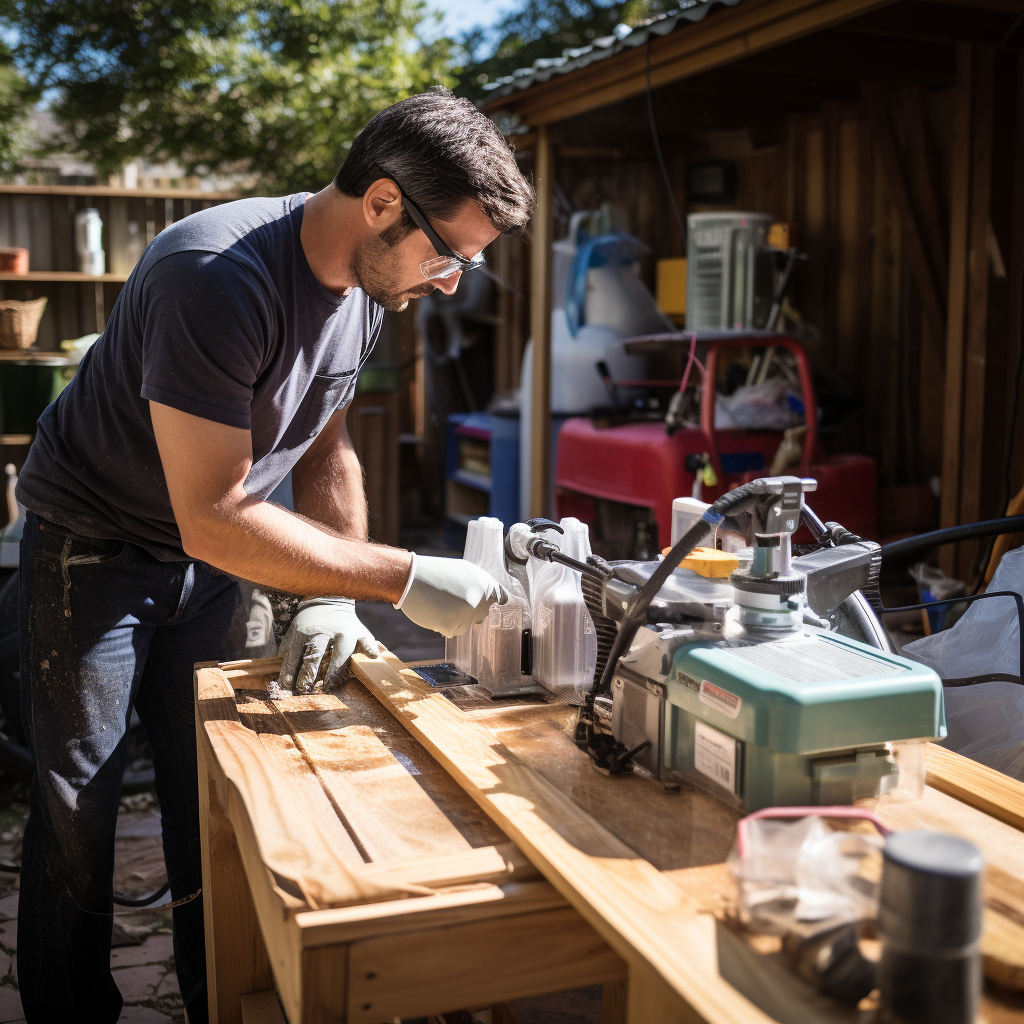
Necessary Tools and Safety Equipment for Pressure Treating Wood
In your toolbox, you’ll need a pressure-treating tank and personal protective equipment, but don’t forget your safety glasses and gloves for handling chemicals. Equipment selection is crucial, and safety measures can’t be compromised.
To visualize the process, imagine these steps:
- Position the wood in the pressure-treating tank.
- Carefully pour the chemical solution, ensuring it’s evenly distributed.
- Secure the tank and ramp up the pressure.
- Once complete, remove your wood safely, using your gloves and glasses.
It’s not just about getting the job done; it’s about doing it safely and efficiently. So, gear up, follow the steps, and you’ll be pressure treating wood like a pro in no time.
Step-by-Step Guide to Pressure Treating Wood
Let’s move on to the step-by-step guide for pressure treating wood, and remember, it’s crucial to follow each step carefully to ensure the best outcome.
First, acquire a pressure treatment tank. Be aware of DIY challenges, such as the cost and availability of this equipment.
Next, prepare your wood; it should be clean and dry.
Now, place your wood in the tank and seal it. Apply the chemical preservative, ensuring it’s uniformly distributed.
Monitor the pressure levels; too high or low can affect the treatment.
After, let the wood dry for 24-48 hours.
The cost analysis here involves weighing the expense of the treatment against potential longevity of the wood.
Tips and Tricks for Effective Wood Pressure Treatment
Before diving into the tips and tricks for effective wood pressure treatment, it’s important to understand that patience and precision are key for this process. When it comes to treating varieties, you’ll encounter DIY challenges that will test your mettle.
- Choose the Right Wood: Not all wood is created equal. Pines, cedars and hardwoods react differently to pressure treatment.
- Proper Equipment: You’ll need a pressure treating cylinder, pressure gauge, and chemical preservative.
- Safety First: Always wear protective gear. Chemicals used in pressure treating are toxic.
- Post-Treatment Care: Once treated, allow the wood to dry for a few days before using.
Maintaining and Caring for Pressure-Treated Wood
You’ll find that with regular maintenance and proper care, your pressure-treated wood can retain its durability and appearance for years.
It’s all about preventing wood rot and sealing treated wood effectively. Start by regularly checking for any signs of damage or decay. If you see any, act quickly to mitigate further damage.
Sealing treated wood is a crucial step. It not only enhances the wood’s appearance, but it also acts as a protective barrier against moisture, a primary cause of wood rot. Use a high-quality wood sealer for this task and reapply it every few years.
It’s also important to keep your wood clean. Dirt can trap moisture, leading to rot.
With these steps, you’ll extend the life of your pressure-treated wood.
Frequently Asked Questions
Q: What is pressure treated wood?
A: Pressure treated wood is lumber that has been infused with a wood preservative to protect it from rot, decay, and insect damage.
Q: Why is pressure treated wood necessary?
A: Pressure treated wood is necessary for certain applications, especially when the wood will be in direct contact with the ground or exposed to moisture. Untreated wood is more susceptible to rot, decay, and insect infestation.
Q: What is the purpose of pressure treating wood?
A: The purpose of pressure treating wood is to preserve the wood and increase its durability. It helps protect the wood from rot, decay, and insect damage, extending its lifespan.
Q: Can I pressure treat wood myself?
A: Yes, you can pressure treat wood yourself. There are DIY methods and wood preservatives available that allow you to treat your own lumber.
Q: What are the benefits of pressure treating wood yourself?
A: Treating your own wood allows you to have control over the process and the choice of wood preservative. It can save you money compared to purchasing pre-treated lumber.
Q: How can I protect my wood from rot and decay?
A: To protect your wood from rot and decay, you can use a wood preservative that is specifically designed for this purpose. Applying a coat of the preservative will help penetrate the wood and prevent rot and decay.
Q: What types of wood species are suitable for ground contact?
A: Some wood species, such as cedar and cypress, are naturally resistant to rot and can be used for ground contact applications. However, it is still recommended to use pressure treated wood for maximum protection.
Q: Can I use any type of wood for ground contact?
A: While some wood species are naturally more resistant to rot, it is still best to use pressure treated wood for ground contact. Pressure treated wood has been specifically treated to resist rot, decay, and insect damage in ground contact situations.
Q: What is the best way to treat untreated wood for ground contact?
A: The best way to treat untreated wood for ground contact is to use pressure treated wood or a wood preservative that is specifically designed for ground contact applications. These products will help protect the wood from rot, decay, and insect damage.
Q: Can I prevent my wood from rotting in the ground?
A: While it is not possible to completely prevent wood from rotting in the ground, using pressure treated wood or applying a wood preservative can significantly slow down the rotting process and prolong the lifespan of the wood.

Leave a Reply