Challenging tasks such as cutting firewood is no longer an almost impossible ordeal, thanks to the creation of the chainsaw. Still, every helpful invention comes with some challenges and setbacks. This means that regardless of your chosen brand for a chainsaw, there will be times when you need to deal with troubles in its various parts, including the carburetor, choke, battery, power-line, and others.
One of the most common tasks that need to be done on a chainsaw is putting a chain on it. In this article, we will learn how to put a chain on a chainsaw, the right and safest way possible.
What You Need
- 13mm pipe wrench
- Screwdriver
- Safety gloves
Step-by-Step Instructions
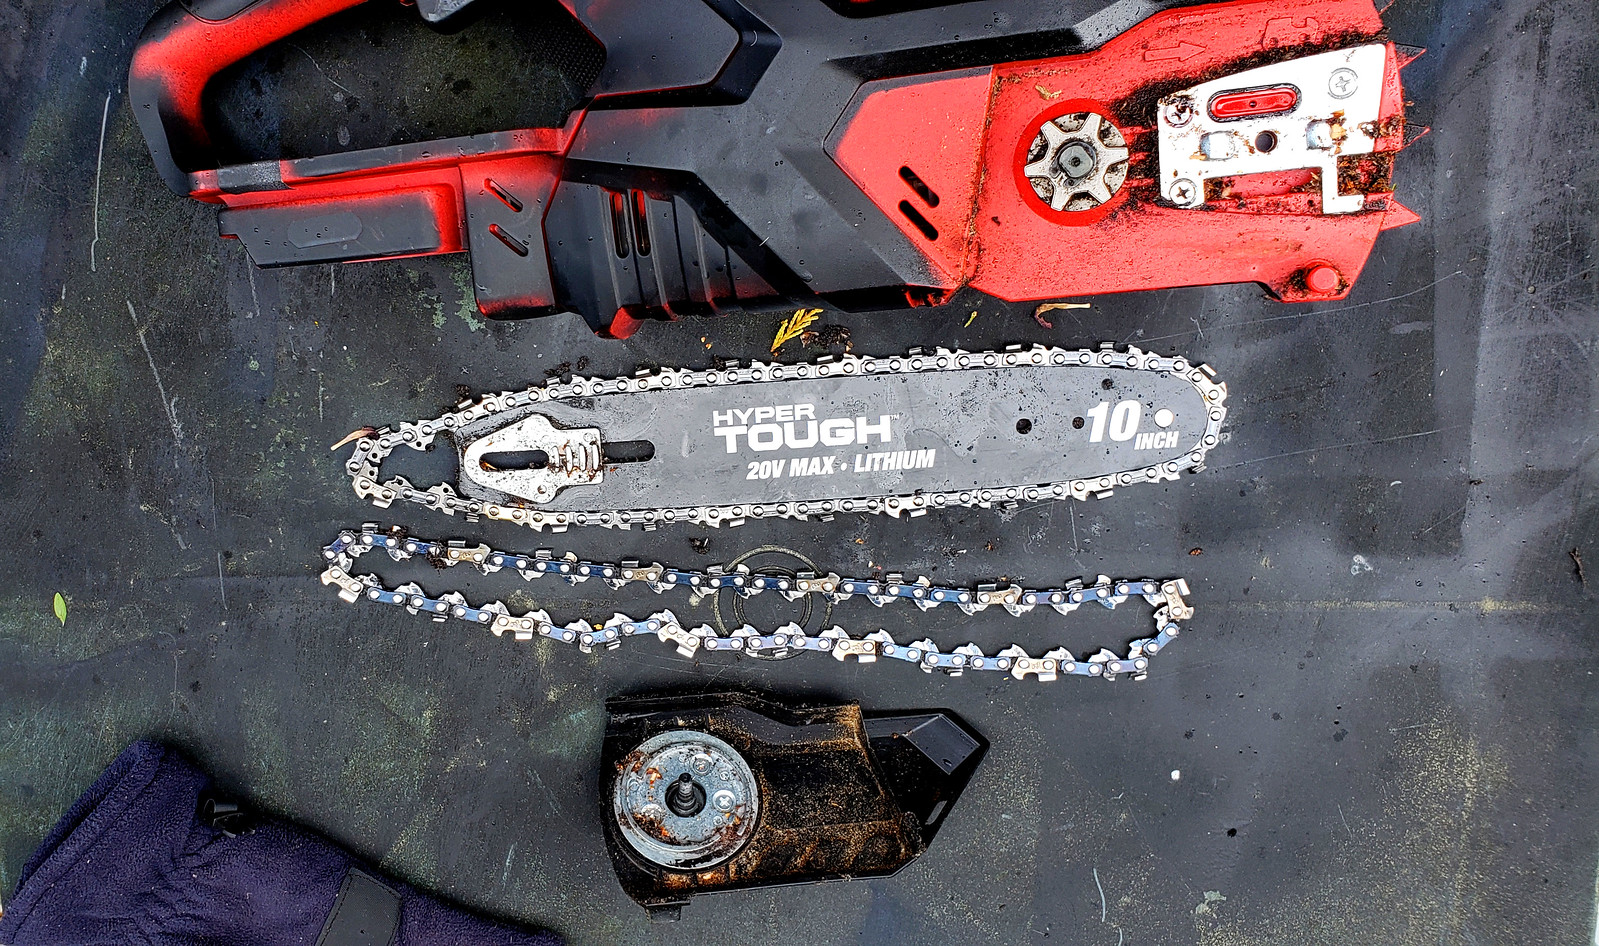
Step 1 – Remove the Chainsaw Sprocket Cover

- Detach the spark plug connector on the thermal chainsaw.
- Use a 13mm pipe wrench to loosen the two bolts holding the housing, including the chain guide bar.
- Simply set the housing aside along with the two clamping bolts.
Step 2 – Detach the Chainsaw Chain Tensioner

At this point, you have access to the chainsaw’s chain tensioner.
- Unscrew the chainsaw chain tensioner using a screwdriver. Make sure that it moves back.
- Unscrew the chain spool cover in a clockwise direction by loosening the wing nut.
- Turn the wheel of the chain tensioner. This is situated at the bar level, towards the end.
- Make sure to wear safety gloves all the time, avoiding the risk of possible hand injuries.
- Place the chain on the guide rail.
Step 3 – Detach the Old Chain

- Loosen the old chain from the guide bar using a flat screwdriver.
- Detach the assembly composing of the guide bar and chain from the motor pulley.
Step 4 – Attach the New Chainsaw Chain

- Remove the new chain from its case along with its guide. Make sure to check on the direction of the chain rotation.
- Find the symbol that contains the arrow on the guide.
- The cutting teeth should be facing up, and into the front part of the guide.
- Double-check to see that the chain is inserted properly in the guide rail bar.
- The chain that is mounted on the guide can be held manually at ground level. This is to make sure that it is installed properly. If the chain is knocked out of place, dropping the guide, could mean that it was not inserted properly.
Step 5 – Place the Protective Cover Back

- Assemble the protective gear using one hand as you hold the chain and guide with the other. Make sure that it is replaced properly.
- Manually tighten the two bolts first. Tighten it further using a 13mm wrench.
- Do not tighten too much because you might need to recalibrate the chain tension later on.
Step 6 – Adjust the Chain Tension

- With a flat screwdriver, locate the adjustment screw that is situated just below the two bolts which were recently installed.
- Turn the adjusting screw in a clockwise direction to tension the chain. Turn it counterclockwise to loosen the chain.
- If the chain is too loose, it may result in the guide derailing along with the rotation. On the other hand, if it is too tight, it may result in accelerated wear of the guide, even resulting to smoke if not greased.
- The chain needs to partially hang from the guide, giving at least 1 cm maximum deviation.
- When you finally achieve the right tension setting, tighten the crankcase bolts well using a wrench.
Step 7 – Start-up the Chainsaw

- Operated by the motor pulley, the chain will begin to heat up, causing the guide to expand, thus creating more tension.
- Check your oil to ensure effective lubrication. The oil tank can be found near the fuel tank.
- Make sure to place the protective case on the guide if you are not using the chainsaw. Doing so is to make sure that you will not have to deal with damages or cuts to your device depending on its storage.
- If you place the chain wrong on the chainsaw, don’t worry nothing bad will happen since the sawing power is not there. However, the chain could unnecessarily wear out, even getting damaged if the above steps are not followed properly.
Conclusion
Learning how to put a chain on a chainsaw is one of the basic things that you can learn. With this, there is no need to keep on calling an expert to do the task for you. This could mean saving a good amount of time and money, plus gaining experience and skills as well. This process may be challenging to learn at first, but when you finally get the hang of it, you can finish it in no time. Share with us your stories in the comments section! Feel free to share this article if you think it is helpful.

Leave a Reply