You might think that it is difficult to sharpen a hand saw blade. However, if you take the time to learn the steps of properly sharpening the tool, you can say that it isn’t that hard. But how to sharpen a hand saw blade? Well, you are about to learn new things in this article.
Even if your hand saw has the sharpest blade, it will eventually become dull due to repeating uses. Sharpening the hand saw blade will make sure that you will get excellent cuts. It will also prevent your wood from being eaten up. It is fair to say that a sharpened blade can save you more time during cutting.
What you will need to follow this Tutorial?
There are some things you need to prepare to follow this tutorial:
- Tools and Supplies
You are about to perform the steps in sharpening a hand saw blade. But before you do the steps, you should first prepare some tools and supplies to make sure your execution would come smooth.
Get ready with a clamping device. You will also need a flat-file. You should also prepare an angle gauge. You don’t have to spend a lot of money on these supplies. They are available at affordable prices so you don’t have to worry about overspending.
Step-by-Step Instructions
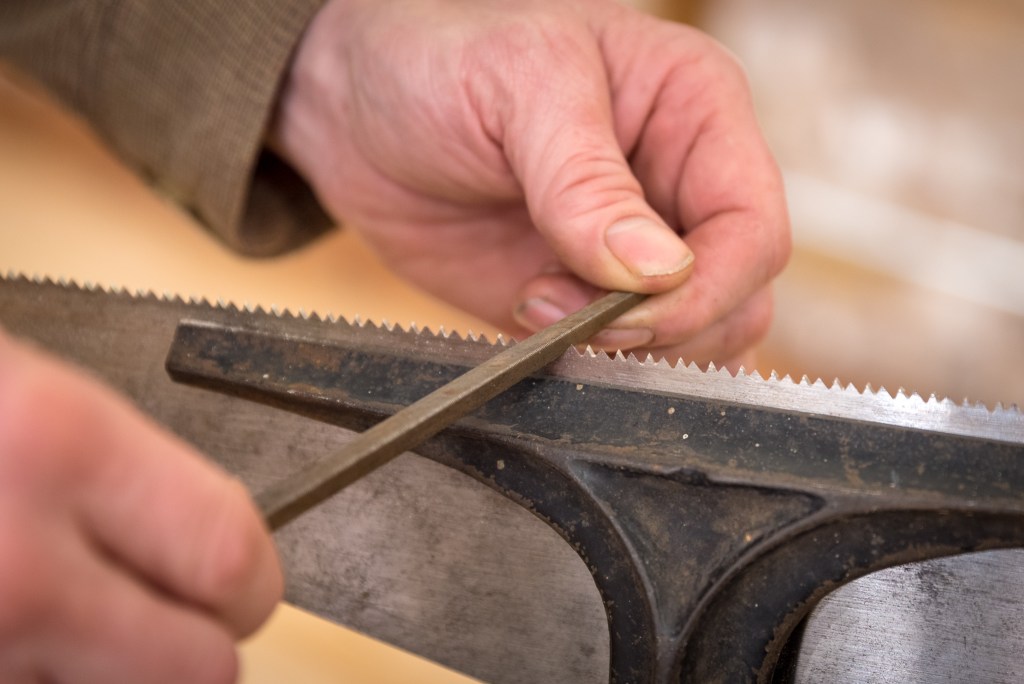
1. Secure the Hand Saw Blade

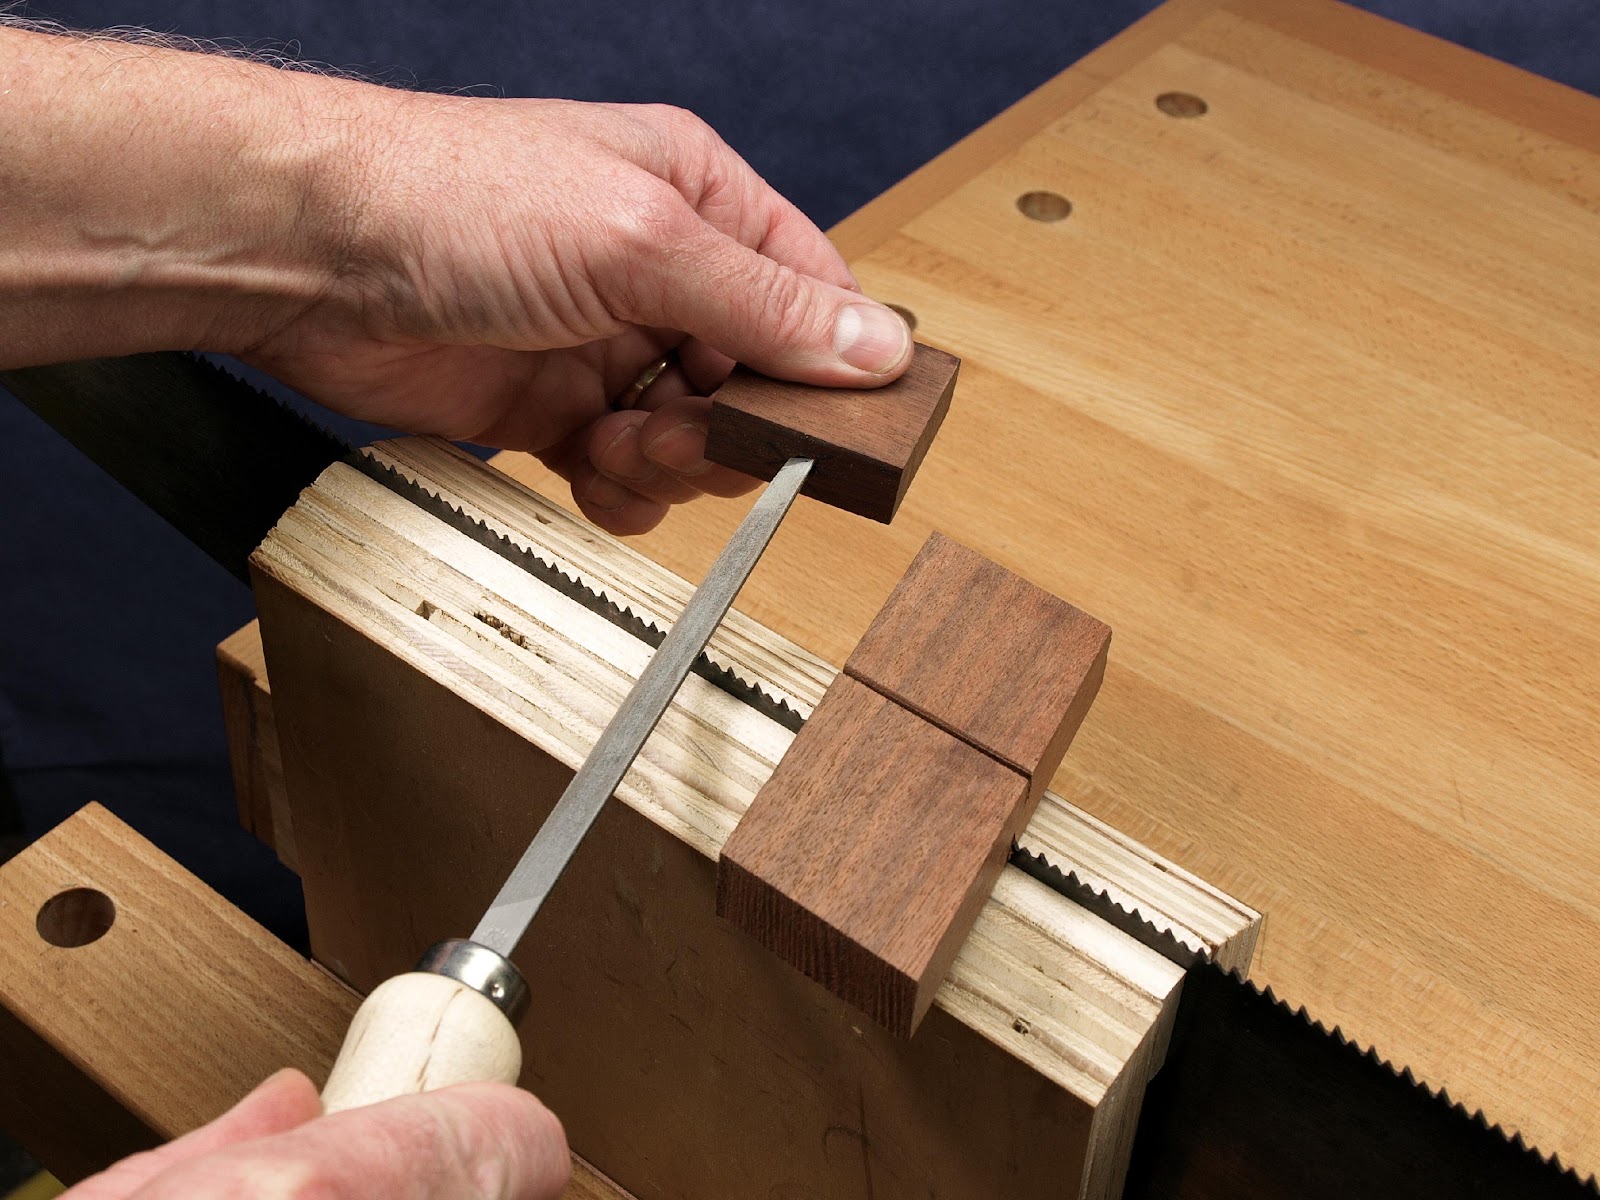
Start by clamping the hand saw blade in a clamping device. Another option of securing the blade is to fasten the sheet between blocks of wood. Set the teeth in a horizontal line. Ideally, you should keep the space between the clamping device and the teeth tight. Doing so will restrain the occurrence of vibration when filing.
Whatever the case is, you should always keep the teeth pointing upwards. Also, the teeth must not stick out excessively from your clamping device.
2. See the Tooth Height

You should then check the height of the hand saw blade’s teeth. It should be clear to you that everything is identical. In case, you notice some irregularity, you should then proceed by adjusting their height. This is known as saw teeth filling.
To do saw teeth filling, you will file the flat file you prepared earlier on top of the tips of the teeth until such time that there will be little but discernible surface forming on them. You will see that the teeth will have the same height.
3. Level the Tooth

By checking the angle and size of the teeth, you should choose a suitable file. Make sure that the teeth do not go beyond half of the file once it is positioned between the gullet which refers to the teeth gaps. This will not make the file easily burn out from the interior edge and allow it to extend its lifespan.
If you have cross-cut saws, use a cross-cut file or 3 square files for cross-cut teeth. Moreover, use a tapered file if you have rip-cut teeth.
4. File Cross Cut Teeth

After choosing the appropriate file for the cross-cut hand saw, your goal is to get a sharp saw after sharpening. To do that, you must put a bit of fleam to the file while you are sharpening. Do not forget to inspect the angle gauge to ensure you are not putting excessive fleam.
5. File the Rip Teeth
You should do the same filing movement when filing rip cut saw. When filing, incorporate a little rake into the filing movement. Just the same, you must get an angle gauge to see if you are adding enough rake. Furthermore, take time to notice the teeth. Check how much movement is needed for the two cases.
6. File the Teeth and Inspect Sharpness

Once you are done with the previous steps, you should then begin filing away. You must always in using 2 to 3 strokes for each tooth. If you are using a cross-cut hand saw, you will have to alternatively file the teeth. Then shift sides, and begin from the part you missed, and begin alternatively filing the teeth.
On the other hand, you may file the teeth and sharpen them individually if you have a rip cut. Do not forget to shift sides once one side is done. If you have a cross-cut, you will have to shift sides twice or more considering the teeth’ geometry.
After sharpening the hand saw, you should then inspect its sharpness through a test cut. If you get a quick and smooth cut, then you can say that you have properly sharpened the hand saw.
Conclusion
Learning how to sharpen a hand saw is necessary if you want to be efficient with your woodworking projects. Now, you know the basic information about carrying out the task. By following the detailed steps above, you can easily sharpen your hand saw. Regardless of your experience, whether it is your first time sharpening a hand saw or you have been doing it several times already, you will find it useful to check and follow this tutorial.

Leave a Reply