A speed square is a very common measuring tool that helps carpenters and woodworkers make perfect measurements. If you want to become a pro, you need to learn how to use a speed square. Let’s start with a short background on this amazing measuring tool followed by a list of its many awesome uses.
Short background on the speed square

The very first speed square was created in 1925 by Albert J. Swanson, the man behind Swanson Speed Squares. Swanson used the measuring device as a layout tool and up until today, his factory in Frankfort, Illinois still makes Swanson Speed Squares.
The speed square can be made from steel, aluminum, or HDPE, and other composites. There are 7, 8, 12, and 25-inch speed squares, each one has embedded gradations so you don’t have to make intricate angle calculations.
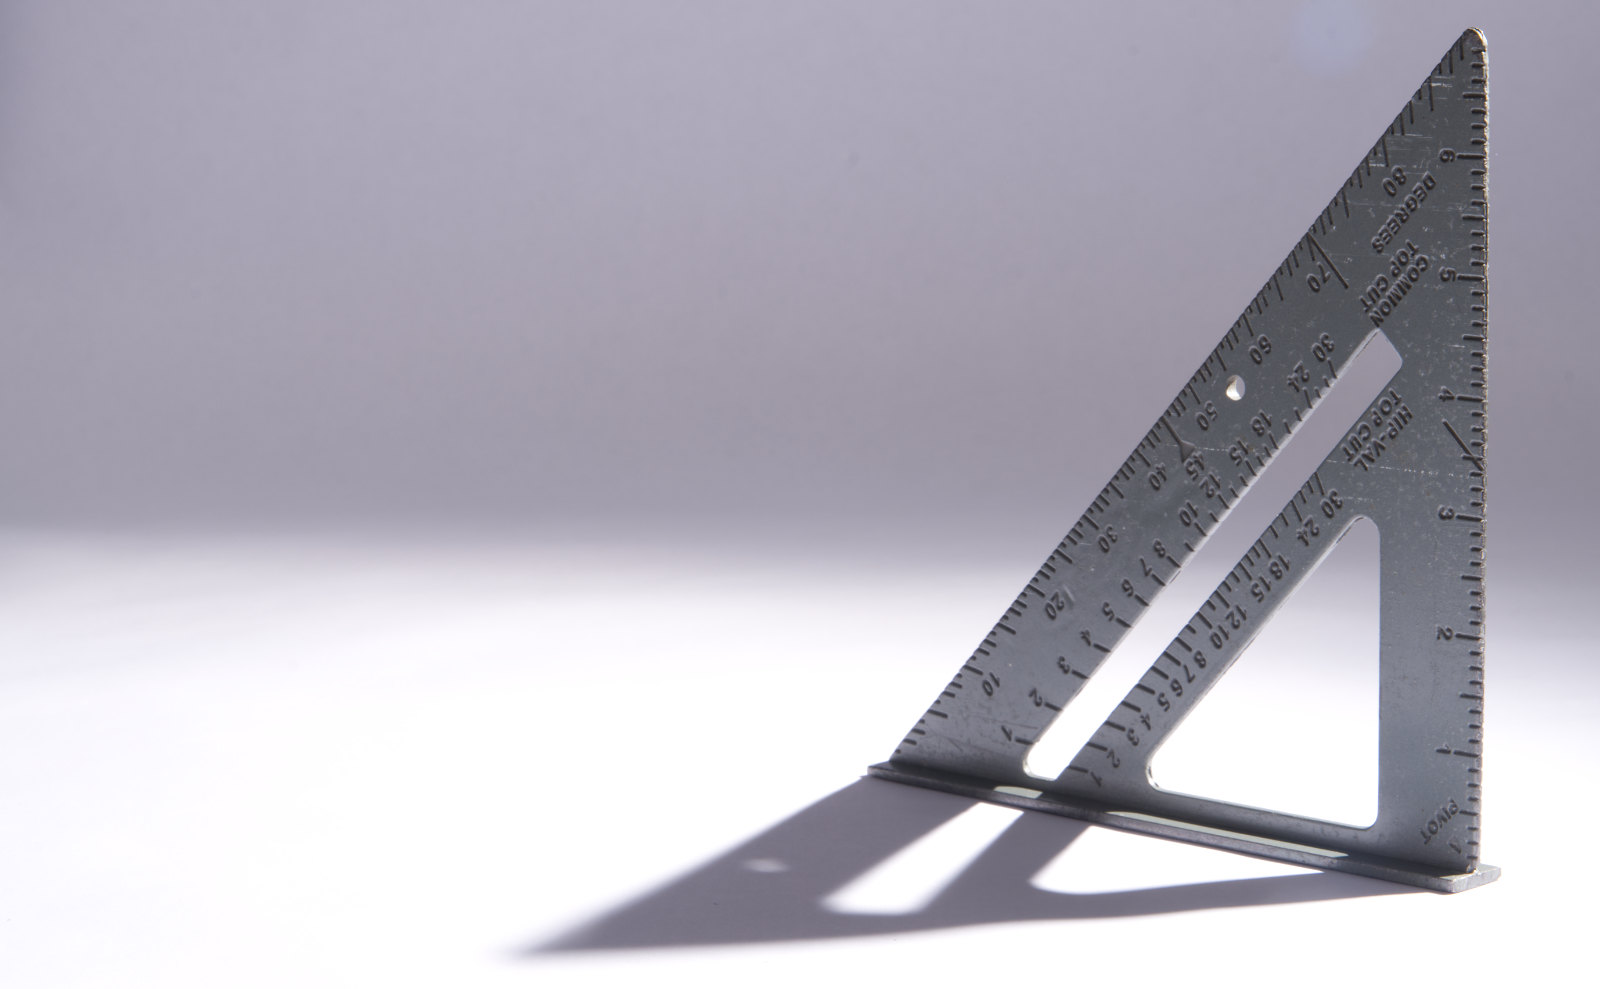
The speed square is an isosceles right triangle but with a ruler on the equal side and with a handy fence on its other side. You will find the word “Pivot” along with the right angle point. It has degrees on the triangle’s hypotenuse.
In some speed square models, divots are also included to mark your wooden piece. You can tell that you’re using a Swanson Tool Company speed square when there is a diamond-shaped pattern along the ruler area at its 3 ½ – inch mark.
Also, genuine Swanson speed squares come with a Speed Square Blue Book. This book contains conversions and will tell you everything about the tool. When you check the back, there are measurements for creating rafters and the length and width of structures.
How a speed square is used

The following are the most common uses of a speed square:
- Creating square lines
Probably the most common use of a speed square is making square lines. Just hold the tool against a long edge and draw your straight line. Because the fence is versatile, you can hold it from the top or from the bottom. Once the fence is secure, just glide the pen or pencil along the long side of the tool and you got your square line.
- Creating multiple lines
While you’re still holding the speed square to make square lines, look at the inner triangle opening. You will use the guide to make multiple lines. For more lines, just move the square to the left or right of the board. Making multiple lines or guide lines can help you place identical wall studs on wood.
- Creating scribe marks
Remain in the same position and check the scribe marks found inside the inner triangle. Use these marks to create straight lines along with the piece. With scribe marks, your marks and cuts will be even and flawless.
- Creating 45-degree angles
To create basic 45-degree angles, turn the speed square until the angled side lines up along your mark. Draw the line to draw your 45-degree angle.
- Creating more than 90-degree angles
If you wish to make any degree angle from a 180-degree plane, look for the word Pivot. Place the 90-degree point along your mark and pivot your speed square to your angle until it’s lined up along your workpiece.
To go higher than 90 degrees, like 105 degrees, subtract 105 with 90 to get 15 or 15 degrees. From the bottom, after 90 degrees to the 15 degrees mark is 105 degrees. Just subtract 90 degrees from the angle and the result will be the mark on the square.
- Speed squares + power tools
Power tools like a circular saw need a reliable guide to cut efficiently. A speed square can be an efficient and practical guide for cutting power tools, just ensure that the table saw blade is a square. To make sure, turn off the power to your saw first and remove the blade guard. Check if the blade of the saw is square to the saw bed. You must check any saw before you use them.
The square must be square; you can check by making a 90-degree line. Just flip the speed square around and see if the line is along the part where there are no gaps.
Power tools will work more accurately and more efficiently with a speed square. You may use a speed square rather than using a perfect line and using clamps to create a guide rail.
- Speed square for roofing and general construction
Anywhere there are angles to make, straight lines to cut, and any square lines to draw, you’ll find a speed square. Roofers, carpenters, interior designers, and engineers use this handy tool to make precise angles and cuts each time.
Tips to extend the life of your speed square

Using a speed square regularly will make the tool susceptible to dirt, grime, paint spills, and other problems. As much as you learn how to use this measuring tool, you must also be aware of how to care for it. Remember, a well-cared-for tool will give you many years of good use.
Probably the most important thing is to carry the speed square safely. Use a toolbox or a tool belt where you can fasten your speed square and other measuring devices. Right after use, wipe it with a soft cloth. Use water and soap to remove any pen, pencil, or crayon marks.
If you’re using a plastic speed square, wipe it with alcohol and handle it with care. Never drop or throw a speed square as it can crack and bend. When using a speed square with a power tool, observe tool safety and use protective gear. Don’t use a speed square other than its intended uses. And if your speed square is dented, cracked and with faded markings, replace them. These are no longer accurate.
Now that you know how to use a speed square, you are now more confident in measuring and constructing different projects. Practice your newfound skill and use the speed square in measuring different angles, cuts, and lines. You’re only a few steps closer to making intricate projects in no time.

Leave a Reply