When constructing a cedar fence, understanding the importance of selecting the right materials is essential for durability and aesthetics.
From the initial layout design to the finishing touches, each step plays a significant role in creating a sturdy and visually appealing boundary for your property.
By following a systematic approach and paying attention to detail in each phase of the construction process, you can guarantee a successful outcome for your cedar fence project.
Here are the expert tips and tricks that will elevate your fence-building skills to the next level, specifically focusing on how to build a cedar fence.
Key Takeaways
- Opt for Western Red Cedar for durability and beauty.
- Set fence posts deep in concrete for stability.
- Use a protective finish to enhance longevity.
- Consider decorative toppers for visual appeal.
Selecting Cedar Fencing Materials
When selecting cedar fencing materials, opt for Western Red Cedar for its exceptional durability and beauty.
For corner posts, it’s important to choose sturdy pieces of cedar that can withstand the structural demands of supporting the fence’s corners.
Western Red Cedar, known for its natural resistance to rot and decay, is an excellent choice for corner posts due to its durability.
These posts play a critical role in providing stability and strength to the entire fence structure.
When setting up the corner posts, make sure they’re firmly anchored into the ground to prevent any leaning or shifting over time.
By using high-quality Western Red Cedar for your corner posts, you can increase the longevity of your fence while maintaining an attractive appearance.
Planning Your Fence Layout
To properly plan your fence layout, start by determining the property lines and the desired fence height before proceeding with construction. Begin by locating the exact property lines to avoid any encroachment issues.
It’s advisable to build the fence slightly inside the property lines for important and necessary reasons.
Clear a work area at least 2 feet on each side of the intended fence line to provide ample space for installation and maneuvering during construction.
When marking the fence post positions, consider using marking paint instead of stakes to prevent trip hazards and ensure accurate placement. This method allows for easy visibility of the layout without the risk of stumbling over markers.
Additionally, before digging any postholes, it’s important to call the Digline utility’s locate number. This step helps prevent damage to underground utilities and guarantees a safe digging process.
Digging Fence Post Holes
When digging fence post holes for your cedar fence, focus on achieving the proper depth, at least 20 inches deep, to guarantee stability.
Make sure to follow hole spacing guidelines to accommodate the size of the cedar fence posts you’ll be using.
Consider using a gas-powered auger for efficiency, or stick to a manual post hole digger for a more traditional approach.
Proper Hole Depth
For the best stability and durability of your cedar fence, make sure that the post holes are dug to a depth of at least 20 inches.
Digging the post holes to the recommended depth is important for providing adequate support for your cedar fence.
A depth of 24 inches is even better, especially in areas prone to strong winds or heavy snow. Consider going deeper in loose or sandy soil to enhance stability.
Properly dug post holes prevent issues such as leaning or shifting of the fence over time, ensuring its integrity.
Remember, the depth of the post holes greatly impacts the overall strength and longevity of your cedar fence.
Hole Spacing Guidelines
After determining the proper hole depth for your cedar fence posts, consider the best spacing between posts to guarantee structural integrity and prevent sagging issues in the long run.
To avoid sagging in wood fences, maintain post spacing under 8 feet. Calculate the ideal post spacing by dividing the total fence length by the recommended spacing.
For instance, for a 58-foot fence, aim for posts to be approximately 7.25 feet apart to assure stability.
Use string or visual alignment to accurately place the posts. When digging the post holes, make sure they’re around 24 inches deep, set the posts in concrete, and make certain they’re level to enhance stability and longevity.
Setting Fence Posts in Concrete
To guarantee the structural integrity and longevity of your cedar fence, setting fence posts in concrete is a critical step that demands precision and attention to detail.
The ideal depth for setting cedar fence posts in concrete is at least 24 inches to ensure optimal stability.
Make sure the posts are aligned in a straight line to maintain the integrity and aesthetics of the fence structure.
Before the concrete sets, use a level to check and adjust the posts for straightness to prevent any future issues.
Concrete serves as a sturdy foundation for cedar fence posts, helping to prevent leaning or shifting over time.
It’s important to properly set fence posts in concrete, as it has a significant impact on the overall durability and longevity of your cedar fence.
Taking the time to make sure that the fence posts are securely embedded in concrete will pay off in the long run, providing a solid foundation for your beautiful cedar fence.
Securing Fence Rails in Place
Securing cedar fence rails in place requires using galvanized screws or nails for durability and weather resistance.
Before attaching the rails, it’s important to pre-drill holes to prevent the cedar wood from splitting. This step also guarantees a cleaner finish and reduces the risk of damage during installation.
When positioning the rails, remember to space them evenly along the length of the fence. This not only enhances the aesthetic appeal but also maintains the structural integrity of the fence.
As you attach each rail, check for levelness to guarantee a straight and well-aligned fence. Any deviations at this stage can affect the overall look and stability of the structure.
For added strength, especially in areas prone to high winds, consider applying exterior wood glue along the rail joints. This extra measure can significantly improve the stability and longevity of your cedar fence.
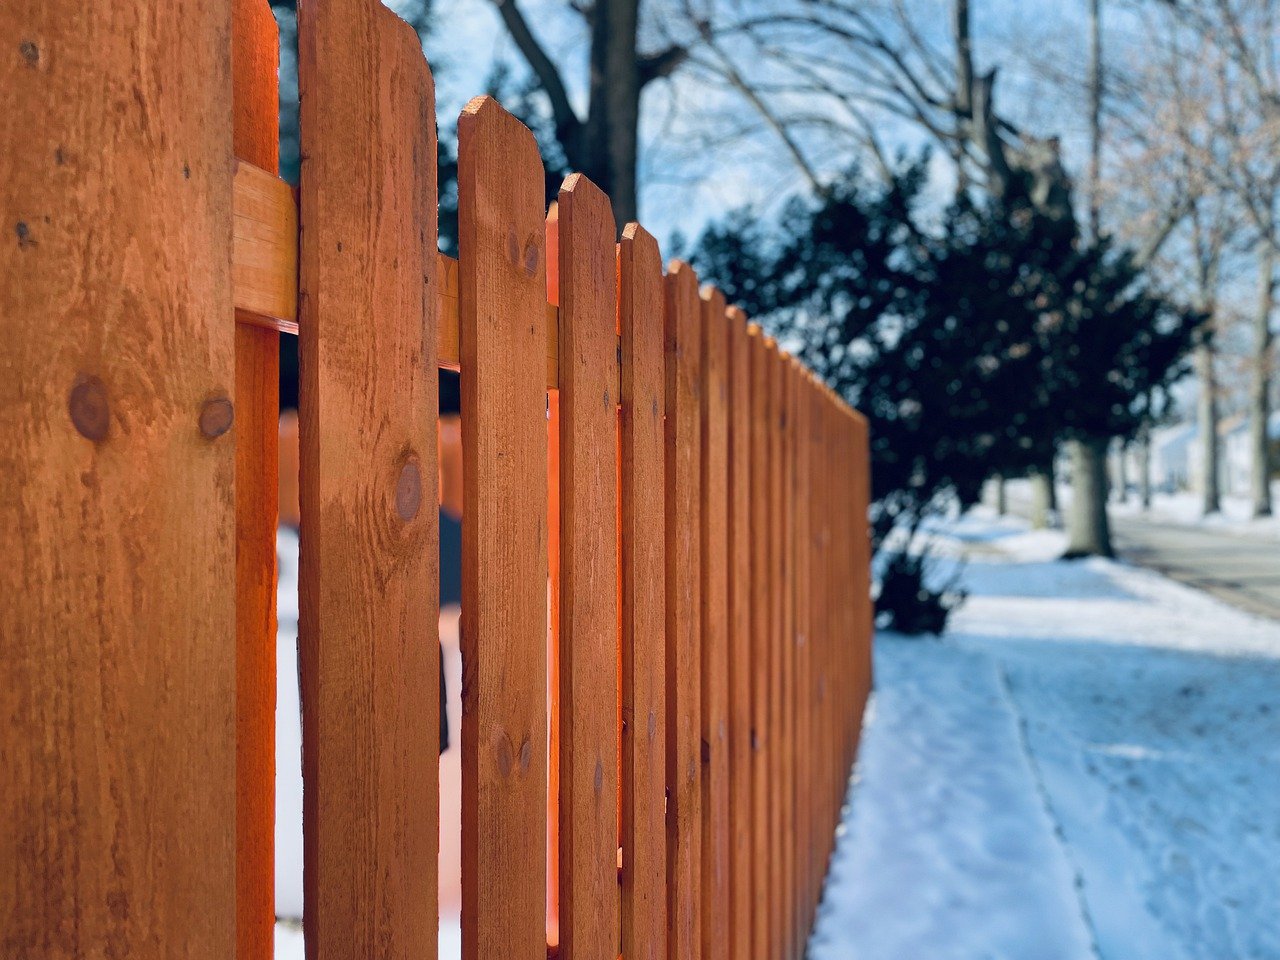
Attaching Cedar Pickets Vertically
Position each cedar picket vertically with precision between the top and bottom rails, ensuring a straight and aligned appearance with a level.
Secure the pickets firmly to the horizontal rails using screws or nails, leaving adequate space for air circulation and using spacers for consistent spacing.
These steps will help you achieve a sturdy cedar fence with uniform picket placement for both aesthetic appeal and functionality.
Picket Alignment Tips
For a flawless cedar fence appearance, make sure your cedar pickets are precisely aligned between the top and bottom rails, using a level for accuracy.
To achieve a professional look, maintain consistent spacing between the pickets. You can use a spacer tool to help make certain uniform gaps.
Begin by placing the first picket flush against the corner post, and then use the level to make certain it’s plumb before securing it.
As you attach each picket, check for alignment both vertically and with neighboring pickets. Secure the pickets to the rails using screws or nails, making certain they’re firmly in place.
Taking the time to align your pickets correctly will result in a visually appealing cedar fence.
Proper Picket Spacing
To ascertain proper picket spacing for your cedar fence, maintain a consistent gap of 1.5 to 2 inches between each vertically attached picket.
This spacing is important as it allows for adequate airflow and helps prevent moisture buildup within the fence structure, ultimately prolonging its lifespan.
When attaching the cedar pickets, using a spacer tool can assist in ensuring uniform spacing throughout the installation process.
Make sure that each picket is straight and aligned vertically between the top and bottom rails to achieve a polished look.
Securing Pickets Firmly
When attaching cedar pickets vertically to the horizontal rails, make sure they’re securely fastened using screws or nails for the best stability.
Position each cedar picket between the top and bottom rails, ensuring they’re straight and aligned correctly, by using a level.
To secure the cedar pickets firmly, leave adequate space between them to promote air circulation and prevent moisture buildup.
Consider employing a spacer tool to maintain consistent gaps between the cedar pickets for a polished and professional appearance.
Adding Decorative Fence Toppers
Consider incorporating decorative fence toppers to enhance the visual appeal and functionality of your cedar privacy fence. These additions not only add a unique aesthetic touch but also contribute to the security and privacy of your outdoor space.
Options for fence toppers include post caps, finials, lattice panels, or custom designs, allowing you to personalize the look of your fence.
Post caps, for example, not only provide a decorative finish but also protect the fence posts from weather elements, ultimately extending their lifespan.
Finials can add a touch of sophistication to the overall design. Lattice panels are a popular choice as they combine decorative elements with functionality by allowing light and air to pass through while still maintaining a sense of seclusion.
Applying Protective Finish to Cedar Fence
Enhance the durability and natural water resistance of your cedar fence by applying a protective finish. Utilizing a wood stain is an excellent way to treat the wood and increase the lifespan of your fence.
Stain oil or sealer can be used for this purpose, creating a barrier that helps repel water and protect the wood from environmental damage.
To make sure your cedar fence remains in top condition, it’s important to regularly inspect and maintain the finish.
Look out for any exposed end grain on the cedar fence, as these areas are particularly vulnerable to moisture and decay.
Touching up these spots will help maintain the fence’s durability over time.
Additionally, consider adding a weatherproof sealant to provide further protection against the elements.
By taking these steps and applying a protective finish with a wood stain, you can greatly extend the life of your cedar fence.

Leave a Reply