When starting on the task of installing a tongue and groove ceiling, think of it as a puzzle waiting to be solved.
The process may seem intricate at first, but with careful planning and attention to detail, you’ll soon unravel the steps to achieving a seamless and visually appealing ceiling.
From prepping the boards to adding finishing touches, each stage plays an important role in ensuring a successful outcome.
Learn the ins and outs of how to install a tongue and groove ceiling with our comprehensive guide.
Key Takeaways
- Prepare and finish boards for durability and visual appeal.
- Use proper installation techniques, like marking joist lines and securing attachments.
- Select suitable battens for support and stability.
- Finish with precision, addressing cutouts and joints for a seamless finish.
Prep Tongue and Groove Boards
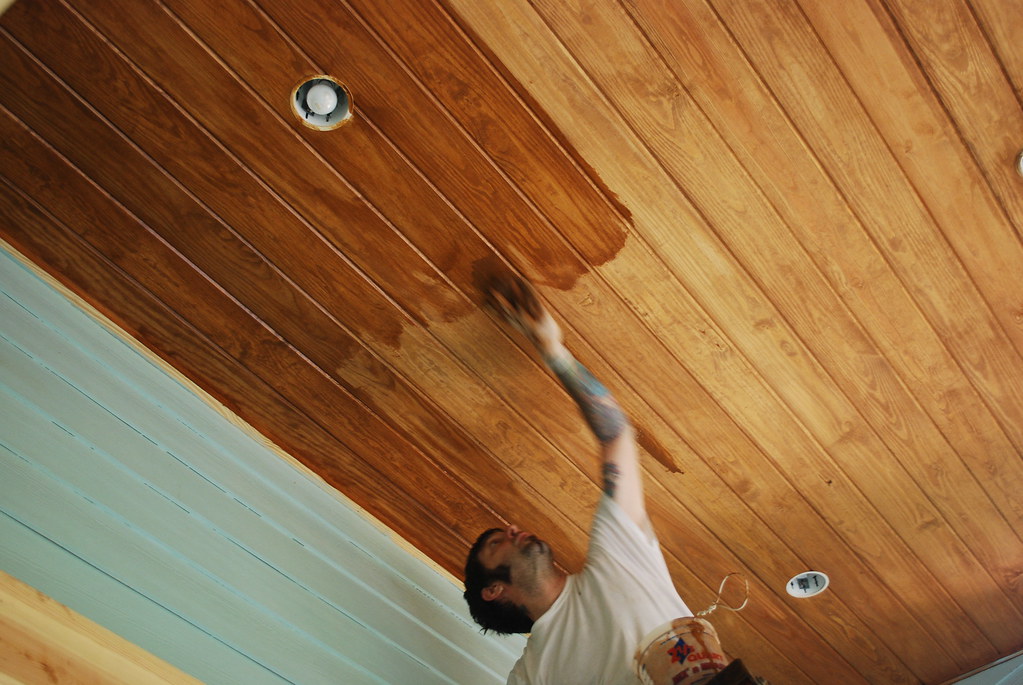
To prep tongue and groove boards for installation, it’s vital to finish them beforehand to mitigate any potential issues arising from fluctuations in humidity.
Before installing a tongue and groove ceiling, make sure that the boards are completely finished, especially the tongues, to prevent any difficulties during installation. This step is important for a smooth and seamless installation process.
When installing a tongue and groove ceiling, it’s important to take into account the layout and design you want to achieve.
Some tongue and groove boards come with a middle groove, adding a unique visual appeal to the ceiling.
Take this into account when planning the installation to create the desired aesthetic for your space.
Additionally, if you prefer a white shiplap ceiling appearance, consider painting the boards before installation.
This can give the ceiling a clean and modern look while providing added protection to the wood.
Properly finishing the tongue and groove boards won’t only enhance the overall appearance but also ensure a durable and long-lasting ceiling.
Finish Wood Plank Ceiling
Before you begin installing the wood planks, make sure you’ve carefully selected the right type of wood for your ceiling.
Remember to properly prepare the surface by finishing the wood planks before installation to prevent future issues.
Following the correct installation techniques will guarantee a stunning and long-lasting finish to your wood plank ceiling.
Wood Plank Selection
Think about selecting tongue and groove planks in common sizes like 1×6 or 1×8 spruce for a traditional look when finishing your wood plank ceiling.
These planks interlock along their edges, creating a seamless and sturdy ceiling surface.
Opt for boards with one rough face and one smooth face, allowing you the flexibility to choose the finish that best suits your space.
For a unique design, you may explore special wood options or custom sizes. Additionally, 1×8 boards with a middle groove or 1×4 beaded ceiling boards offer different aesthetic styles to think about.
Remember to finish the boards before installation to avoid complications due to changes in humidity and to achieve a professional and durable look.
Surface Preparation Tips
Preparing the wood plank ceiling surface thoroughly is essential for guaranteeing a smooth and durable finish.
Before installation, finish the ceiling boards to prevent issues related to changes in humidity.
If you desire a white shiplap ceiling appearance, consider painting the boards beforehand.
It’s important to ensure complete finishing of the tongues to avoid any future problems with the tongue and groove joints.
Utilizing wood plank ceiling ideas can effectively conceal unattractive ceilings, enhancing the overall look of your space.
By taking the time to properly prepare the surface, you not only improve the aesthetics but also increase the longevity of your tongue and groove ceiling.
Installation Technique Steps
To secure a professional installation of your tongue and groove ceiling, begin by marking the joist lines on the ceiling for precise placement of the boards.
Confirm the boards are straight and not warped before installation to avoid complications.
Use liquid nails for boards not nailed into studs to guarantee a secure attachment. Leave expansion gaps around the perimeter to prevent buckling as the wood adjusts to humidity levels.
As you attach the planks, nail through the tongue of each board to lock them in place and create a seamless appearance.
Plan ahead for obstacles like lights and speakers, adjusting your board placement accordingly to maintain a uniform and polished finish.
Start with Ceiling Battens
Before installing your tongue and groove ceiling boards, the first step is to start with ceiling battens. Choose suitable battens that are straight and free of defects.
Secure the battens properly onto the ceiling joists and make sure they’re level to guarantee a smooth and professional finish for your project.
Choose Suitable Battens
For best stability and a level installation, make sure you start by selecting the appropriate ceiling battens when preparing to install a tongue and groove ceiling.
Ceiling battens play an important role in providing a sturdy nailing surface for the tongue and groove boards.
To guarantee a level outcome, opt for battens that are spaced evenly, typically 16-24 inches apart, to offer ample support across the ceiling.
It’s vital to secure the battens properly to the ceiling joists to enhance structural integrity.
When choosing battens, consider the size and material carefully, as these factors greatly impact the success of your installation.
By selecting the right battens, you set a solid foundation for a smooth and durable tongue and groove ceiling.
Secure Battens Properly
When securing battens properly for your tongue and groove ceiling installation, the first step is to verify they’re firmly attached to the ceiling joists for maximum stability and support.
Use nails to secure the battens directly into the joists, ensuring a strong foundation for the ceiling boards.
Make sure the battens are evenly spaced to provide consistent support across the entire ceiling area.
By securely fastening the battens, you create a level surface for the tongue and groove boards to be installed smoothly.
Whether running the battens parallel or perpendicular to the ceiling joists, proper attachment is key to a successful installation.
Take the time to secure the battens correctly for a professional and long-lasting finish.
Level the Battens
To establish a level foundation for your tongue and groove ceiling, begin by leveling the battens, starting with the ceiling battens.
Ceiling battens play an important role in providing a stable nailing surface for the tongue and groove boards.
By ensuring the battens are level and securely attached to the ceiling joists, you create a stable base for the installation.
Proper spacing of the battens is essential to guaranteeing consistent board placement and a professional finish.
Leveling the battens not only helps to straighten out uneven ceilings but also contributes to the overall aesthetic appeal of the ceiling.
Take the time to meticulously level each batten to lay the groundwork for a visually pleasing and structurally sound tongue and groove ceiling.
Prep Board Ends
Recut the board ends to confirm a precise fit and alignment before proceeding with installing the tongue and groove ceiling. By taking this step, you guarantee that the boards will snugly interlock, creating a seamless look once installed.
Additionally, adding a bevel to the board ends will result in a smoother shift between boards, enhancing the overall professional finish of the ceiling.
After re-cutting and beveling the board ends, it’s vital to apply a finish to protect them from moisture and humidity changes. This step not only safeguards the wood but also contributes to the longevity of your tongue and groove ceiling.
Furthermore, pay close attention to properly preparing the tongues.
Ensuring that they’re completely finished will prevent future issues such as gaps or movement between the boards.
These meticulous preparations of the board ends and tongues are essential for achieving a visually appealing and durable tongue and groove ceiling.
Blind-Nail Tongues
Blind-nail the tongues of the boards to achieve a clean and seamless look for your tongue and groove ceiling installation. This technique involves driving nails through the tongues at an angle, making certain that the fasteners are concealed from view, resulting in a professional finish.
By blind-nailing the boards, you can secure them in place without having visible nails on the surface, which enhances the overall aesthetic appeal of your ceiling.
To blind-nail effectively, make sure to space the nails properly along the tongue of each board and angle them correctly for secure attachment. This method not only provides a neat appearance but also helps hold the boards firmly in place.
Remember that the key to a successful blind-nail application lies in the precision of your nail placement.
As you work on blind-nailing the tongues of the boards, pay close attention to detail to guarantee a flawless finish for your tongue and groove ceiling.
Stagger Butt Joints
Consider staggering the butt joints of the boards when installing a tongue and groove ceiling to achieve a visually appealing and seamless finish that distributes the joints evenly across the ceiling.
Staggering butt joints involves alternating the end seams of adjacent boards.
By implementing this technique, you create a more important look that prevents the formation of patterns and reduces the visibility of seams.
The even distribution of joints across the ceiling enhances the overall aesthetic of the space, giving it a professional finish.
When staggering the butt joints, make sure that the ends of the boards don’t align vertically, as this would lead to a less polished appearance.
Proper staggering is critical to achieving a high-quality tongue and groove ceiling that not only looks visually pleasing but also showcases a level of craftsmanship.
Take your time to plan the staggering pattern to ensure a flawless result that adds elegance to your ceiling.
Address Cutouts
When addressing cutouts on your tongue and groove ceiling, make sure you plan and measure for fixtures such as lights, fans, or vents before proceeding with installation.
To create precise cutouts in the tongue and groove boards, you can use a jigsaw or a hole saw. It’s important to make sure that the cutouts are accurately sized and positioned to accommodate the fixtures without compromising the integrity of the boards.
Take into account any obstacles or obstructions on the ceiling that may affect the placement of the cutouts.
Before finalizing the installation, test-fit the fixtures in the cutouts to avoid the need for rework or adjustments later on. This step will help maintain a seamless look and make sure that everything fits perfectly.
Close and Cut Problem Boards
To address problematic boards in your tongue and groove ceiling, consider trimming off damaged sections with a saw for a tight and precise fit. Use a table saw for accurate cuts, especially when dealing with irregular board ends.
Measure carefully to avoid gaps, and make sure the boards fit snugly together. Before cutting, mark the areas on the boards that need trimming to maintain a consistent appearance throughout the ceiling.
Check for defects or issues in the boards before installation to prevent any cutting and fitting problems later on.
When facing boards that are challenging to fit, using a face nail can help secure them in place.

Leave a Reply