If you’re looking to create a pedestal table, you might think it’s an overwhelming task at first glance.
However, with the right guidance and attention to detail, you can tackle this project with confidence.
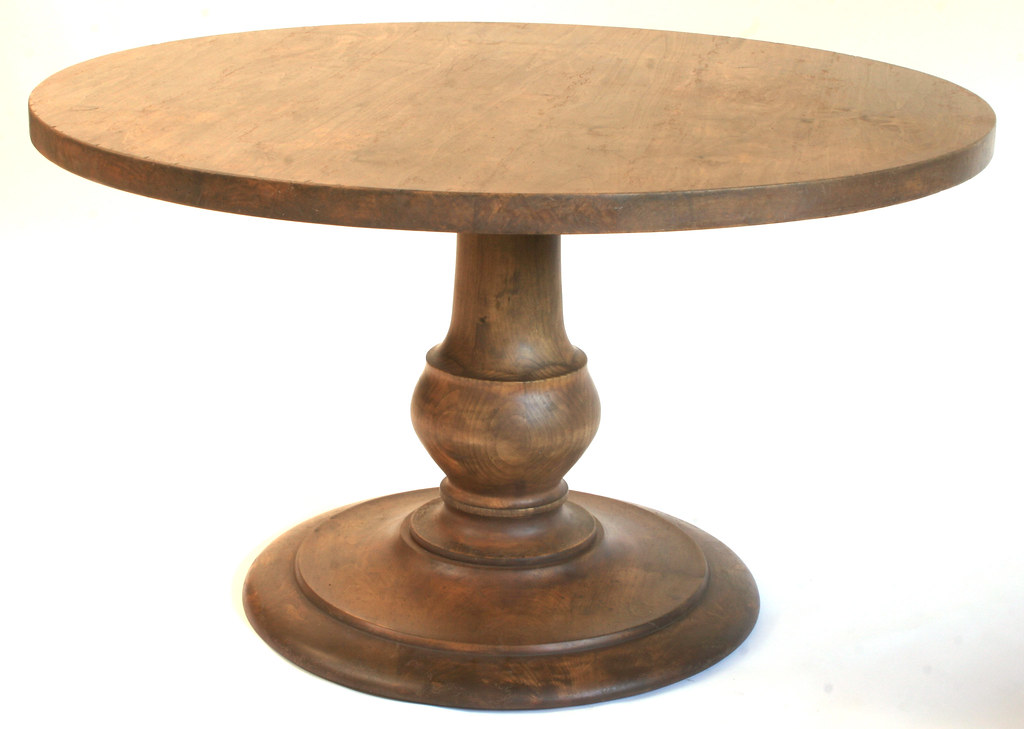
Starting from the base up, the pedestal’s construction sets the stage for a stable and aesthetically pleasing piece.
But what about the intricate details that truly lift the table’s design and functionality?
Here are the essential tools, clever assembly techniques, and finishing touches that will bring your pedestal table to life.
Materials Needed for Pedestal Table
When starting on creating a pedestal table, make sure you gather rift white oak sheets for the table top.
The use of white oak not only provides a beautiful finish but also guarantees durability. These sheets will be the focal point of your pedestal table, so choose them carefully.
Additionally, you’ll need Baltic birch plywood for the bottom of the table top. This plywood will provide stability and support to the oak sheets above.
To guarantee a seamless finish on your pedestal table, you’ll also require wood filler. This essential material will help you fill in any gaps or imperfections in the wood, creating a smooth surface for your table top. The wood filler will blend in with the white oak, giving your table a polished look.
Essential Tools for Building
Select a circular saw to guarantee precise wood cuts when constructing your pedestal table. This tool will make sure that your table’s top is perfectly circular and smooth.
Additionally, a drill with various drill bits is vital for creating holes in the pedestal and table top for bolts and screws to secure them together.
Clamps play a critical role in holding the pieces firmly in place during assembly, preventing any misalignments.
A sander is a must-have tool for smoothing out surfaces and edges, giving your table a professional and polished look.
To maintain accuracy throughout the construction process, make sure to use measuring tools like a tape measure and square to make sure that all dimensions and angles are correct for a perfectly crafted round table.
Steps to Construct Pedestal Base
Utilize bullnose trim pieces to establish a robust foundation for the pedestal structure, guaranteeing stability and durability for supporting the table top.
Start by attaching the bullnose trim to the plywood circles using screws and wood glue. These trim pieces will provide the necessary support and structure for the pedestal dining table.
Next, reinforce the base by connecting 2x4s vertically between the plywood circles. This step is essential for creating a sturdy pedestal structure that can bear the weight of the table top. Make sure to secure the connections properly to avoid any wobbling or instability.
To add a decorative touch and further strengthen the pedestal, include an additional plywood ring at the bottom. This ring not only enhances the aesthetic appeal but also serves as a platform for attaching trim pieces that elevate the overall look of the table.
Remember to cut and sand the trim pieces to precise measurements for a professional finish.
This attention to detail will guarantee a polished final product that’s both functional and visually appealing.
Assembling the Tabletop
To assemble the tabletop, begin by carefully gluing together CNCed half circles of rift white oak sheets.
This process creates a solid and visually appealing surface for your Pedestal Table. Make a precise fit by using half lap joints at the edges of the tabletop halves.
Secure the tabletop halves with metal aligners and bolts to provide stability and durability.
For a polished look, add a white oak sliver along the edge of the table. Fill any gaps in the edge joint with wood filler, then sand the surface smooth.
To enhance the tabletop’s appearance and protect it from wear and tear, apply two coats of ink and satin varnish.
Consider using semi-gloss or gloss varnish for the initial coats for added luster before finishing with a final coat of satin varnish. This process will give your tabletop a professional finish that complements the elegant design of your Pedestal Table.
Finishing Touches and Final Assembly
To achieve a flawless final assembly, make sure that the tabletop halves are perfectly aligned before securing them with metal aligners and bolts for maximum stability and durability.
Once the halves are aligned, apply 5 coats of ink and 4 coats of satin varnish to the table top for a durable finish.
Use white oak sliver on the table edge and fill any gaps with wood filler for a seamless look. Completing the table top in two halves not only makes transportation and assembly easier but also guarantees a smoother finish.
After securing the halves, add final touches to your Pedestal Table to elevate its aesthetic appeal.
Consider placing a gray carpet rug underneath, hanging a chandelier above, showcasing artwork on the walls, and adorning it with Studio McGee chairs.
These final touches will give your table a polished and sophisticated look, making it a focal point in your space.
Conclusion
To sum up, by following the steps outlined in this guide and using high-quality materials, you can create a beautiful and sturdy pedestal table that will be a stylish addition to any room.
Remember to take your time, pay attention to detail, and enjoy the process of building something unique and functional for your home.
With a little effort and patience, you can achieve a professional-looking result that you can be proud of for years to come.

Leave a Reply