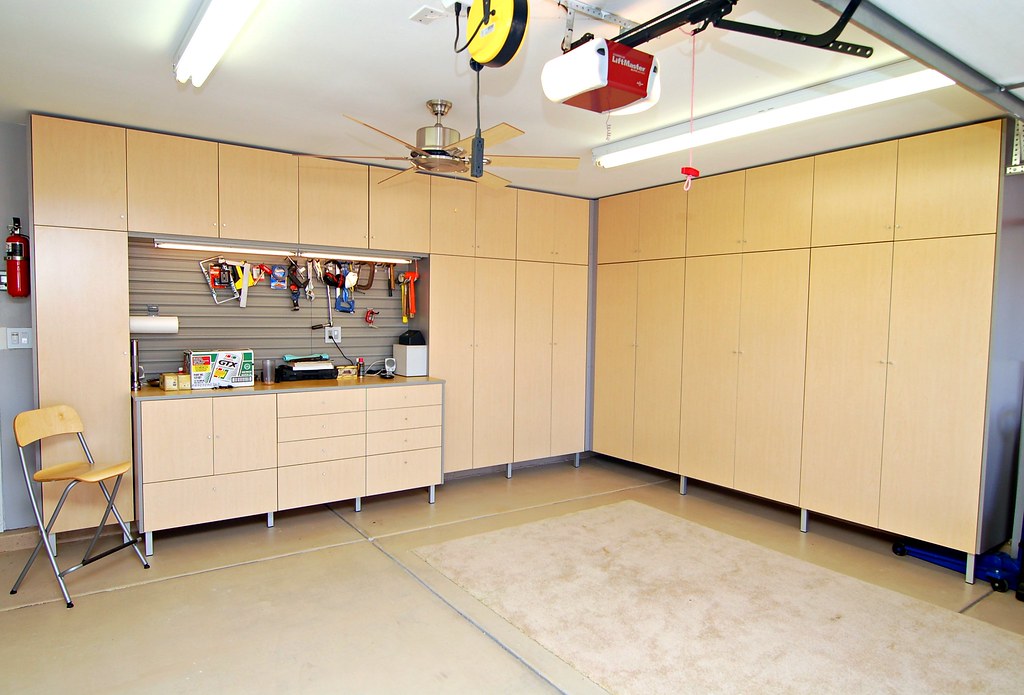
If you’re looking to construct plywood garage cabinets, you’ll be starting the foundation for organized storage solutions that stand the test of time.
From selecting the right plywood to ensuring a seamless assembly, each step plays an important role in creating functional and durable cabinets.
As you start on this project, keep in mind the importance of precise measurements and attention to detail.
Stay tuned to discover practical tips that will elevate your garage space and transform clutter into order.
Plan Garage Layout
To effectively plan your garage layout for installing plywood cabinets, carefully assess the available space and consider the depth and height requirements for maximum storage efficiency.
Begin by examining the dimensions of the garage and identifying the most suitable areas for installing the cabinets.
Take into account any existing fixtures or workspaces that may impact the layout of the cabinets.
It’s important to measure the space accurately to make sure the plywood cabinets fit seamlessly into the designated areas.
When positioning the cabinets, factor in ventilation needs to prevent any moisture build-up that could damage the plywood over time.
Additionally, remember to plan for easy access to electrical outlets if you intend to use the cabinets for tools or appliances that require power.
Proper placement of the cabinets in relation to electrical sources will enhance the functionality and convenience of your workspace.
By meticulously considering these aspects during the layout planning stage, you can optimize both the storage efficiency and practicality of your garage cabinets.
Cut Plywood for Cabinets
Assess the dimensions of the plywood sheets accurately before making cuts to guarantee precise cabinet components for your garage cabinets.
Measure and mark the plywood sheets meticulously to make sure clean and smooth cuts when using a circular saw with a fine-tooth blade.
Properly support the plywood during cutting to prevent splintering and make sure straight cuts for your cabinet doors.
Consider using a straight edge or guide to assist in maintaining the cuts straight and consistent throughout the process.
Double-check your measurements before cutting to avoid wastage and make sure that all pieces fit together correctly during the assembly phase.
By paying attention to these details and taking the necessary precautions, you can make sure that your plywood cabinets are accurately cut and ready for the next steps in the assembly process.
Assemble Cabinet Components
Attach the sides to the fixed shelves using screws to guarantee stability in assembling the cabinet components.
Make sure the edges are flush and use clamps to hold the pieces together securely. Double-check the measurements and alignment to avoid any misalignment issues during assembly.
When joining the cabinet sides and fixed shelves, verify precise fitting to create a strong and durable structure for your garage workshop cabinets.
Follow the assembly instructions carefully, step by step, to make sure a seamless construction process.
Before finalizing the assembly, measure the diagonals of the cabinet frame to confirm its squareness.
For added functionality, incorporate adjustable shelves and shelf supports to optimize storage space within the cabinet.
Consider using birch plywood for the cabinet doors and top to make sure a sturdy and long-lasting finish.
Finish off the edges with edge banding to give your cabinets a polished look while also protecting the plywood.
By paying attention to detail and following these steps diligently, you’ll create high-quality cabinets for your garage workshop.
Install Cabinet Hardware
When installing cabinet hardware, make sure that the chosen handles, knobs, hinges, and drawer slides not only complement the cabinet design but also offer durability to withstand the weight and usage requirements.
The cabinet hardware serves a functional purpose while also adding a decorative touch to the overall look of the cabinets.
Make certain that the handles and knobs are ergonomically designed for easy gripping and smooth operation.
When attaching hinges, make sure they’re sturdy enough to support the cabinet doors and allow for seamless opening and closing.
Drawer slides should be of high quality to bear the weight of items stored inside the drawers and ensure they slide in and out effortlessly.
Proper installation of these components is vital for the cabinets to function effectively and have a longer lifespan. Follow the manufacturer’s instructions carefully to secure the hardware accurately and guarantee the cabinets operate smoothly.
Finish and Seal Cabinets
To achieve a clean and stylish finish for your plywood garage cabinets, consider staining or painting the cabinet doors. Start by using cabinet-grade plywood with overlay doors for a seamless look.
After applying the desired finish, it’s important to seal and protect the cabinets and counter. Apply two coats of polycrylic, sanding between each coat for a smooth surface. For increased longevity, opt for a durable finish like polyurethane.
To make sure an even application, you can use a brush or sprayer. This step is essential in maintaining the cabinets’ appearance and protecting them from wear and tear in your DIY garage project.
By paying attention to detail and precision during the finishing process, you can create a professional and long-lasting finish that complements your garage storage ideas while elevating the overall look of your space.
Conclusion
To summarize, building plywood garage cabinets requires careful planning, precise measurements, and attention to detail. By following the steps outlined in this guide, you can create a functional and efficient storage solution for your garage.
Remember to customize the design to fit your specific needs and make use of cost-effective materials to save money.
With a little time and effort, you can have sturdy and practical garage cabinets that will help keep your space organized.


Leave a Reply