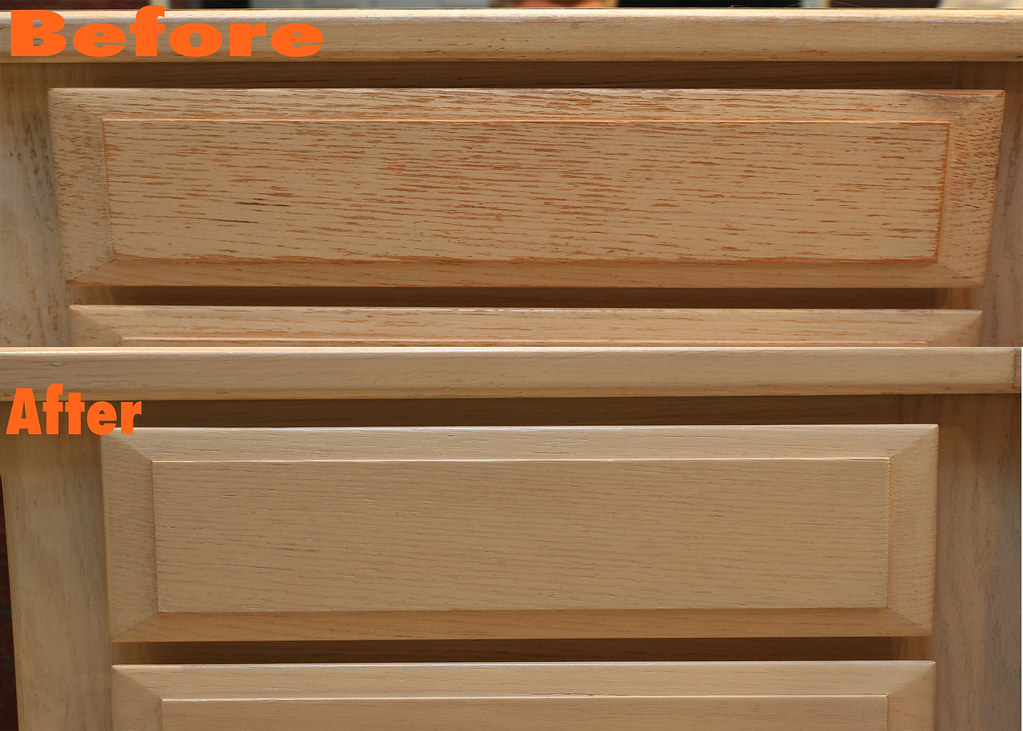
If your kitchen cabinets look like they’ve been through a warzone, fear not; there’s a way to revive them without resorting to drastic measures.
You might be surprised to learn that a few simple steps can work wonders, bringing back the glory of your cabinets.
By following a few expert tips and tricks, you can transform those worn spots into shining examples of kitchen elegance.
Sanding and Preparing the Surface
When sanding and preparing the surface of worn spots on your kitchen cabinets, make sure to use a medium-grit sandpaper for creating a smooth surface conducive to refinishing.
Begin by sanding along the wood grain in a back-and-forth motion to avoid damaging the wood fibers.
Using a sanding block or sanding sponge can help you achieve an even sanding pressure across the area, preventing over-sanding in specific spots.
This technique guarantees that the surface is leveled and ready for the next steps in the refinishing process.
After sanding, it’s important to clean the sanded spots thoroughly with a tack cloth or damp cloth. This step removes any dust or debris left behind by the sanding process, making sure a clean surface for the upcoming stain application.
By following these precise sanding guidelines and techniques, you prepare the worn spots on your kitchen cabinets effectively for the refinishing journey ahead.
Applying Wood Filler and Patching
To effectively address the worn spots on your kitchen cabinets, the next step involves skillfully applying wood filler to seamlessly patch up the damaged areas.
Begin by selecting a wood filler that closely matches the color of your kitchen cabinet to guarantee a cohesive repair. Using a putty knife, carefully apply the wood filler to the worn spots, making sure to fill them completely.
Once applied, smooth out the filler to be level with the surrounding cabinet surface. Allow the wood filler to dry thoroughly as per the manufacturer’s instructions before proceeding.
After the wood filler has dried, gently sand the patched areas to blend them seamlessly with the rest of the cabinet surface. This step is important in achieving a uniform and professional-looking finish.
Take care not to over-sand the area, as this can affect the final result.
Once the patched spots are smooth and well-integrated, you can proceed to apply a clear finish or stain to protect the repaired areas and enhance their appearance.
Matching and Applying Stain or Paint
For a flawless restoration of worn spots on your kitchen cabinets, carefully match the stain or paint color to the existing cabinet finish.
Begin by testing stain colors on a small inconspicuous area to ensure an accurate match.
Once you have the right color, apply the stain using a soft cloth. This method provides better blending and control over the application, helping you achieve a seamless finish.
When dealing with worn areas around knobs, exercise caution when sanding and refinishing to maintain the uniform appearance of the cabinet.
Consider using steel wool to delicately work on these areas for a polished result.
For added protection and durability, apply a clear finish over the sanded and stained spots. This extra step will help safeguard the wood and prolong the life of your cabinets.
Avoid common mistakes like using liquid paint stripper and make sure consistency in the finish sheen across all cabinet doors for a professional look.
Sealing and Protecting the Restored Area
To guarantee long-lasting protection for the restored area, consider sealing it with a non-yellowing polyurethane or clear lacquer. This step is essential in preserving the newly stained or painted surface of your kitchen cabinets.
When applying the protective finish, make sure that you follow the direction of the wood grain to achieve a seamless and professional look.
Properly sealing the restored area won’t only enhance its durability but also shield it from potential damage caused by moisture, heat, or daily use.
Additionally, make sure to pay special attention to the knobs and handles on your cabinets. These areas are prone to frequent touching and should be well-sealed with the protective finish to prevent wear and tear over time.
Following the manufacturer’s instructions for the proper application of the sealant is important for achieving the best results.
A well-sealed and protected surface won’t only maintain its appearance but also resist damage for an extended period, keeping your kitchen cabinets looking fresh and vibrant.
Buffing and Blending for a Seamless Finish
Smooth out the worn spots on your kitchen cabinets by buffing them to prepare for blending and achieving a seamless finish.
Start by gently buffing the affected areas using a soft cloth and light pressure. This step helps to even out the surface and remove any rough edges around the worn spots.
Pay extra attention to the areas around the knobs, as they can be tricky to merge seamlessly.
Once the surface is smooth, it’s time to merge the stain or finish around the worn spots. Use a steady hand and a light touch to feather the new finish into the existing one, ensuring a seamless merge.
By carefully blending the colors and textures, you can create a professional-looking repair that seamlessly integrates with the original cabinet finish.
Remember to take your time and pay attention to detail while buffing and merging. With patience and precision, you can achieve a flawless finish that rejuvenates your kitchen cabinets without the need for extensive refinishing or painting.
Frequently Asked Questions
How Do You Fix Worn Spots on Cabinets?
When fixing worn spots on cabinets, explore cabinet refinishing options and DIY repair techniques.
Lightly sand the worn areas, test stain colors, and carefully apply the selected stain. Seal with a protective finish for lasting results.
How Do You Fix Worn Wood Cabinets?
To fix worn wood cabinets, start by sanding the damaged areas. Test stain colors before applying with a soft cloth.
Protect the wood by applying a clear finish. For expert results, consider using refinishing techniques and wood restoration products.
How Do You Touch up Nicks in Kitchen Cabinets?
Assess the damage to your kitchen cabinets to determine if touch-up is possible. Use a touch-up marker or fill stick for quick fixes.
Blend the product evenly and apply a clear coat for protection. Keep your cabinets looking new with DIY solutions.
How Can I Restore My Kitchen Cabinets Without Sanding and Varnishing?
To restore your kitchen cabinets without sanding and varnishing, consider cabinet refinishing options like stain markers or touch-up stains for quick fixes.
Test colors, apply clear finish for protection, and use dewaxed shellac or water-based polyurethane for compatibility.

Leave a Reply